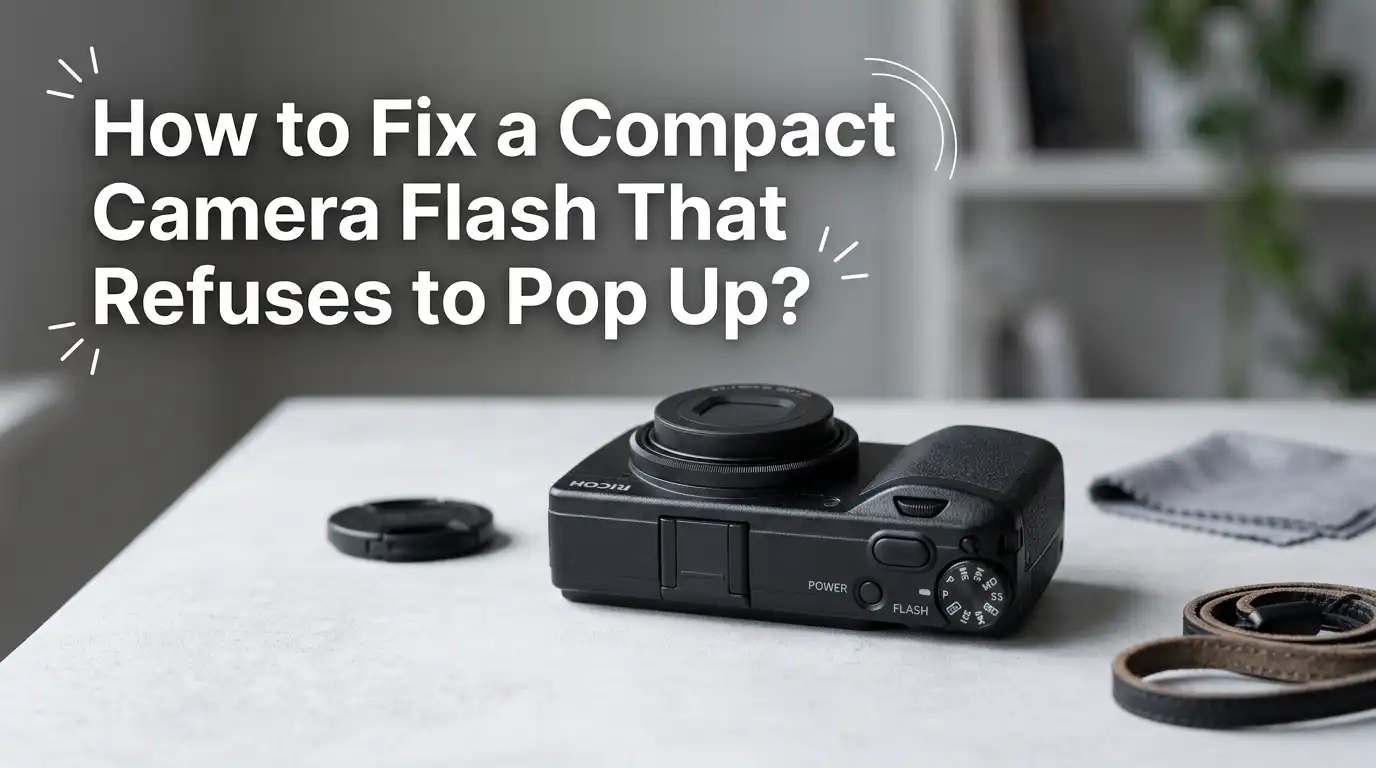
How to Fix a Compact Camera Flash That Refuses to Pop Up?
Your compact camera flash sits silent. You press the button, but nothing happens. The little flash unit stays stuck inside the body, refusing to spring up like it should.
This problem frustrates photographers at weddings, birthdays, and dark indoor events where natural light fails.
A stuck pop up flash usually points to a mechanical or electronic issue you can solve at home. Dust, jammed springs, dead batteries, or confused hotshoe sensors often cause the trouble. The good news is that most fixes require no tools and only a few minutes of patient work.
Key Takeaways
- Dirt and dust under the flash hinge cause most pop up failures. A gentle cleaning with a soft brush or air blower often solves the problem within minutes.
- Battery power matters more than you think. A weak battery cannot lift the flash spring. Always charge or replace the battery before trying any deeper fix.
- The hotshoe micro switch can confuse the camera into thinking an external flash is attached. Cleaning the hotshoe contacts with a cotton swab often restores normal pop up function.
- Mode settings block the flash in auto landscape, sports, and movie modes. Switch to P, Av, Tv, or M mode and the flash button works again.
- Gentle manual lifting with a fingernail under the flash lip helps unstick a jammed unit. Never force it open because you can snap the plastic hinge.
- Professional repair becomes necessary when the spring breaks or the internal ribbon cable disconnects. Knowing when to stop saves your camera from worse damage.
Why Does a Compact Camera Flash Get Stuck?
A pop up flash uses a small spring loaded mechanism hidden under a plastic cover. When you press the flash button, the camera releases a latch and the spring pushes the flash up. Any blockage in this path causes failure.
Common causes include dust buildup along the hinge, sticky residue from sunscreen or skin oil, a weak battery that cannot trigger the release coil, and a damaged latch spring. Sometimes the camera firmware thinks an external flash is mounted, so it disables the internal one.
Dropping the camera even from a low height can shift internal parts. Sand at the beach often slips into the seam around the flash. Once you understand the cause, the fix becomes much easier to choose.
Check the Battery Before Anything Else
A weak battery is the number one hidden cause of a stuck flash. The flash needs a strong burst of power to charge its capacitor and release the spring. If voltage drops too low, the camera silently disables the flash.
Follow these steps to rule out battery issues. Remove the battery and inspect the contacts for green or white corrosion. Wipe them clean with a dry cotton swab. Charge the battery fully or insert a fresh set of AA cells if your model uses them.
Pros of this fix include zero risk, no cost, and quick testing. Cons are that it only helps if power was the real problem. Still, always start here because it takes less than two minutes.
Inspect Your Shooting Mode Settings
Many photographers panic when the flash will not pop up, but the camera is simply obeying its mode. Auto landscape, sunset, sports, panorama, and movie modes automatically disable the flash. The button does nothing in these settings.
Turn the mode dial to P (Program), Av (Aperture Priority), Tv (Shutter Priority), or M (Manual). Now press the flash button again. If the flash pops up, your camera was working perfectly all along.
The pros of this check are obvious because it costs nothing and confirms the camera is healthy. The con is that new users often miss this detail and assume hardware failure. Always check the mode dial before opening anything or contacting support.
Clean Dust and Debris Around the Flash Hinge
Dust gathers in the thin gap around the flash cover. Over time it forms a sticky paste with humidity and skin oil. This paste glues the flash shut even when the spring still works.
Use a soft brush like the kind sold for lens cleaning. Sweep along the edges of the flash housing. Then use a hand blower or a can of compressed air held upright. Blow short bursts into the seam to lift loose particles.
Pros include high success rate, low cost, and no disassembly. Cons are that compressed air held sideways can spray cold liquid onto the camera and damage electronics. Always keep the can vertical and use short controlled puffs.
Try the Gentle Fingernail Lift Method
When dust holds the flash down, a small upward nudge often breaks it free. This trick comes recommended by repair technicians and works on most compact cameras and entry level DSLRs.
Turn the camera on and set it to P mode. Press the flash button. While the camera tries to release the flash, slide your fingernail under the front lip of the flash cover. Lift gently with about the same force you would use to open a jar lid.
Pros of this method are speed and simplicity. You can do it anywhere without tools. Cons include the risk of snapping the plastic hinge if you pull too hard. Stop immediately if you feel strong resistance.
Clean the Hotshoe Contacts
The hotshoe on top of your camera has a tiny micro switch that detects external flash units. When this switch jams or gets dirty, the camera thinks a big flash is mounted and refuses to pop up the internal one.
Look closely at the hotshoe with a flashlight. You will see metal contacts and sometimes a small pin. Wipe the contacts with a cotton swab lightly dipped in isopropyl alcohol. Let it dry for one minute.
Pros include solving a very common but rarely guessed problem. Cons are that some hotshoes have delicate spring pins that bend if pressed too hard. Use light pressure only and never insert metal objects to test the switch.
Reset the Camera to Factory Settings
Software glitches can disable the flash even when the hardware works fine. A full factory reset clears these glitches and restores normal behavior. Most compact cameras hide this option deep in the menu.
Find the setup menu and look for an option called Reset, Default Settings, or Initialize. Confirm the action. The camera erases your custom settings but keeps your photos safe on the memory card. Power off and on, then test the flash.
Pros include fixing hidden firmware bugs and removing confusing custom settings. Cons are that you lose your personal preferences like custom white balance, date format, and shortcut buttons. Write down important settings before resetting.
Update the Camera Firmware
Manufacturers release firmware updates to fix bugs, including flash related ones. If your camera runs old firmware, a known flash bug might be the cause. Updating takes about fifteen minutes and often solves stubborn issues.
Visit the official support site for your camera brand. Find your exact model and download the latest firmware file. Copy it to a freshly formatted memory card. Insert the card, charge the battery fully, and follow the update prompts on the camera screen.
Pros include free fixes from the manufacturer and improvements to other features too. Cons include the small risk of bricking the camera if power fails during the update. Never remove the battery while the update runs.
Check for a Broken or Displaced Spring
If cleaning and resets fail, the internal release spring may have shifted out of place. This often happens after a drop or impact. You can sometimes spot the issue by looking at how the flash sits in its housing.
Examine the flash cover for crookedness or a visible gap. Press down on it gently. If you hear a faint click or feel a loose part shift inside, the spring may be displaced. Do not open the camera body unless you have repair experience.
Pros of identifying this early include saving money on misdiagnosed repairs. Cons are that home fixing a spring requires opening the camera, voiding the warranty, and risking electric shock from the flash capacitor.
Discharge the Flash Capacitor Safely
The flash unit holds a high voltage capacitor that stores enough energy to shock you even when the camera is off. Before any deep inspection, you must let this capacitor discharge. Skipping this step is dangerous.
Remove the battery and leave the camera off for at least forty eight hours. This time lets the capacitor bleed down through its internal resistor. Some technicians recommend a full week for older cameras. Never poke inside with metal tools while power remains.
Pros of waiting include personal safety and protection of internal circuits. Cons are the time delay before you can work on the camera. Patience matters because a flash capacitor shock can stop your heart in rare cases.
Try the Tap and Power Cycle Trick
A light tap on the side of the camera sometimes shakes loose a small obstruction. Combined with a power cycle, this trick has saved many cameras from the repair shop. It works best when dust or a tiny pebble is the culprit.
Hold the camera with the flash facing up. Tap the body firmly but gently against your palm three or four times. Turn the camera off, remove the battery, wait thirty seconds, reinsert the battery, and power on. Press the flash button.
Pros include simplicity and zero cost. Cons are that tapping a fragile electronic device feels risky. Use your palm, never a hard surface, and stop if you hear any rattling sound inside the camera body.
Use an External Flash as a Workaround
If your internal flash refuses to cooperate, you can still take well lit photos. An external flash unit slides into the hotshoe and gives even better light than the built in one. This solution works while you save up for repairs or buy a new camera.
Choose a small external flash compatible with your camera mount. Slide it into the hotshoe and tighten the locking ring. Set the camera to manual mode and adjust flash power until the exposure looks right. Bounce the flash off the ceiling for softer light.
Pros include better image quality, more power, and creative control. Cons are added cost, extra weight, and the need to learn flash settings. Some compact cameras lack a hotshoe entirely, which makes this option impossible.
When to Visit a Professional Repair Shop
Some problems need expert hands. If the spring is broken, the ribbon cable inside is torn, or the flash board itself has failed, home repair becomes risky and often impossible. A trained technician has the tools, parts, and safety gear to fix these issues.
Signs you need professional help include a flash that rattles when you shake the camera, visible cracks in the housing, error messages on the screen, or a camera that has been wet. Get a repair quote before agreeing to the work.
Pros include proper repair and a short warranty on the fix. Cons are the cost, which can equal half the price of a new camera. For older compact cameras, replacement sometimes makes more sense than repair.
How to Prevent Flash Problems in the Future
Prevention saves money and frustration. A few simple habits keep your flash working for years. Most flash failures trace back to dust, drops, or moisture that you can easily avoid.
Store your camera in a padded bag with a silica gel pack. Keep it away from sand, water, and sticky surfaces. Wipe the flash cover with a microfiber cloth after each use. Never force the flash down if it pops up on its own.
Pros of prevention include longer camera life and fewer repair bills. Cons are minimal because good habits cost nothing. Treat your camera gently and the flash will reward you with reliable performance for many years.
Frequently Asked Questions
Why does my camera say flash error when I press the button?
This message usually means the camera detected an obstruction or a power problem. Turn the camera off, remove the battery for one minute, and reinsert it. Clean around the flash hinge and try again. If the error returns, the internal sensor may be faulty.
Can I use my camera without the pop up flash working?
Yes, you can shoot in any well lit setting without the flash. Increase the ISO setting to brighten dark scenes, or use a tripod for steady low light shots. An external flash in the hotshoe also works as a complete replacement for the built in unit.
Is it safe to open my camera and fix the flash myself?
Only if you have electronics repair experience. The flash capacitor stores high voltage that can shock you even when the camera is off. Wait at least forty eight hours after removing the battery before opening the body. When in doubt, visit a repair shop.
How much does flash repair cost at a camera service center?
Costs vary by brand and model. Most compact camera flash repairs range from forty to one hundred and twenty dollars. Always get a written quote before agreeing to the work. For older cameras, compare the repair cost with the price of a used replacement.
Does using flash often shorten my camera battery life?
Yes, the flash draws a large burst of power each time it fires. Heavy flash use can drain a full battery in under an hour. Carry a spare battery for events and turn off the flash when you do not need it to save power.
Why does my flash work sometimes but not always?
Intermittent flash failure usually means a loose internal connection or a weak spring. Dirt in the hinge can also cause inconsistent behavior. Clean the area, check the battery contacts, and update the firmware. If the problem continues, professional inspection becomes the next step.

Hi, I’m Frankie Shaw, the founder and writer behind Swittchly 👋. I’m a passionate tech enthusiast who loves exploring the latest gadgets, devices, and electronics that hit the market. Through my honest, research-backed Amazon product reviews, I help readers make smarter buying decisions without the hype or confusion.