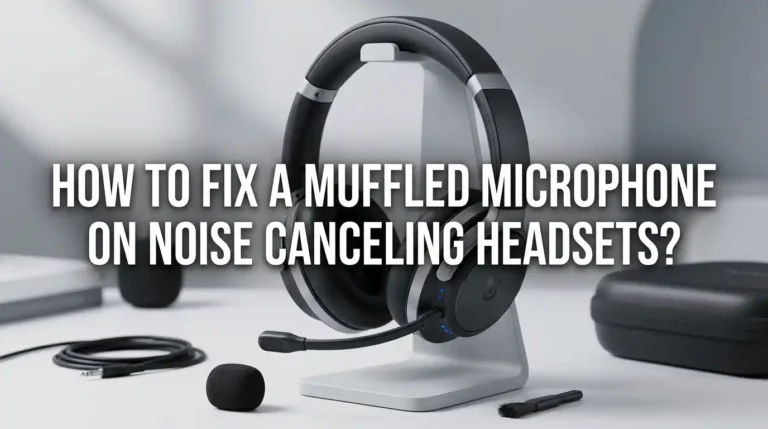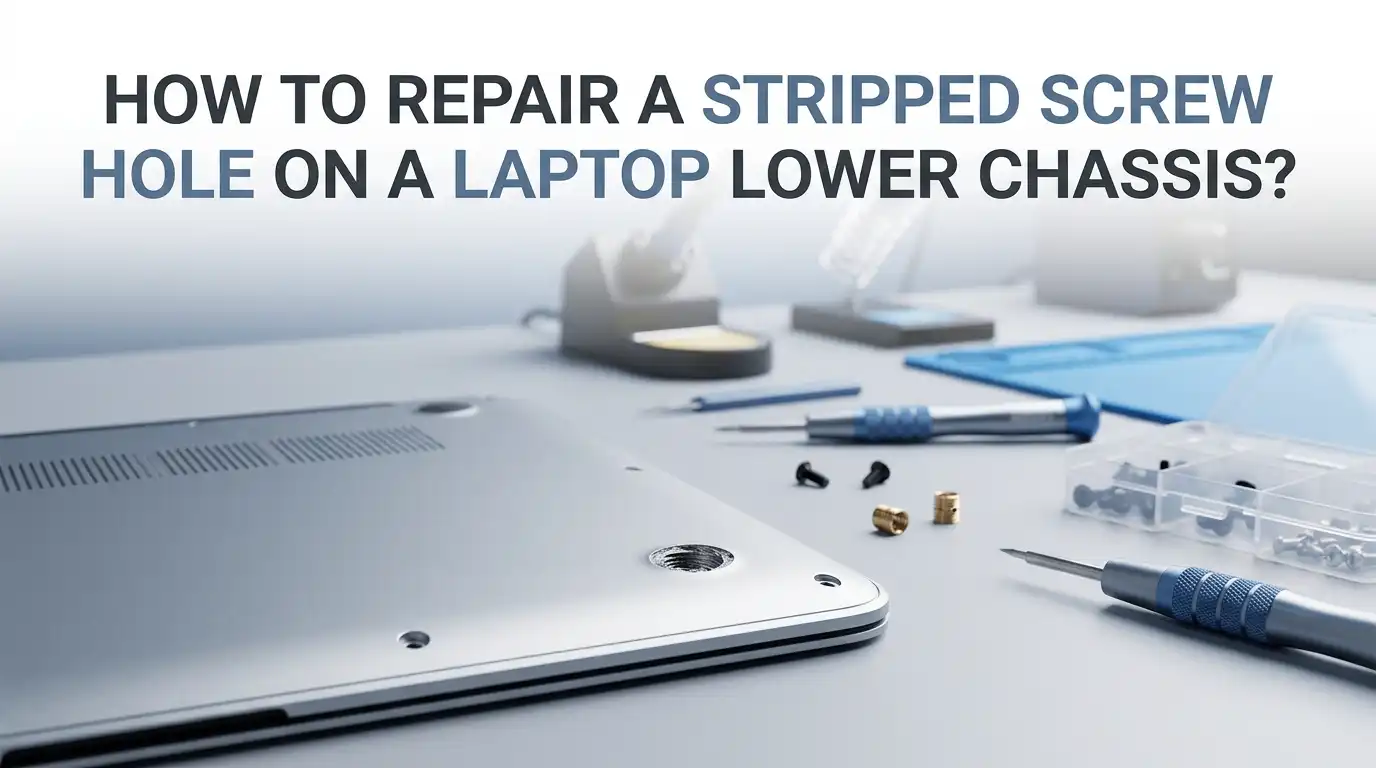
How to Repair a Stripped Screw Hole on a Laptop Lower Chassis?
You opened your laptop to clean the fan or swap the SSD. Now one tiny screw spins forever and refuses to bite. The bottom panel feels loose, and you worry the whole chassis might rattle apart. Take a breath. This problem has many simple fixes.
A stripped screw hole on a laptop lower chassis is one of the most common repair headaches. It usually happens because the plastic threads inside the boss are soft, thin, and worn from being opened too many times.
The good news is that you can fix it at home with cheap tools. You do not need to throw away your laptop or pay a technician hundreds of dollars.
In a Nutshell
- Diagnose first. Check if the screw itself is stripped, the plastic boss is stripped, or the metal insert has popped out. Each problem needs a different fix.
- Toothpicks plus wood glue is the cheapest and most popular method for shallow damage. It works in about ten minutes and costs almost nothing.
- JB Weld, two part epoxy, or epoxy putty gives the strongest long term hold for badly chewed plastic bosses. Let it cure fully before driving any screw.
- Heat set brass inserts are the professional level solution. They restore the original thread quality and last for years of repeated opening.
- Never overtighten a freshly repaired hole. Snug is enough. Most stripped holes happen because someone went too hard with the driver in the first place.
- Always test fit the screw before glue dries. A dry run saves you from a permanent mistake that needs more drilling and more glue.
Understand Why Laptop Screw Holes Strip So Easily
Laptop chassis are usually made from thin ABS plastic, polycarbonate, or magnesium alloy. The screw holes are tiny molded towers called bosses. These bosses hold self tapping screws, which cut their own threads into the soft material.
Each time you open and close your laptop, those threads wear down a little. After three or four cycles, the plastic gets soft and crumbly. One extra firm twist is all it takes to chew the threads completely.
Heat from the CPU and battery also makes the plastic brittle over time. Cheaper laptops use thinner bosses, so they strip faster than premium models. Knowing this helps you treat the repair gently and choose the right method for your specific chassis material.
Gather the Right Tools and Materials First
Before you start, lay out everything you need on a clean, well lit table. Rushing mid repair is how people lose tiny screws inside their laptop.
You will want a precision screwdriver set with Phillips PH0 and PH00 bits, plastic spudgers, tweezers, and a magnetic mat or small bowls for screws. For the actual repair, grab wooden toothpicks, white wood glue or PVA glue, two part epoxy such as JB Weld, super glue gel, and cotton swabs.
Optional but helpful items include a small drill bit set, an X Acto knife, brass threaded inserts, a soldering iron for heat setting, and isopropyl alcohol for cleaning. Having the right tool nearby turns a thirty minute job into a ten minute job.
Diagnose the Type of Stripped Damage You Have
Not every “stripped hole” is the same. Look closely with a flashlight before you choose a fix.
Type one is a stripped screw head, where the driver cannot grip the cross slot anymore. Type two is a stripped plastic boss, where the screw spins freely inside the hole. Type three is a cracked or broken off boss, where the entire plastic tower has snapped from the chassis.
Type one needs a screw extractor or a rubber band trick. Type two responds well to toothpicks or glue. Type three is the hardest and usually needs epoxy plus a backing plate. Identifying the damage saves time and prevents you from picking a method that will fail.
Method 1: The Toothpick and Wood Glue Trick
This is the classic budget fix, and it works surprisingly well on laptop plastic. You only need a few wooden toothpicks and standard wood glue.
Snap two or three toothpicks so they fit inside the hole. Dip the broken ends in wood glue and push them into the stripped boss until they sit snug. Wipe away any glue that oozes out with a cotton swab dipped in water. Let it dry for at least two hours, preferably overnight.
Once dry, snap or trim the toothpicks flush with the chassis using a sharp knife. Now drive your screw in slowly. The wood fibers swell against the screw threads and create a tight, lasting grip.
Pros: Almost free, fast, beginner friendly, and reversible if you drill it out later.
Cons: Not strong enough for heavily chewed bosses or load bearing hinge screws. May fail after two or three open close cycles.
Method 2: Super Glue with a Cotton Fiber Plug
Super glue gel is faster than wood glue and bonds to plastic better than PVA. This method works great for small or shallow strip damage.
Twist a tiny piece of cotton from a cotton ball into a thin rope. Push it into the screw hole using a toothpick or tweezers. Drop two or three drops of super glue gel onto the cotton, making sure it soaks through. Let it cure for about fifteen minutes.
Before the glue fully hardens, gently thread your screw in just enough to form a starter channel, then back it out. Wait an hour, then drive the screw home properly. The cotton fibers act like rebar inside the glue.
Pros: Quick cure time, strong bond on ABS plastic, easy to control.
Cons: Super glue is brittle under stress, can crack the boss if you overtighten, and fumes can stain electronics if used in excess.
Method 3: JB Weld or Two Part Epoxy Rebuild
For badly damaged bosses or holes you have already tried to fix, two part epoxy is the heavy duty answer. JB Weld is the most trusted brand among laptop repair technicians.
Mix equal parts of the resin and hardener on a piece of cardboard. Pack the mixture into the stripped hole using a toothpick. Coat your screw threads lightly with petroleum jelly or candle wax so the epoxy does not bond permanently to the screw.
Insert the screw halfway into the wet epoxy and leave it there for at least six hours. Once cured, unscrew it carefully. You now have fresh, custom threads molded directly to your screw.
Pros: Extremely strong, heat resistant, works on metal and plastic chassis, lasts for years.
Cons: Long cure time, messy if you rush, permanent so mistakes are hard to undo, and the chemical smell needs ventilation.
Method 4: Heat Set Brass Threaded Inserts
This is the professional method. Brass inserts give you metal threads inside a plastic boss, which is what high end laptops use from the factory.
Drill out the damaged boss slightly using a small bit that matches your insert size. Place the brass insert on top of the hole. Heat the tip of a soldering iron to around 250 degrees Celsius and press the insert down gently into the plastic.
The plastic melts around the brass and locks it in place when it cools. Wait two minutes, then thread your original screw into the new metal threads. The result feels brand new.
Pros: Permanent, professional finish, supports many repeat open close cycles, holds screws at high torque.
Cons: Requires a soldering iron and inserts, slight risk of melting nearby plastic, not reversible, and harder for beginners.
Method 5: Plastic Washer or Backing Plate Repair
When the entire boss has cracked off the chassis, you cannot rebuild threads in thin air. You need to give the screw something solid to bite against.
Cut a small square from an old credit card or thick plastic sheet. Drill a hole slightly smaller than your screw through the center. Place the plastic patch on the inside of the chassis where the boss used to be, lining it up under the screw hole.
Apply epoxy or super glue gel around the edges to hold the patch in place. Once cured, the screw passes through the chassis and threads into the new plastic plate. This is a salvage method when nothing else is possible.
Pros: Saves chassis that would otherwise be thrown out, cheap, uses scrap materials.
Cons: Looks rough, only works if there is interior clearance, and can interfere with internal components if not measured carefully.
Method 6: Baking Soda and Super Glue Hardener Hack
This is a lesser known trick from the model making world, and it works wonderfully for tiny laptop bosses.
Sprinkle a small pinch of baking soda into the stripped hole. Then add one or two drops of thin super glue. The baking soda reacts with the cyanoacrylate and hardens instantly into a rock solid plastic like compound.
You can build up layers if needed. Once fully hard, use a fine drill bit or a self tapping screw to cut new threads into the dry compound. The result is harder than the original plastic and sets in under sixty seconds.
Pros: Lightning fast cure, very strong, no waiting around, uses common kitchen items.
Cons: Generates heat as it cures so use small amounts, can be too hard to drill cleanly, and the bond to oily plastic is sometimes weak.
How to Remove a Stripped Screw Before Repair
Sometimes the screw is also damaged and you cannot even get it out. You must remove it before you can fix the hole.
Try the rubber band trick first. Place a wide rubber band flat over the screw head, press your driver firmly into it, and turn slowly. The rubber fills the stripped cross slot and gives extra grip. If that fails, use a manual screw extractor bit sized for laptop screws.
For really stuck screws, apply a tiny drop of penetrating oil and wait ten minutes. Avoid drills unless you absolutely have to, since they can crack the chassis. Pliers work if the screw head sticks out enough to grab.
Prevent Stripping in the Future With Smart Habits
Once your repair holds, treat it kindly so you never have to redo it. Most stripped holes are user error, not material failure.
Always use the correct screwdriver size, usually PH00 or PH0 for laptop chassis screws. Press down firmly while turning slowly. Stop the moment you feel resistance, never go beyond snug.
Keep your screws organized by location when you disassemble, because using the wrong length screw in the wrong hole can split a boss instantly. Mark a small diagram on paper if your laptop has many screws. A magnetic mat with labeled sections works even better and prevents lost hardware.
When to Stop DIY and Call a Professional
Some damage goes beyond what glue and toothpicks can fix. Knowing the limit saves you from making things worse.
If the chassis is cracked across multiple bosses, if the laptop is under warranty, or if a hinge screw is involved, stop and consult a repair shop. Hinge stress points carry enormous force every time you open the lid, and a weak repair will fail fast.
Professional shops can also replace the entire bottom cover for many laptop models for a reasonable price. Sometimes a forty dollar replacement panel is smarter than three hours of epoxy work. Be honest with yourself about your skill level and the value of your laptop.
Final Thoughts on Saving Your Laptop Chassis
A stripped screw hole feels like a disaster in the moment, but it is one of the easiest electronics repairs you can do. With patience, the right glue, and a steady hand, you can restore your laptop to factory tight in under an hour.
Start simple with toothpicks or super glue. Move up to epoxy or brass inserts only if the damage demands it. Always test the fit before the glue sets, and never overtighten the screw afterward.
Your laptop will thank you with many more years of quiet, rattle free service. And next time you open it up, you will know exactly how to protect those tiny plastic bosses from harm.
Frequently Asked Questions
Can I use hot glue to fix a stripped laptop screw hole?
Yes, hot glue works as a temporary fix and many technicians use it for low stress areas. Fill the hole, push the screw in while warm, and let it cool. However, hot glue softens near hot components like the CPU, so avoid it in those zones.
Will JB Weld damage my laptop plastic or motherboard?
JB Weld is safe on ABS and polycarbonate plastics once cured. Keep it well away from circuit boards and connectors during application. The cured material is non conductive, but uncured epoxy can drip and damage components, so work slowly.
How long should I wait before screwing into a glued hole?
For wood glue, wait at least two hours, ideally overnight. Super glue needs about thirty minutes. Two part epoxy like JB Weld needs a full six to twenty four hours depending on the formula. Rushing the cure is the top reason DIY repairs fail.
Can I drill a new screw hole next to the stripped one?
Only as a last resort. Drilling new holes can hit internal components or weaken the chassis. If you must, measure the inside clearance first and use the smallest bit possible. Heat set inserts in the original spot are almost always a better choice.
Is it worth repairing or should I buy a new bottom cover?
If replacement panels are available for your laptop model and cost less than fifty dollars, replacement is often easier and looks cleaner. For older or rare laptops, DIY repair is usually the only option. Check parts marketplaces before deciding.
Why does my screw still spin after using toothpicks?
Either the toothpicks were not packed tightly enough or the glue did not cure fully. Remove the screw, add more toothpicks with fresh glue, and wait longer this time. For deep damage, switch to epoxy instead of wood glue for a stronger result.

Hi, I’m Frankie Shaw, the founder and writer behind Swittchly 👋. I’m a passionate tech enthusiast who loves exploring the latest gadgets, devices, and electronics that hit the market. Through my honest, research-backed Amazon product reviews, I help readers make smarter buying decisions without the hype or confusion.