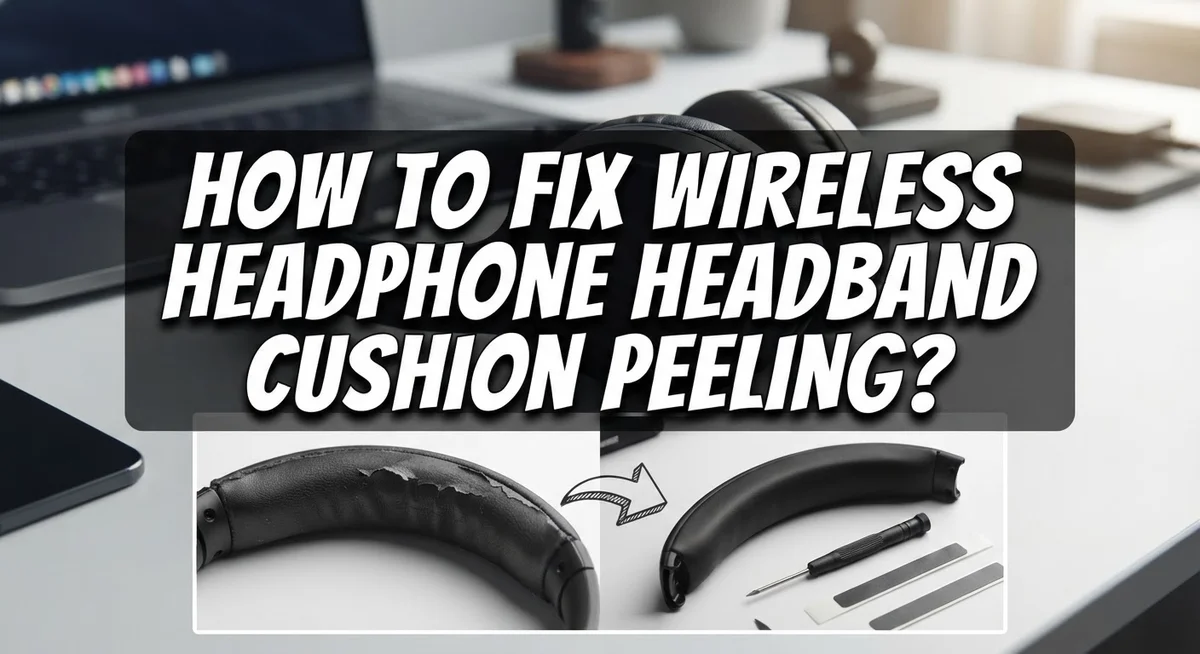
How To Fix Wireless Headphone Headband Cushion Peeling?
Wireless headphones make life easier. You can move around freely without messy cables. But over time, that comfy headband cushion starts to peel.
This is a common problem. Most headphones use synthetic leather or faux leather on the headband. These materials look nice at first. But they break down after months of use.
Sweat, oil, and sunlight speed up this damage. Soon, small flakes and cracks appear. The peeling gets worse each day you wear them.
The good news is you don’t need to throw away your headphones. You can fix this peeling problem at home. It just takes a few simple steps and some patience.
This article will show you easy ways to repair a peeling headband cushion. We will cover cleaning methods, patching tricks, and full cushion replacement options. You will also learn how to prevent peeling from happening again.
By the end, your headphones will feel comfortable again. You will save money and keep using headphones you already love. Let’s get started on fixing that cushion right now.
In a Nutshell
Here is a quick summary before you start:
-
Peeling happens naturally. The foam layer inside your cushion breaks down over time. This is not a sign of poor use.
-
You can fix it at home. Simple tools like fabric glue, tape, or a sewing kit work well. No special skills are needed.
-
Covers protect better than repairs. Buying or making a cushion cover stops future peeling. It also adds a fresh look to old headphones.
-
Cleaning matters a lot. Wiping your headband after each use slows down damage. Sweat and oil are the biggest culprits.
-
DIY wraps save money. Cloth, leather strips, or even socks can wrap around the band. This gives instant comfort without spending much.
-
Replacement pads are an option. If the peeling is too bad, a full pad swap solves the issue completely. This works best when foam is fully worn out.
-
Small fixes extend headphone life. You don’t need a new pair just because the cushion looks bad. A few minutes of care brings comfort back fast.
Why Headband Cushions Peel Over Time
Headband cushions peel because materials break down naturally over time. The outer fabric layer separates from the foam underneath, creating that annoying flaking appearance. This happens to almost every wireless headphone eventually.
Moisture is the main culprit. Sweat from your head, humidity in the air, and even rain exposure weaken the glue holding layers together. The adhesive loses its stickiness when wet, and the materials expand and contract as they dry. This constant movement causes peeling.
Heat also speeds up deterioration. Leaving headphones in a hot car or near a sunny window damages the material faster. UV rays break down the outer covering, making it brittle and prone to cracking. High temperatures dry out the foam layer, causing it to shrink and separate.
Regular friction wears things down too. Every time you adjust the headband, stretch it, or rub it against your hair and skin, tiny fibers break. Over months of use, these small damages add up. The material becomes weak in spots and starts peeling.
The quality of materials matters here. Cheaper foam and synthetic fabrics peel sooner than premium options. Budget headphones often use adhesives that fail quickly when exposed to moisture and heat.
Dust and dirt particles also play a role. They get trapped between layers and create friction points. This speeds up the separation process.
Understanding these causes helps you prevent future peeling. You’ll know why it happens and what conditions make it worse. This knowledge lets you take better care of your headphones and extend their comfortable lifespan.
Tools and Materials You Will Need
Before you start fixing your headband cushion, gather the right supplies. Having everything ready makes the job faster and easier.
Adhesives are your first priority. Fabric glue works best for peeling cushions because it bonds cloth and foam together. You can also use contact cement if you want a stronger hold. Super glue works for small areas, but it dries too fast and can be messy. Clear-drying glue helps keep your headphones looking neat.
Covering materials protect the repair. Self adhesive tape, athletic tape, or duct tape can cover damaged spots quickly. Cloth tape sticks better than plastic tape and looks more professional. You might also want fabric scraps, old cloth, or even a sock to wrap around the band as a DIY cover.
Basic tools make work simpler. A small brush or applicator helps spread glue evenly. Tweezers remove loose foam pieces gently. Scissors cut tape and fabric to the right size. A damp cloth cleans away old glue and dirt before you start repairs.
Optional items improve results. Sandpaper smooths rough edges where cushion material is peeling. A heat gun or hair dryer softens old glue so you can peel it away. Needle and thread help if stitching is needed for cloth wraps.
Cleaning supplies matter too. Rubbing alcohol removes sticky residue and old adhesive. Paper towels or soft cloths dry everything after cleaning. Let surfaces dry completely before applying new glue.
Organization saves time. Put all supplies in one spot before you begin. This prevents you from stopping mid repair to search for something. Small containers hold tiny items so nothing gets lost during the process.
Step-by-Step Guide to Removing Peeling Cushion Material
Start by examining your headband cushion closely. Look for areas where the material is lifting away from the foam underneath. Use your fingers to gently peel back any loose edges so you can see the full extent of the damage.
Clean the area thoroughly before removal. Wipe away dust, sweat, and old adhesive residue with a dry cloth first. Then use rubbing alcohol on a cloth to remove sticky buildup. Let everything dry completely for at least 5 minutes.
Carefully peel away the damaged cushion material. Work slowly from the edges inward. If the material resists, apply a small amount of heat from a hair dryer on low setting. This softens the old adhesive and makes removal easier.
Pull the material off in one piece if possible. This helps you see exactly how much needs replacing. If pieces tear off in chunks, that’s fine too. Just remove all the loose parts.
Once removed, inspect the foam layer underneath. Check for mold, mildew, or severe deterioration. If the foam is still firm and dry, you can reuse it. If it’s crumbly or wet, you’ll need new padding.
Clean the exposed foam with a dry cloth. Remove any leftover adhesive residue or debris. Wipe gently to avoid damaging the foam surface.
Let the headband sit uncovered for a few hours. This allows any remaining moisture to evaporate. Proper drying prevents mold growth under your new cushion material.
Now your headband is ready for the next repair step. You’ve successfully removed the old peeling material and prepared the surface for restoration.
How To Repair and Recover the Headband Cushion
Once you’ve removed the peeling material, the real repair work begins. Your goal is to restore the headband to a comfortable, functional state.
Start by deciding between two main repair paths. You can either reattach the original cushion material or apply a fresh covering. Both methods work well depending on the damage level.
If the original material is still in good condition underneath, reattachment is your best option. Apply fabric glue to the foam layer using a small brush or applicator. Spread the glue evenly across the surface. Press the cushion material back down firmly. Hold it in place for several minutes so the adhesive sets properly. Wipe away any excess glue with a damp cloth before it dries.
For cushions that are too damaged to reuse, covering is the smarter choice. Self adhesive tape, athletic tape, or similar wrapping materials work great here. Start at one end of the headband and wrap the material around the foam layer. Overlap each layer slightly as you work your way across. This creates a smooth, protective surface. Trim any excess material with scissors for a clean finish.
Let your repair cure completely before wearing the headphones. Most fabric adhesives need at least 24 hours to reach full strength. Rushing this step can cause your repair to fail quickly.
Test the comfort level before regular use. The new cushioning should feel similar to the original. If it feels too firm or uncomfortable, you may need to add an extra layer of softer material underneath. This extra step prevents headaches during extended wear sessions.
Your headband is now ready for regular use again.
Tips for a Clean and Durable Finish
A clean and durable finish keeps your headphone headband looking fresh and lasting longer. Start by maintaining regular cleaning habits. Wipe your headband cushion with a soft, dry cloth every few days to remove dust and oils from your skin.
Use a slightly damp cloth with mild soap for deeper cleaning. Avoid soaking the headband or using harsh chemicals that damage the material. Let it air dry completely before wearing your headphones again.
When applying adhesive or covering materials, work in a clean, dust free space. Particles that settle on wet glue create bumps and uneven surfaces. Wash your hands before handling repair materials to prevent transferring oils and dirt onto the adhesive.
After repairs, give your headband plenty of time to cure. Most fabric adhesives need 24 hours to reach full strength. Rushing to wear your headphones can undo all your repair work and cause peeling to return quickly.
Protect your repair by storing headphones properly. Keep them in a clean case or bag away from extreme heat and humidity. These conditions weaken adhesive bonds and damage cushion materials over time.
Inspect your headband monthly for early signs of wear. Catching small peeling spots before they spread makes repairs much easier. Address problems early rather than waiting until the entire cushion is damaged.
Avoid excessive stretching and folding when you store your headphones. Place them gently in your case instead of cramming them into bags. Gentle handling preserves your repair and extends the life of your cushion significantly.
Your consistent care habits directly impact how long repairs last. Small daily actions prevent major damage and keep your headphones comfortable and looking good.
Common Mistakes to Avoid During Repair
When fixing your wireless headphone headband cushion, several mistakes can ruin your repair work. Understanding these errors helps you succeed on the first try.
Applying too much adhesive is the most common mistake people make. Excess glue creates messy overflow, attracts dust, and makes the cushion material slide around. Use only a thin, even layer. You want the material to stick, not swim in glue.
Another frequent error is rushing the drying process. Removing or wearing your headphones before the adhesive sets completely causes the repair to fail. Most adhesives need several hours to cure properly. Check the instructions on your specific adhesive for exact timing.
Many people skip the cleaning step before repair. Old residue, dust, and dried glue prevent new materials from bonding correctly. Take time to clean the headband thoroughly with rubbing alcohol. Let it dry completely before starting your repair.
Stretching the cushion material too tight causes premature peeling again. You want the material smooth and secure, not stretched like a drum. Apply gentle, even pressure as you work.
Choosing the wrong adhesive type creates problems too. Some glues work better on fabric, while others suit foam better. Select an adhesive designed for your specific materials.
Ignoring the foam layer underneath leads to incomplete repairs. If the foam is damaged, compressed, or deteriorating, your new cushion will peel again soon. Replace damaged foam before adding new covering material.
Finally, avoid working in dusty or humid environments. Dust settles on wet adhesive and ruins your finish. Humidity prevents proper drying and weakens bonds. Work in a clean, dry space for the best results. These simple precautions transform your repair outcome significantly.
How to Prevent Future Peeling and Extend Cushion Life
Your headphone headband cushion will stay in great shape when you follow smart prevention habits. Start by storing your headphones correctly every single time you use them. Keep them in a protective case or pouch instead of tossing them in a bag with other items.
Avoid excessive heat and direct sunlight. These elements break down cushion materials much faster. Store your headphones in a cool, dry place away from windows and heat sources.
Clean your headband regularly with a soft, dry cloth. This simple habit removes dust and oils that weaken the material over time. Once per week takes just seconds but makes a real difference.
Be gentle when you adjust the headband. Avoid twisting or bending it forcefully. Your cushion material stretches and weakens when you handle it roughly during daily use.
Control humidity levels where you store your headphones. Moisture causes adhesives to fail and materials to deteriorate. Keep them away from bathrooms and other damp areas.
Rotate your headphone use if you own multiple pairs. This reduces constant pressure on a single cushion. When one pair rests, the material can recover naturally.
Check your headband monthly for small signs of wear. Early detection means you can fix tiny problems before they become major peeling issues. A quick visual inspection takes one minute.
Avoid exposing your headphones to extreme temperature changes. Rapid shifts from cold to hot cause materials to expand and contract, which damages the adhesive bond.
These prevention steps work together to extend your cushion life significantly. Consistent care habits protect your investment and keep your headphones comfortable for years.
Troubleshooting Common Repair Issues
When your wireless headphone headband cushion starts peeling, you need to identify what went wrong before you fix it again. Common issues include moisture damage, material fatigue, and improper adhesive application.
Start by examining the peeling area closely. Is the foam underneath still intact? Does the material feel sticky or dry? These details tell you whether the original repair failed or if new damage occurred. If the foam is compressed or damaged, you’ll need to replace it completely rather than just reapply the covering.
Check your storage habits next. Headphones stored in hot cars or damp bathrooms experience material breakdown faster. Temperature swings cause adhesives to weaken over time. If your environment is humid or warm, that’s likely why your repair didn’t last.
Inspect the adhesive you used previously. Some adhesives lose strength when exposed to body heat and sweat. Others dry out too quickly and don’t create lasting bonds. The wrong adhesive type is often the hidden culprit behind repeat peeling.
Look at how tight the cushion material was stretched. Overstretching creates constant tension that eventually breaks the adhesive bond. The material needs to sit comfortably without being pulled taut.
Also examine the headband structure itself. If the plastic is cracked or warped, the cushion won’t sit evenly. Uneven pressure causes certain spots to peel repeatedly.
Finally, consider whether you cleaned the surface thoroughly before your last repair. Dust, oils, and old adhesive residue prevent new adhesive from gripping properly. This is often overlooked but absolutely critical.
Once you understand why peeling happened, you can address the root cause. This prevents the same problem from repeating after your next repair attempt.
Final Thoughts
Fixing a peeling headband cushion is a simple task once you know the steps. You do not need special skills or expensive tools.
Patience makes the biggest difference in your repair. Rushing leads to weak bonds and repeated peeling.
Clean the surface first. Apply adhesive evenly. Let it dry fully before you use your headphones again.
Small repairs today prevent bigger problems tomorrow. A cushion that peels once will likely peel again without proper care.
Your headphones deserve regular attention. Check the headband often. Look for early signs of wear before they turn into major damage.
Prevention works better than repair in almost every case. Store your headphones properly. Keep them away from heat and moisture. Clean them gently after each use.
These small habits add years to your cushion life. They also save you money on replacements.
If peeling happens again, do not panic. You now know how to fix it. You also know what mistakes to avoid.
Every repair teaches you something new. You learn how your specific headphones react to different adhesives. You learn how long drying really takes.
This knowledge makes future repairs faster and easier. You become more confident each time you fix your headband cushion.
Remember that quality materials matter. Cheap adhesives or mismatched foam often cause more harm than good. Choose materials that match your original cushion type.
Your wireless headphones can last for years with the right care. A peeling cushion does not mean the end of your headphones.
It simply means it is time for a small fix. With the right steps, your headphones will feel comfortable and look great again.
Take action today. Your ears and your wallet will thank you.
Frequently Asked Questions
Why does my headband cushion peel so quickly?
Your cushion peels fast when moisture and heat work together against the adhesive. Sweat from your ears and head creates a damp environment. This dampness weakens the bond between the cushion and the headband structure.
Heat from your skin also plays a role. Many adhesives lose their grip when exposed to body warmth over time. If you store your headphones in hot places, peeling speeds up even more.
Can I prevent peeling without replacing the cushion?
Yes, you can slow down peeling significantly. Keep your headphones away from extreme heat and humidity. Store them in a cool, dry spot when you are not wearing them.
Wipe your headband regularly with a soft cloth. This removes sweat and oils that eat away at the adhesive bond. Give your ears a break by rotating between multiple headphone pairs if you own them.
What should I do if peeling starts in just one small area?
Act fast when you spot the first signs. Small peeling is much easier to fix than widespread damage.
Gently lift the peeling edge and clean both surfaces underneath. Remove old adhesive, dust, and dried sweat. Let everything dry completely before you reattach the cushion material.
Is the headband itself damaged if peeling keeps happening?
Not always. Repeated peeling usually points to adhesive failure, not headband damage. However, check the headband surface for cracks or warping.
If the headband feels soft or bent, the structure itself may be weakening. In this case, the cushion cannot stay attached properly no matter what adhesive you use.

Hi, I’m Frankie Shaw, the founder and writer behind Swittchly 👋. I’m a passionate tech enthusiast who loves exploring the latest gadgets, devices, and electronics that hit the market. Through my honest, research-backed Amazon product reviews, I help readers make smarter buying decisions without the hype or confusion.