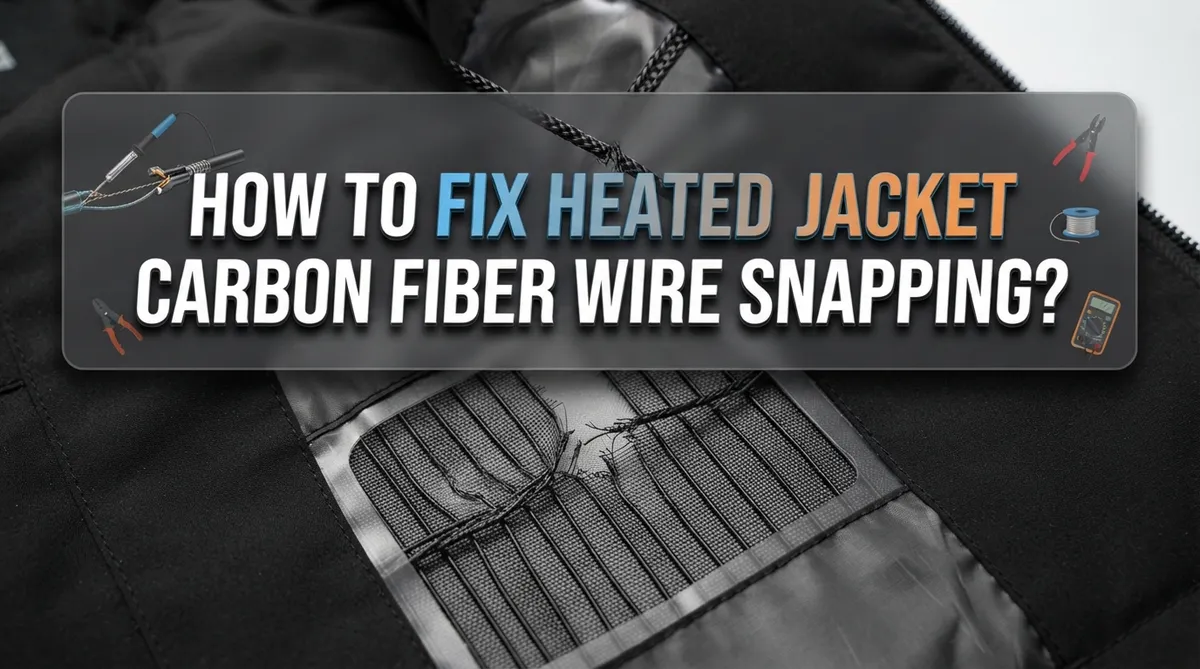
How To Fix Heated Jacket Carbon Fiber Wire Snapping?
Your heated jacket kept you warm all winter. Then one day, the heat just stops. You check the battery. You check the settings. Everything seems fine, but no warmth comes through.
This is a common problem. The carbon fiber wire inside your jacket has likely snapped. It usually happens at the connection point near the chip or controller.
Good news: your jacket is not ruined. A snapped wire does not mean you need a new jacket. You can fix this problem at home with a few simple tools.
In a Nutshell
- Find the break first. Most snapped wires happen at the connection point near the chip or controller. Check this spot before anything else.
- Strip and splice the wire. Carefully remove the insulation and join the broken ends together. This creates a solid electrical connection again.
- Insulate every splice properly. Wrap each wire with shrink tubing on its own. Then add a second layer of tubing over both wires together.
- Swap the connector if needed. A damaged jack or connector should be replaced. This keeps your repair strong and safe.
- Test before you wear it. Always check that heat comes back through the jacket before putting it on. This step catches shorts early.
- Skip the shortcuts. Avoid quick fixes like tape alone. Poor insulation causes shorts and can undo your hard work.
Understanding Carbon Fiber Wiring and Why It Snaps
Carbon fiber wire is a thin strand made to conduct electricity and heat. It runs through your heated jacket’s lining and creates warmth when power flows through it. Understanding why this wire snaps helps you prevent future breaks and fix current problems.
The wire snaps most often at connection points. These are spots where the wire meets the controller chip or power jack. These junctions experience constant flexing when you wear and move in your jacket. Each bend weakens the connection until the wire finally breaks.
Carbon fiber wire is fragile by nature. It cannot handle repeated bending like regular copper wire can. The material becomes brittle over time, especially if exposed to moisture or temperature changes. This brittleness makes it snap rather than bend.
The heating system relies on unbroken electrical flow. When the wire snaps, electricity cannot reach the carbon fiber tape sewn into your jacket’s liner. This stops all heat production in that section. A single break can disable an entire heating zone.
Why connections fail most often comes down to stress points. The wire must flex when you move your arms and torso. The connector jack also moves slightly each time you plug in the battery. Over months of use, these small movements add up and cause failure.
Your jacket uses thin insulation around each wire to prevent electrical shorts. When the wire snaps, this insulation breaks too. Exposed wire ends can touch each other or metal parts, creating dangerous shorts. This is why proper repair with new insulation matters so much.
Knowing these facts helps you understand the repair process ahead. You will see why each step matters and why shortcuts fail.
Tools and Materials You’ll Need Before Starting
Before you start fixing your heated jacket, gather the right tools and materials. Having everything ready makes the repair faster and safer.
You will need wire strippers to remove the insulation from your carbon fiber wire. A basic wire stripper works well for this job. Make sure it can handle thin gauge wire without crushing the conductor inside.
Shrink tubing is essential for proper insulation. Get shrink tubing in at least two different sizes. One size should fit snugly around a single wire. The second size should fit around both wires bundled together. This double layer prevents electrical shorts and keeps moisture out.
A heat source is required to shrink the tubing properly. A heat gun works best for this task. You can also use a lighter or match, though these require more care and control.
Solder and a soldering iron help create strong wire connections. If you have never soldered before, practice on scrap wire first. The goal is a clean joint that conducts electricity reliably.
Electrical tape serves as a backup insulation layer. Wrap it around your shrink tubing for extra protection against damage.
A multimeter lets you test the circuit after repair. This tool measures electrical continuity and helps confirm your splice works correctly.
Tweezers or small pliers help manipulate tiny wires and connectors. Precision matters when working with thin carbon fiber wire.
Finally, gather a small notebook to document where you found the break. This information helps you understand why the wire failed and where future breaks might occur.
Having these materials ready means you won’t stop halfway through your repair to search for supplies. Start with quality basics, and your jacket repair will succeed.
Step-by-Step Guide to Splicing a Snapped Wire
Start by locating the exact break in your carbon fiber wire. Use a multimeter to test continuity and find where the electrical connection stops. Mark this spot with a pen so you don’t lose it.
Strip the insulation carefully from both broken wire ends. Remove about half an inch of the outer coating from each side. Work slowly to avoid damaging the thin carbon fiber strands underneath. A wire stripper designed for delicate wires works best here.
Twist the exposed wire strands together tightly. Align both broken ends so they overlap slightly. This creates a secure mechanical connection before you add any insulation. The overlap should be firm and stable.
Apply shrink tubing around each wire individually first. Slide a small piece of shrink tubing over one wire end, covering the splice area completely. Heat it gently until it shrinks tight around the wire. Repeat this process for the second wire end. This step prevents each wire from touching anything it shouldn’t.
Next, slide a larger piece of shrink tubing over both wires together. Position it so it covers both individual tubes and the junction point. Heat this secondary layer until it shrinks fully. This creates a double layer of protection against electrical shorts.
Test your repair with a multimeter before reassembling anything. Check that electricity flows through the splice properly. If the circuit reads broken, your splice needs adjustment.
If your connector jack is damaged or corroded, replace it now. A faulty connector can undo all your splicing work. Once everything tests correctly, your jacket is ready to reassemble and use again.
Properly Insulating the Repair with Shrink Tubing
Shrink tubing acts as your primary defense against electrical shorts after splicing broken wires. This insulation layer protects the exposed copper strands from touching each other or the jacket’s metal components.
Start by sliding a piece of shrink tubing over the first wire end before you solder anything together. Make sure the tubing covers the stripped section completely. The tubing should extend slightly beyond where the insulation originally ended.
Heat the first piece of shrink tubing with a heat source until it contracts snugly around the wire. You’ll see it shrink down and grip the wire tightly. This creates a seal that prevents moisture and debris from entering the connection.
Now apply a second, larger piece of shrink tubing over both wires together. This double layer approach gives you extra protection. The outer tubing should cover the splice point where both wires meet and extend an inch on each side.
Heat the outer tubing carefully using steady, even heat. Move your heat source back and forth to avoid melting the tubing or damaging the wire underneath. The tubing should feel firm and smooth when it cools.
Check that no bare wire is visible anywhere on the splice. If you see any exposed copper, add another small piece of tubing over that spot. Proper coverage prevents shorts that could damage your jacket’s heating system or create safety hazards.
Allow the tubing to cool completely before handling the repair. This ensures the seal sets properly and bonds securely to the wire. Once cooled, gently tug on the tubing to confirm it won’t slip off under normal use.
Replacing a Damaged Connector or Jack
A connector or jack failure happens when the metal contact point becomes loose, corroded, or damaged. This prevents your heated jacket from receiving power even if the carbon fiber wiring itself is intact. Replacing it is often faster than splicing wires.
Start by identifying which connector failed. Look for green or white corrosion on the metal contacts. Check if the jack wiggles when you gently pull on it. A loose connector means the metal prongs inside have separated from the plastic housing.
Disconnect the battery immediately before touching any connectors. This keeps you safe from electrical shock. Carefully examine how the old connector attaches to the wires. You may see solder joints, crimped connections, or both holding it in place.
Use your wire strippers to remove about half an inch of insulation from each wire attached to the damaged connector. Be gentle here because carbon fiber wires are delicate. If you strip too much, the exposed wire becomes fragile.
Next, remove the old connector by desoldering the joints or cutting the wires close to the connector base. Clean any remaining solder from the wire ends using a damp sponge or brass wire cleaner.
Attach the new connector by inserting each wire into its correct port. Most jacks have two ports: one for positive current and one for negative. Check your jacket’s manual or look for color coding on the wires.
Solder each wire firmly to its contact point. Apply heat for 3 to 5 seconds until solder flows smoothly. Let the connections cool naturally.
Test your repair immediately using a multimeter before reassembling your jacket. Set the meter to continuity mode and touch both wire ends. You should hear a beep or see a reading. This confirms power flows through your new connector correctly.
Testing the Heating Function Before Reassembly
Testing your heating function after repair is absolutely essential. You need to confirm the circuit works before you put the jacket back together. This step prevents wearing a non functional jacket and catches problems early.
Start by reconnecting your battery to the repaired wire. Make sure all connections are tight and secure. Double check that shrink tubing covers every exposed wire completely. No bare metal should be visible anywhere on your splice.
Use a multimeter to test continuity across your repair. Set the multimeter to its continuity or resistance setting. Touch one probe to the wire before the break and the other probe after the break. You should hear a beep or see a low resistance reading. This confirms electricity can flow through your splice.
Next, activate the heating function on your jacket’s controller. Place your hand near the carbon fiber heating element to feel if warmth develops. The element should get noticeably warm within 30 seconds. If it stays cold, your splice may have failed or a connection is loose.
Check the entire heating panel for hot spots or cold spots. Uneven heating suggests a partial break elsewhere in the wire. Uniform warmth across the panel means your repair succeeded.
Leave the jacket running for 5 to 10 minutes to ensure stable operation. Watch for any burning smells or visible damage. These signs mean you need to stop immediately and inspect your work.
Test the heating function on different power settings if your jacket has them. Low, medium, and high settings should all produce warmth. This confirms your repair handles variable current properly.
Only after passing all these tests should you reassemble your jacket completely.
Common Mistakes That Lead to Repair Failure
Repair failure often stems from overlooking simple but critical steps during the splicing process. Many people rush through wire preparation and skip proper testing, which creates problems later.
Inadequate insulation is the most common mistake. When you splice wires together, bare copper becomes an electrical hazard. Some people use regular tape or cloth instead of proper shrink tubing. This approach fails because tape deteriorates over time and doesn’t create a secure seal. Moisture and friction eventually expose the copper, causing shorts that damage your jacket’s entire heating system.
Another frequent error is poor solder joints. If your splice connection is weak or incomplete, the heating current cannot flow properly. The wires may appear connected but actually carry inconsistent power. This creates hot spots in some areas while other sections stay cold. Always ensure your solder flows smoothly around both wires and cools into a shiny, smooth finish.
Skipping the functionality test is equally dangerous. Many people reassemble their jackets immediately after splicing without checking if the repair actually works. You might discover a failed repair only after wearing the jacket, when it’s too late to fix easily. Testing takes just minutes and saves hours of frustration.
Poor connector reattachment also causes failure. If you don’t solder the new connector firmly or insert wires into wrong ports, your jacket won’t heat at all. Double check that each wire connects to its correct contact point before soldering.
Finally, rushing the cooling process causes problems. Shrink tubing must cool completely before you handle the repair. Moving or bending the splice while it’s still warm can crack the insulation and undo your work.
Troubleshooting Persistent Heating Problems After Repair
After you repair your heated jacket’s carbon fiber wires, heating problems can still occur. These issues often appear even when your splice looks perfect. Understanding why this happens helps you fix the real problem.
Intermittent heating is a sign that your splice connection remains loose or unstable. The wires may touch sometimes but not consistently. Check your shrink tubing first. If it feels loose or moves when you gently tug the wires, your insulation failed. Remove the old tubing and resplice the wires more tightly. Apply shrink tubing again, making sure it grips both wires firmly.
Partial heating means only part of your jacket warms up. This suggests a weak connection at your splice point. The electrical current flows, but resistance at the joint creates a bottleneck. Test this with a multimeter by checking voltage on both sides of your splice. If voltage drops significantly across the joint, you need to resolder or resplice.
No heat at all after repair points to a complete circuit break. Your splice may have failed entirely, or your connector came loose during reassembly. Trace the entire wire path from your battery to your heating panel. Look for any visible gaps or separated connections.
Temperature fluctuations also indicate splice problems. Your jacket heats, then stops, then heats again. This happens when your connection is marginal. The wire heats up, expands slightly, and loses contact.
The solution involves redoing your splice work completely. Don’t try quick fixes. Strip the wires again, clean the copper thoroughly, and create a fresh connection. Use proper solder and apply shrink tubing correctly. Test everything before wearing your jacket.
Final Thoughts
Fixing a snapped carbon fiber wire in your heated jacket is a manageable task. You do not need advanced electrical skills to complete this repair successfully.
Patience matters more than expertise here. Rushing through the splicing process causes most repair failures. Take your time with each step.
Your jacket can work like new again after a proper repair. Many people fear their heated jacket is beyond saving once a wire breaks near the chip. This fear is usually unfounded.
Proper insulation and careful testing make the difference between a lasting fix and a repeat failure. Shrink tubing protects your splice from moisture and prevents dangerous shorts.
Always gather the right tools before starting. A soldering iron, wire strippers, and shrink tubing are basic requirements. Having these ready saves time and frustration during the repair.
Remember that heated jackets face constant movement and bending. This makes wire breaks a common issue over time. Knowing how to fix them yourself saves money and extends your jacket’s life.
If your first repair attempt does not work, do not give up. Sometimes a second splice is needed to get a stable connection. Small mistakes in the first try are normal.
Keep your jacket’s wiring in good condition through gentle care. Avoid sharp folds and store your jacket properly when not in use. This prevents future breaks.
Your heated jacket represents an investment in comfort during cold weather. A few minutes of repair work can restore that comfort for many more seasons.
With the right approach, fixing a snapped carbon fiber wire becomes a simple task. You gain confidence and save your favorite jacket from the trash.
Frequently Asked Questions
Can I really splice a snapped carbon fiber wire back together?
Yes, you can splice a snapped wire successfully. The key is using proper insulation materials like shrink tubing around each wire individually, then adding a second layer around both wires together. This prevents electrical shorts that could damage your jacket or create safety hazards.
The splice itself is straightforward. Strip the insulation from both wire ends, twist them together securely, and cover them completely with shrink tubing. Test the connection before reassembling your jacket to confirm the heating works properly.
Why do heated jacket wires snap in the first place?
Wires typically snap at connection points where the carbon fiber tape meets the controller or chip. These junction areas experience constant movement and bending as you wear the jacket. The repeated flexing eventually weakens the wire until it breaks.
Battery connections and the jack connector also see stress from regular use. Exposure to moisture, temperature changes, and physical impacts can accelerate wire failure over time.
What happens if I skip testing after splicing?
Skipping the test is risky. Your splice might look perfect but still have loose connections or incomplete insulation. Testing reveals these problems before you wear the jacket.
An untested splice can cause intermittent heating, partial heating in only some areas, or complete failure. Worse, poor insulation might create electrical shorts that damage the entire heating system or pose safety risks.
Do I need to replace the connector jack if it’s damaged?
If the jack connector is cracked, corroded, or loose, replacement is necessary. A damaged jack prevents proper electrical contact even if your wire splice is perfect.
New connector jacks are straightforward to install. Simply solder or crimp the wires to the new jack carefully, then test the connection before reassembling your jacket.

Hi, I’m Frankie Shaw, the founder and writer behind Swittchly 👋. I’m a passionate tech enthusiast who loves exploring the latest gadgets, devices, and electronics that hit the market. Through my honest, research-backed Amazon product reviews, I help readers make smarter buying decisions without the hype or confusion.