How To Fix Drone Camera Gimbal Dampening Rubber Tearing?
Your drone gimbal keeps your camera steady during flight. It relies on small rubber dampeners to absorb vibration. These tiny parts play a huge role in keeping your footage smooth.
Over time, this rubber can tear or crack. You might notice shaky footage or strange jitters in your videos. This happens because the dampeners lose their ability to absorb shock.
Many drone pilots face this exact problem. The good news is that you can fix it without buying a brand new drone. This guide will show you simple ways to repair or replace torn gimbal dampeners.
In a Nutshell
- Check the damper rubber often. Small cracks turn into big tears fast. Catch problems early to save your gimbal.
- Temperature swings cause damage. Heat and cold make rubber brittle over time. Store your drone in stable conditions when you can.
- Replacement is easier than you think. You do not need special tools for most repairs. A steady hand and patience work well here.
- Cleaning matters more than people realize. Dust and grime speed up rubber breakdown. Wipe your gimbal after each flight session.
- DIY fixes can work temporarily. Some pilots use adhesive patches for small tears. This buys time until a proper fix happens.
- Prevention beats repair every time. Gentle handling extends the life of your dampening rubber. Avoid rough landings and impacts whenever possible.
Understanding Gimbal Dampening Rubber and Its Purpose
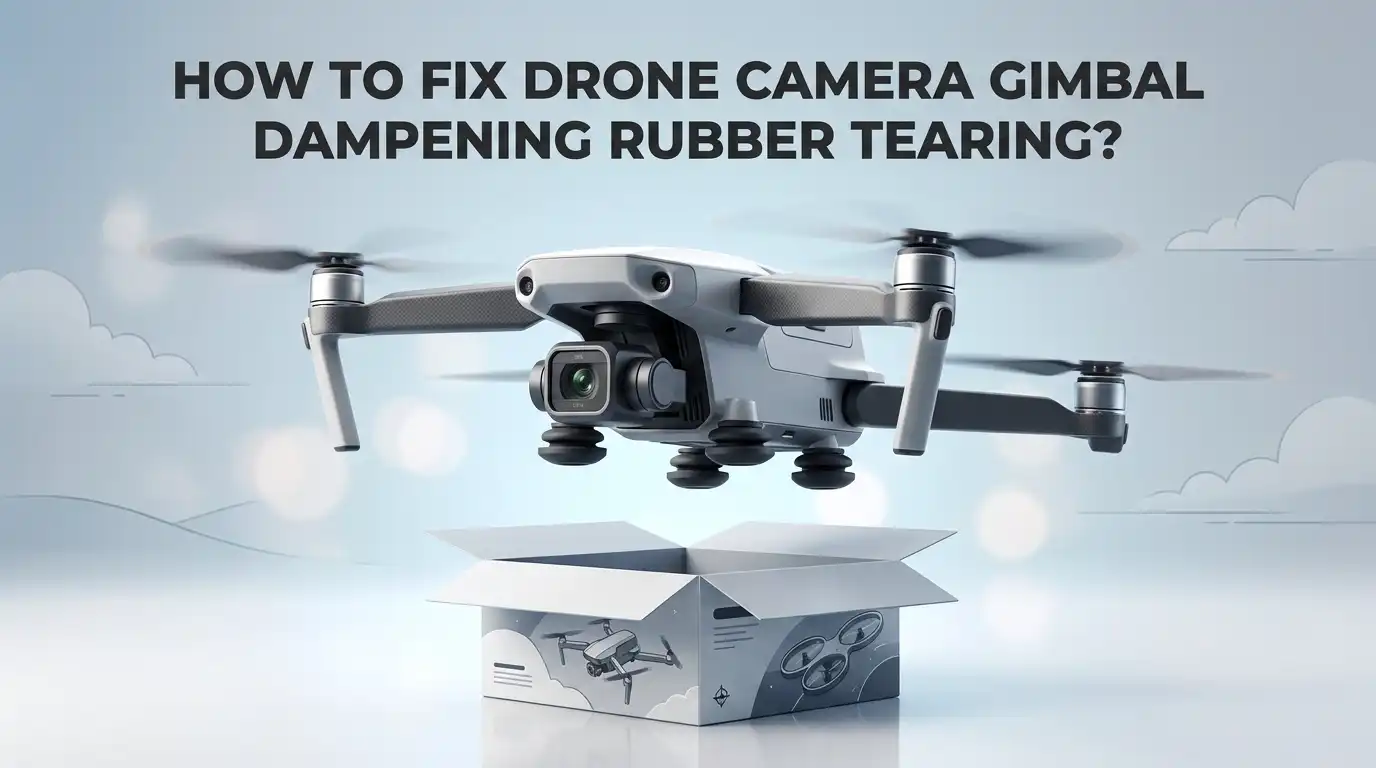
The dampening rubber in your drone gimbal absorbs vibrations from the motors and propellers. This rubber sits between the gimbal frame and your camera. It stops shaking and blur from ruining your video footage.
Your camera needs this rubber to stay perfectly still. Without it, every motor vibration transfers directly to the lens. The result is shaky, unusable video that looks unprofessional.
The rubber works by compressing slightly when vibrations hit it. This compression absorbs the energy instead of passing it to your camera. Think of it like a shock absorber in a car. It takes the impact so your camera does not feel the bump.
These rubber pieces are usually made from silicone or similar elastic materials. They can handle thousands of vibrations per second during normal flight. The rubber stretches and compresses repeatedly without losing its shape, at least for a while.
Over time, the rubber gets tired. The constant flexing weakens the material. Temperature changes make it brittle and less flexible. Dust and dirt also break down the rubber surface.
When the rubber tears or cracks, your gimbal loses its dampening ability. Small vibrations become big problems. Your video starts to shake and blur again. The tear grows larger with each flight.
Some pilots do not notice the damage right away. The gimbal might still work, but the video quality drops. A torn dampener lets vibrations through that should have been stopped.
Understanding this purpose helps you recognize why repairs matter. Your gimbal rubber is not just a small part. It is essential for smooth, professional looking footage. Keeping it in good condition keeps your entire gimbal system working properly.
Common Causes of Dampening Rubber Tearing
The dampening rubber in your gimbal fails for several clear reasons. Understanding these causes helps you prevent future damage.
Vibration stress is the primary culprit. Your drone’s motors and propellers create constant vibrations during flight. The rubber absorbs these shocks repeatedly. Over thousands of flight cycles, the material fatigues and eventually tears. This is especially true if you fly in windy conditions where the gimbal works harder.
Temperature changes damage the rubber significantly. Rubber becomes brittle in cold weather and loses flexibility in extreme heat. If you store your drone in an unheated garage or fly in freezing temperatures, the rubber becomes more prone to cracking. Sudden temperature swings between your climate controlled home and outdoor flights accelerate this breakdown.
Physical impact and mishandling cause immediate tears. Dropping your drone or bumping the gimbal against objects creates stress points where the rubber splits. Even gentle pressure on the gimbal during transport can cause small cracks to form.
Dirt and debris accumulation speeds up deterioration. Dust particles stick to the rubber and create friction. Moisture combined with dirt creates a corrosive environment. The rubber degrades faster when exposed to these contaminants.
Age and material degradation happen naturally. Rubber loses elasticity over time regardless of use. UV exposure from sunlight weakens the material. Chemical exposure from fuel or cleaning products can also break down the rubber composition.
Improper maintenance contributes to premature failure. Pilots who skip regular inspections miss small cracks before they become serious problems. Not cleaning the gimbal regularly allows debris to accumulate and cause damage.
Recognizing these causes helps you develop better habits. You can extend your gimbal’s life significantly through proper care and handling.
Signs Your Gimbal Dampener Needs Attention
Your drone’s gimbal dampener sends you clear warning signs when trouble is coming. Watch for visible cracks or splits in the rubber material. Small lines might seem harmless, but they grow quickly under vibration stress.
You may notice increased camera shake in your footage. If your videos look blurry or jittery, the dampener is failing. The gimbal cannot absorb vibrations properly anymore.
Listen for unusual sounds during flight. A squeaking or creaking noise means the rubber is breaking down internally. The rubber loses its flexibility and starts making noise as it moves.
Check if your gimbal feels loose or wobbly when you move it by hand. Press gently on the camera. It should feel firm and stable. If it moves too freely, the dampener rubber has lost its grip.
Look at the rubber’s color and texture closely. Healthy rubber appears smooth and uniform. Damaged rubber looks discolored, brittle, or sticky. The surface might feel hard instead of slightly spongy.
Test your gimbal’s responsiveness before each flight. Move it side to side slowly. It should return to center smoothly and quickly. Sluggish movement indicates rubber degradation.
Inspect after rough flights or crashes. Even minor impacts can create hidden tears inside the rubber. Vibration will make these small tears expand rapidly.
Pay attention to performance changes over time. If your gimbal worked perfectly last month but feels different now, the dampener needs inspection. Catching problems early saves you money and keeps your footage sharp.
Regular checks take just two minutes. This simple habit prevents expensive gimbal replacement later.
Step-by-Step Guide to Repairing Torn Dampening Rubber
Before you start any repair work, gather what you need. You’ll require basic tools like small screwdrivers, tweezers, and possibly a small wrench depending on your drone model. Have cleaning supplies ready including isopropyl alcohol and soft cloths.
Next, power off your drone completely and remove the battery. Safety comes first when working with electrical equipment. Let the gimbal sit for a few minutes so any residual charge dissipates.
Locate the gimbal assembly on your drone. Most models have the dampening rubber pieces positioned around the camera mount. Take photos before disassembly so you remember how everything fits back together. This step saves frustration later.
Carefully remove the gimbal cover or protective housing. Use gentle pressure to avoid damaging other components. The dampening rubber sits between the camera and the gimbal frame, typically in small rubber mounts or bushings.
Inspect the torn rubber closely. If the tear is small, you might clean and reinforce it. For larger damage, you’ll need to replace the rubber piece entirely. Check your drone’s manual for the exact replacement part specifications.
Remove the damaged rubber by unbolting it from the gimbal frame. Some pieces slide out while others require gentle prying with a flat tool. Work slowly to avoid stripping screw heads or damaging surrounding parts.
Clean the mounting area thoroughly with isopropyl alcohol. Remove any dirt, old rubber pieces, or debris. This ensures your new or repaired rubber sits properly and functions correctly.
Install the replacement rubber or secure your repaired piece back into position. Tighten all bolts firmly but don’t overtighten, as this can damage the rubber or strip threads. Reassemble your gimbal cover and reattach the battery.
Test your gimbal’s movement before flying. It should respond smoothly without wobbling or grinding sounds.
Tools and Materials Needed for the Fix
You need specific items to complete your gimbal rubber repair successfully. Gather everything before you begin so you won’t interrupt your work halfway through.
Start with basic hand tools. A screwdriver set with both Phillips and flathead options works best. You’ll need different sizes because gimbal screws vary. A small wrench or hex key set helps you remove bolts holding the rubber dampeners. Needle nose pliers give you precision when working in tight spaces around the gimbal assembly.
Cleaning supplies are essential for proper repair. Isopropyl alcohol removes dirt and old adhesive from mounting surfaces. Use lint free cloths or coffee filters to avoid leaving fibers behind. A soft brush helps dislodge debris without scratching sensitive gimbal parts.
Safety equipment protects you during the process. Wear safety glasses to shield your eyes from small parts that might pop loose. Gloves keep your hands clean and protect the gimbal’s electronics from skin oils.
Documentation items help you remember your steps. Take photos of the gimbal before disassembly so you know how everything fits back together. A small notebook lets you write down bolt locations and sizes.
Optional but helpful items include a magnifying glass for inspecting damage clearly and a small container for organizing removed screws and bolts. This prevents losing tiny parts that are hard to replace.
A work surface matters too. Use a clean, flat area with good lighting. An old towel protects your workspace and prevents parts from rolling away.
Having these items ready means your repair goes smoothly without frustrating delays. You’ll work confidently knowing you have everything needed to fix your gimbal properly.
Tips to Prevent Future Rubber Tearing
Prevention is far easier than repair. Once you fix your gimbal dampening rubber, you want to avoid tearing it again. Small changes to how you fly and store your drone make a big difference.
Store your drone properly between flights. Keep it in a dry place away from direct sunlight. Heat and UV rays break down rubber faster than anything else. A protective case or bag shields your gimbal from dust and moisture too.
Avoid extreme temperatures when possible. Cold weather makes rubber brittle and stiff. Hot weather accelerates rubber degradation. If you must fly in harsh conditions, let your drone adjust to room temperature before storing it away.
Handle your gimbal gently during takeoff and landing. Sudden movements stress the dampening rubber unnecessarily. Smooth, controlled flights reduce vibration and strain on these components. Practice steady hand movements when adjusting your camera angle.
Check your gimbal before every flight. A quick visual inspection takes seconds. You spot small tears before they become major problems. Early detection prevents complete rubber failure during flight.
Clean your gimbal regularly with soft, dry cloths. Dirt particles can lodge under the rubber and cause extra stress. Never use harsh chemicals or abrasive materials on rubber components.
Balance your camera properly on the gimbal. Unbalanced weight puts uneven pressure on the dampening rubber. Follow your drone’s manual for correct camera positioning and weight distribution.
Avoid flying in wet conditions. Water seeps into rubber and causes swelling and deterioration. If you accidentally fly in rain, dry your gimbal completely afterward.
Replace dampening rubber before it reaches critical wear. Don’t wait for visible tearing. Preventive replacement costs less than emergency repairs during important flights.
Common Mistakes to Avoid During Repair
Many people rush through gimbal repairs and create bigger problems. Here are the mistakes you should avoid to keep your drone working properly.
Don’t skip the power off step. Working on a live gimbal is dangerous. You risk electrical shock or accidentally damaging components. Always disconnect your battery before touching anything inside the gimbal assembly.
Avoid forcing stuck bolts. If a bolt won’t turn easily, apply a small amount of penetrating oil and wait five minutes. Forcing it can strip the threads and ruin your gimbal frame permanently. Patience saves you money and headaches.
Don’t reuse old dampening rubber. Torn rubber loses its shock absorption ability completely. Installing the same damaged piece again will cause problems within days. Always replace it with new material or use a proper repair solution.
Skip the cleaning step at your own risk. Dirt and debris left on the mounting area prevent proper contact between the rubber and frame. Your repair will fail quickly. Take time to clean with isopropyl alcohol and let it dry completely.
Avoid overtightening replacement rubber. This compresses the material too much and reduces its effectiveness. Tighten bolts firmly but not with maximum force. You should feel resistance, not hear cracking sounds.
Don’t test your gimbal while it’s still mounted to the drone. Remove it first and test the movement by hand. This prevents accidents if something goes wrong during testing.
Never skip the inspection after repair. Move the gimbal through its full range slowly and smoothly. Listen for unusual sounds. If something feels wrong, stop immediately and recheck your work.
These mistakes happen frequently with drone owners. Avoiding them makes your repair successful and keeps your gimbal functioning reliably for many flights ahead.
Troubleshooting Persistent Gimbal Vibration Issues
Gimbal vibration that persists even after you’ve replaced the dampening rubber usually points to a few common culprits. The vibration often comes from loose components, misaligned parts, or incomplete installation rather than the rubber itself.
Start by checking if your replacement rubber sits flush against all mounting points. Even tiny gaps create vibration. Press gently around the entire rubber piece to confirm it makes full contact. If it doesn’t, remove it and inspect the mounting surface for dirt, debris, or damage that prevents proper seating.
Loose bolts frequently cause ongoing vibration issues. Use your wrench to tighten each bolt holding the gimbal assembly. Turn slowly and steadily. Don’t force them, as over tightening damages the rubber or strips the bolt threads. Each bolt should feel snug but not rock hard.
Check your camera’s balance on the gimbal. An unbalanced camera creates constant vibration no matter how perfect your rubber is. The camera should sit level without tilting forward, backward, or to either side. Adjust your camera position slightly if needed.
Inspect the gimbal’s internal moving parts for damage or misalignment. Look for bent brackets, cracked plastic components, or anything that appears out of place. These mechanical issues cause vibration that rubber replacement alone cannot fix.
Test the gimbal’s movement by hand with the drone powered off. Rotate it smoothly in all directions. Stiff or jerky movement suggests internal problems beyond rubber repair.
If vibration continues after these checks, your gimbal’s motor or internal bearings may need professional service. Some damage goes beyond what home repair can address.
Final Thoughts
Fixing a torn gimbal dampening rubber is a task you can handle at home. With patience and the right tools, you can restore smooth footage in less than an hour.
Remember that your drone’s stability depends on this small but mighty piece of rubber. Taking care of it protects your camera and your footage quality.
Regular checks make a huge difference. A few minutes of inspection before each flight can save you hours of repair work later.
Don’t feel discouraged if your first repair attempt isn’t perfect. Gimbal repair is a skill that improves with practice.
Each drone model has slightly different gimbal designs. What works for one drone might need small adjustments for another.
Trust your instincts during the process. If something feels wrong or looks misaligned, stop and check again before flying.
Your drone represents a real investment. Learning to fix small issues like this saves you money and keeps your gear flying longer.
Many pilots feel nervous about their first gimbal repair. This fear fades quickly once you see how straightforward the process really is.
The skills you build here apply to other drone maintenance tasks too. Understanding your gimbal helps you understand your entire drone system better.
Quality footage starts with a stable gimbal. Every smooth shot you capture depends on this tiny rubber component working correctly.
Keep spare dampening rubber on hand for future repairs. This way you’re always ready when wear happens again.
Your drone deserves proper care and attention. A few simple habits keep it flying smoothly for many seasons to come.
Take pride in learning this skill. You’ve added a valuable tool to your drone maintenance knowledge that will serve you well for years ahead.
Frequently Asked Questions
How do I know if my dampening rubber is actually torn?
Look for visible cracks, splits, or chunks missing from the rubber pieces. You might also notice your camera footage looks shaky or blurry even when the drone is stationary. Torn rubber loses its ability to absorb vibration, so your gimbal can’t stabilize properly. If you see any damage, replacement is necessary.
Can I repair torn dampening rubber with glue or tape?
No. Adhesives and tape won’t restore the rubber’s dampening properties. The rubber needs to compress and flex to absorb vibration, and glue prevents that movement. You must replace the rubber entirely for your gimbal to work correctly again.
What happens if I ignore a torn dampening rubber?
Vibration gets worse over time. Your camera footage becomes increasingly unstable and unusable. The torn rubber also stops protecting your gimbal’s internal components from shock and impact. Ignoring this problem can lead to damage in other gimbal parts, which costs more to fix later.
How often should I replace my dampening rubber?
This depends on how frequently you fly and the conditions you encounter. Regular inspection during routine maintenance helps you catch tears early. If you fly weekly in dusty or sandy environments, check every few months. Casual fliers might only need replacements once or twice yearly.
Why does my new dampening rubber feel different from the original?
Replacement rubber may feel slightly firmer or softer depending on the brand or material composition. Small variations in feel are normal and don’t affect performance. What matters is that the rubber sits flush and secure against all mounting points.

Hi, I’m Frankie Shaw, the founder and writer behind Swittchly 👋. I’m a passionate tech enthusiast who loves exploring the latest gadgets, devices, and electronics that hit the market. Through my honest, research-backed Amazon product reviews, I help readers make smarter buying decisions without the hype or confusion.