How To Fix Portable Nebulizer Mesh Cap Clogging?
Does your portable nebulizer suddenly produce weak mist or no mist at all? Mesh cap clogging is often the hidden culprit. This tiny part plays a huge role in turning liquid medicine into breathable mist.
When residue builds up on the mesh, it blocks proper aerosolization. This means your medicine cannot reach your lungs the way it should. Over time, dried medication and mineral deposits create stubborn blockages.
The good news? You can fix this problem easily at home. This guide walks you through simple, effective methods to clear a clogged mesh cap. We will cover the boiling technique that loosens tough buildup in minutes.
In a Nutshell
- Boil the mesh cap in hot water for 10 to 15 minutes. This loosens residue stuck in the tiny holes.
- Let the cap air dry completely before using it again. Moisture left behind can cause new clogs.
- Clean the medicine cup and mouthpiece with water after every single treatment. This stops buildup before it starts.
- Skipping proper drying is a common mistake. Always give parts enough time to dry fully.
- Stick to a regular cleaning schedule. Waiting too long between cleanings lets residue harden and stick.
- Store all parts in a clean, dry space. Poor storage lets dust and residue collect on the mesh.
Why Mesh Caps Clog: Understanding the Cause
Mesh cap clogging happens because medicine residue builds up on the tiny mesh openings. When you use your nebulizer, liquid medicine passes through the mesh to create mist. Over time, this medicine dries and hardens on the surface.
Mineral deposits also cause clogs. If your tap water contains minerals like calcium or magnesium, these minerals stick to the mesh. Hard water is a major culprit in many homes. Each treatment adds another thin layer of mineral buildup.
The mesh cap has thousands of tiny holes. Even small amounts of dried medicine block these holes quickly. A partially clogged mesh produces weak mist. A fully clogged mesh produces no mist at all.
Infrequent cleaning allows residue to accumulate faster. When you skip cleaning between treatments, old medicine mixes with new medicine. This creates a thicker, stickier coating on the mesh. The longer you wait to clean, the harder the residue becomes.
Improper storage also contributes to clogging. If you store the mesh cap while it is still damp, moisture traps particles inside the mesh. Bacteria and mold can grow in this environment. This makes the clog worse over time.
Your nebulizer’s performance depends directly on mesh cap condition. A clean mesh cap produces strong, consistent mist. This means your medicine reaches your lungs properly. A clogged mesh cap wastes your medicine and reduces treatment effectiveness.
Understanding these causes helps you prevent future clogs. Regular maintenance is much easier than dealing with severe blockages. Clean your mesh cap immediately after each use. Use distilled water instead of tap water when possible. Store all parts in a dry location. These simple habits keep your nebulizer working efficiently for years.
Signs Your Nebulizer Mesh Cap Is Clogged
Your portable nebulizer tells you when the mesh cap is clogged. Learning these signs helps you catch the problem early before it gets worse.
Weak or no mist output is the most obvious sign. You turn on your device and expect a steady cloud of medicine. Instead, you see barely any mist or nothing at all. This happens because the mesh openings are blocked.
Pay attention to unusual sputtering sounds. A normal nebulizer makes a consistent humming noise. When the mesh cap clogs, you might hear irregular clicking, popping, or grinding sounds. These noises mean the vibrations cannot pass through properly.
Check if mist comes out unevenly. Sometimes you get mist from only one side of the mask or mouthpiece. Other times the mist stops and starts randomly. This uneven output signals that some mesh holes are blocked while others remain open.
Notice when treatment times get longer. Your normal 10 minute session suddenly takes 20 minutes. You are not getting enough medicine in your lungs because the flow is restricted. Longer sessions mean your device is working harder to push medicine through.
Feel the mesh cap surface carefully. Run your finger over it gently. A clean mesh feels smooth. A clogged mesh feels sticky, crusty, or rough. You might see visible white, brown, or yellow buildup on the surface.
Watch for medicine pooling in the cup. If medicine sits in the reservoir instead of converting to mist, your mesh cap likely has blockages. The medicine should disappear into vapor, not stay as liquid.
Your device might also vibrate differently. Clogs change how the mesh vibrates, so you feel less vibration in your hands. These physical changes are your device’s way of telling you it needs help.
Step-by-Step: How to Unclog Your Mesh Cap by Boiling
Boiling is the most effective way to unclog your mesh cap at home. This method uses heat to break down stubborn residue and mineral deposits that block the tiny mesh openings.
Start by filling a clean pot with water. Bring the water to a rolling boil on your stove. Make sure the water is actually boiling before you proceed to the next step.
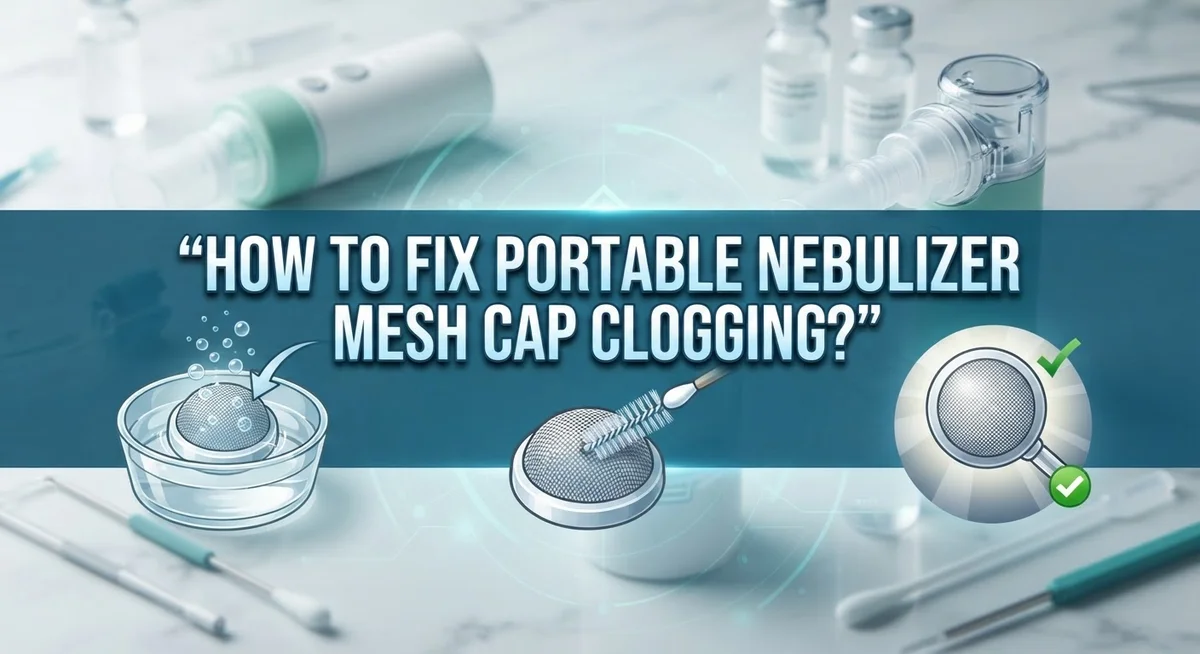
Carefully place your mesh cap into the boiling water. Use a spoon or small strainer to keep it submerged. Let it sit in the hot water for 10 to 15 minutes without moving it around.
The heat works on the clogged material during this waiting period. Don’t rush this step because the time allows the boiling water to penetrate the mesh openings. Residue softens and breaks apart naturally.
After 15 minutes, remove the mesh cap using tongs or a spoon. Place it on a clean paper towel. Let it cool down completely before touching it with your bare hands.
Once cooled, rinse the mesh cap under clean running water. Use your fingers to gently rub the mesh surface. You may see particles washing away as the loosened residue releases.
Air drying is absolutely critical at this point. Do not use a cloth or paper towel to dry it. Lay the mesh cap flat on a clean surface in a warm, dry location. Allow at least 2 to 3 hours for complete air drying.
Never put a damp mesh cap back into your nebulizer. Moisture inside the device causes damage and prevents proper misting. Wait until the cap feels completely dry to the touch.
Test your nebulizer after reassembling everything. You should notice stronger, more consistent mist output. The boiling method typically restores full performance when done correctly.
Proper Drying and Reassembly After Cleaning
After you boil and rinse your mesh cap, the drying step matters more than you might think. Moisture trapped inside the tiny holes can cause new clogs or damage your nebulizer’s electronic components. Place your mesh cap on a clean paper towel in a well ventilated area. Never use a cloth to dry it, as fibers can stick to the wet mesh and create blockages.
Let the mesh cap sit for at least 30 to 45 minutes before reassembling. You want it completely dry to the touch. If you’re in a humid environment, give it extra time. Some people place it near a fan to speed up the process, which works well. Just avoid direct heat sources like hair dryers, as extreme temperatures can warp the plastic components.
While your mesh cap dries, inspect the medicine cup and mouthpiece for any remaining residue. Rinse these parts thoroughly under running water. Wipe them gently with a soft cloth. Make sure no water droplets remain on any component before reassembly.
Check each part carefully before putting everything back together. Look for cracks, discoloration, or damage on the mesh cap itself. If the mesh looks permanently damaged or discolored, replacement might be necessary.
When reassembling, align each piece properly. The mesh cap should fit snugly onto the medicine cup without forcing it. Add your prescribed medication only after you’re certain everything is completely dry and properly connected.
Test your nebulizer briefly before your next full treatment. Listen for normal vibration sounds and check that mist flows evenly. This quick test catches any reassembly problems early. Proper drying and careful reassembly work together to keep your portable nebulizer functioning reliably for months to come.
Daily and Weekly Maintenance Routine to Prevent Clogging
A daily and weekly maintenance routine keeps your portable nebulizer working smoothly. You prevent clogs by cleaning right after each use. Wash the medicine cup and mouthpiece with water immediately following your treatment. This stops medicine from drying and hardening inside the cup.
Do this cleaning step every single day. Dried medicine residue is the main culprit behind mesh cap blockages. Running water over these parts takes just one minute. Pat them dry with a clean cloth before storage.
Your weekly routine should include a deeper clean of the mesh cap itself. Once per week, boil a pot of water and submerge your mesh cap for 10 to 15 minutes. This hot water breaks down any mineral deposits or stubborn residue that daily washing missed. Use tongs to remove the cap safely.
After boiling, rinse the mesh cap under clean running water. Let it air dry completely before reassembling. This drying step is absolutely critical. Never rush this part or you risk trapping moisture inside the nebulizer.
Store your nebulizer in a clean, dry location between uses. Keep it away from dust and humidity. Moisture and dust are enemies of your mesh cap. They combine with medicine residue to create tough clogs.
Check your device once weekly for any visible buildup. Look at the mesh cap surface under good lighting. If you notice discoloration or spots, that is a sign minerals are accumulating. Schedule your boiling session before clogs become serious.
Consistency matters most. A few minutes of daily care prevents hours of troubleshooting later. Your nebulizer performs best when you maintain it regularly. Small efforts today stop big problems tomorrow. This routine protects your investment and keeps your treatments effective.
Common Mistakes That Cause Repeat Clogging
Many people make the same mistakes over and over, which leads to repeat clogging problems. Understanding these errors helps you break the cycle and keep your nebulizer working properly.
Not letting medicine fully dry between treatments is one of the biggest culprits. When you use your nebulizer and immediately store it, moisture gets trapped inside the mesh cap. This moisture mixes with medicine residue and hardens into a stubborn clog. You need to wait until everything is completely dry before putting the device away.
Skipping the cleaning step after each use creates buildup that gets worse over time. Some people only clean their nebulizer when it stops working well. By then, layers of dried medicine have already blocked the mesh. Daily cleaning takes just a few minutes but prevents this problem entirely.
Using the wrong water temperature during cleaning also causes issues. Cold water doesn’t dissolve dried medicine effectively. Hot water works much better at breaking down the stuck particles. This is why boiling is so effective for unclogging.
Storing your nebulizer in humid environments traps moisture inside the mesh cap. A bathroom or kitchen near a sink creates the perfect conditions for clogging. Store your device in a dry, cool place instead. This simple change prevents moisture from accumulating.
Rushing the drying process leads many people back to the same problem. Putting a damp mesh cap into your nebulizer guarantees future clogs. The moisture activates the medicine residue again, and it hardens faster the second time around.
Ignoring early warning signs lets small clogs become big problems. When mist seems lighter or treatment takes longer, clean immediately. Catching issues early means you do simple maintenance instead of heavy repairs. These mistakes are all preventable with consistent attention and proper technique.
Troubleshooting: When Boiling Doesn’t Fix the Clog
Sometimes boiling doesn’t completely solve your mesh cap clogging problem. This happens more often than you might think, and it’s not a reason to panic.
If boiling and rinsing haven’t worked, the clog is likely deeper inside the mesh structure itself. Mineral deposits and medicine residue can bond together over time, creating stubborn blockages that heat alone cannot remove.
Your next step is to use a gentle soaking method with a cleaning solution. Mix equal parts white vinegar and distilled water in a small cup. Submerge your mesh cap in this mixture for 20 to 30 minutes. The acidity in vinegar breaks down mineral buildup without damaging the delicate mesh material.
After soaking, use a soft brush or cloth to gently wipe the mesh surface. Never scrub hard or use abrasive materials. Aggressive scrubbing can tear the mesh and ruin your device permanently. Work slowly and let the vinegar solution do most of the work for you.
Rinse the mesh cap thoroughly under clean running water after the vinegar soak. Make sure all vinegar smell is gone before reassembling. If you still see residue, repeat the soaking process one more time.
If the clog persists after vinegar soaking, the mesh cap may have permanent damage. Tiny holes in the mesh can become enlarged or sealed over time. At this point, you’ll need to replace the mesh cap entirely. A damaged mesh cannot produce proper mist, no matter how much you clean it.
Prevention is always easier than fixing persistent clogs. Use distilled water instead of tap water in your nebulizer whenever possible. Distilled water has fewer minerals that cause buildup. This simple switch prevents most stubborn clogging problems before they start.
Final Thoughts
A clogged mesh cap does not mean your nebulizer is broken. Most of the time, simple cleaning steps solve the problem.
Boiling remains your best first fix. Ten to fifteen minutes in hot water clears most residue and buildup.
Air drying matters just as much as cleaning. Never skip this step, even when you feel rushed.
Think of maintenance as a habit, not a chore. Small daily actions prevent big problems later.
Your nebulizer works hard to help you breathe better. It deserves a little care in return.
If boiling and soaking do not clear the clog, the mesh may have deeper damage. At that point, replacement becomes your practical option.
Do not force stubborn residue with sharp tools. This can damage the delicate mesh holes permanently.
Patience during the cleaning process pays off. Rushed cleaning often creates more problems than it solves.
Keep your treatment schedule consistent too. A well maintained device delivers medicine more evenly and effectively.
Remember that humidity is not your friend. Always store your nebulizer somewhere dry and clean.
Every treatment session leaves behind tiny particles. These particles build up fast without regular attention.
Make cleaning part of your daily routine, not an afterthought. This single habit prevents most clogging issues.
Your health depends on proper misting function. A clogged mesh cap reduces medicine delivery significantly.
Stay observant about how your device performs. Weak mist output often signals an early clog forming.
Catching problems early saves you time and frustration. It also protects your device from lasting damage.
In short, boiling, drying, and consistency form your best defense against mesh cap clogging. Follow these steps regularly, and your nebulizer will keep working the way it should.
Simple habits truly make the biggest difference here.
Frequently Asked Questions
What exactly clogs a mesh cap on a portable nebulizer?
Medicine residue builds up inside the mesh holes over time. The liquid medicine dries and hardens on the mesh surface. Mineral deposits from tap water also accumulate in the tiny openings. Humidity and moisture speed up this buildup process. Each treatment leaves behind small particles that stick to the mesh. When these particles combine, they block the misting function.
How long should I boil the mesh cap to unclog it?
Boil water and submerge your mesh cap for 10 to 15 minutes. Use clean water without any additives or chemicals. Let the cap sit in the hot water so heat loosens the dried medicine. After boiling, remove the cap carefully and let it cool down. Rinse it under clean running water while gently rubbing the mesh surface.
Why does my mesh cap clog again right after I clean it?
Incomplete drying is usually the main reason. If you don’t let the cap air dry completely, moisture traps inside. This creates a perfect environment for new residue to stick and harden. Air drying matters just as much as cleaning itself. Always let your mesh cap dry fully before reusing it. Store it in a dry place away from humid areas.
Can I use vinegar to clean a stubborn clog?
Yes, vinegar works as a gentle cleaning solution. Soak the mesh cap in equal parts white vinegar and water for 30 minutes. The acid helps dissolve mineral deposits and dried medicine. After soaking, use a soft cloth to wipe the mesh gently. Rinse thoroughly with clean water and air dry completely before your next treatment.

Hi, I’m Frankie Shaw, the founder and writer behind Swittchly 👋. I’m a passionate tech enthusiast who loves exploring the latest gadgets, devices, and electronics that hit the market. Through my honest, research-backed Amazon product reviews, I help readers make smarter buying decisions without the hype or confusion.