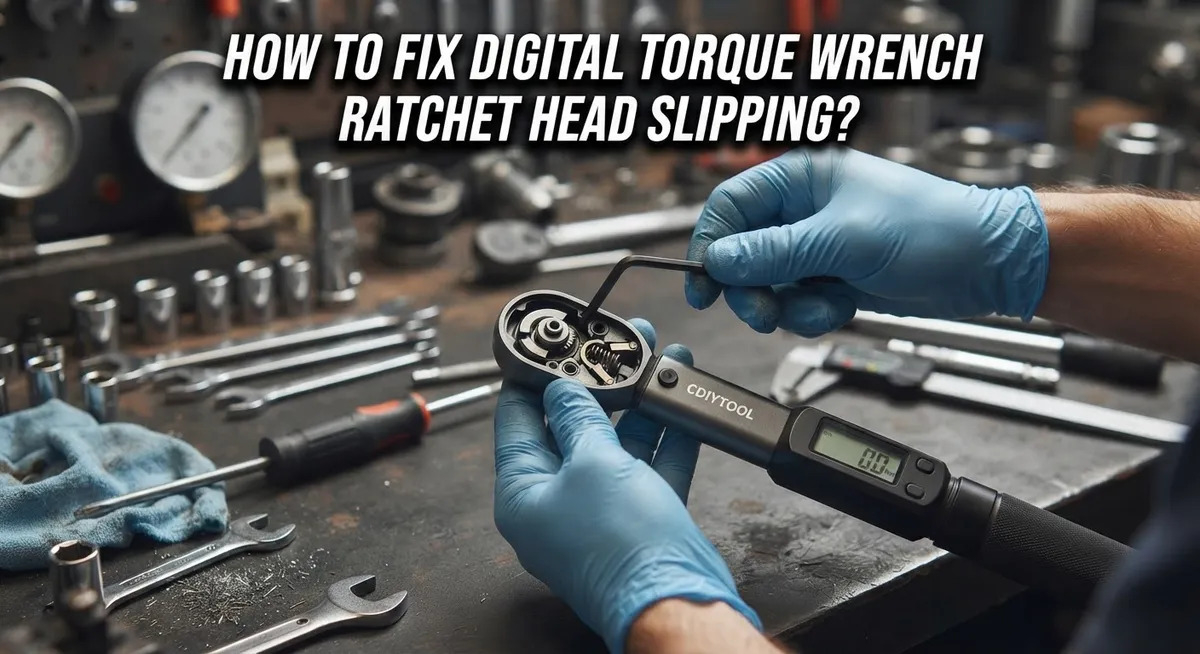
How To Fix Digital Torque Wrench Ratchet Head Slipping?
Does your digital torque wrench ratchet head slip when you apply pressure? This annoying problem can ruin your project and waste your time.
Slipping happens for a few common reasons. Sticky internals, rust, and dirt buildup all block smooth operation. Sometimes the socket sits improperly on the ratchet head too.
The good news? You can fix this issue quickly at home. Most solutions need only basic tools and a few minutes of your time.
In a Nutshell
- Tap the wrench head against your palm a few times. This loosens sticky internals that cause slipping.
- Clean the barrel and square drive thoroughly. Dirt and rust buildup often block smooth ratchet movement.
- Apply lubricant after cleaning. This keeps internal parts moving freely and prevents future sticking.
- Seat your socket properly on the ratchet head before use. A loose or misaligned socket often causes slipping.
- Use steady, controlled force on the handle. Jerky movements can make slipping worse and damage internal parts.
- Store your wrench at the lowest torque setting. High settings during storage throw off calibration over time.
Understanding Why Ratchet Heads Slip
A slipping ratchet head happens when the connection between your socket and wrench fails. The socket doesn’t grip properly, and you lose torque control. Understanding the root causes helps you fix the problem fast.
Sticky internals are the most common culprit. Inside your digital torque wrench, small mechanical parts work together to deliver precise force. When these parts get stuck, the ratchet head loses its grip strength. Dust, old lubricant, or manufacturing residue can cause this stickiness over time.
Rust and corrosion damage the ratchet mechanism too. If your wrench sits in a humid environment, moisture attacks the metal components. Rust builds up on the square drive (the part where your socket attaches). This rough, corroded surface prevents your socket from seating firmly.
Dirt and debris block smooth operation. Every time you use your wrench, tiny particles can enter the ratchet head. These particles accumulate and interfere with the locking mechanism that holds your socket in place.
Improper socket installation creates immediate slipping problems. If you don’t push your socket all the way onto the square drive, it won’t grip correctly. The socket needs full contact to transfer torque effectively.
Storage mistakes damage your wrench’s internal calibration. Leaving your wrench at a high torque setting stresses the internal spring and gears. This stress weakens the ratchet mechanism over months or years.
Understanding these causes puts you in control. Most slipping issues come from one of these five problems. Once you identify which one affects your wrench, the fix becomes straightforward. The next steps walk you through practical solutions for each issue.
Tools and Supplies You Will Need
You need several basic items to fix your digital torque wrench ratchet head slipping. Gather these supplies before you start working.
A soft cloth or small brush removes dirt and debris from your wrench. Use a cloth that won’t scratch the metal surfaces. A soft toothbrush works well for reaching tight spaces around the ratchet head.
Penetrating oil or light machine oil helps free stuck components. This lubricant breaks down rust and allows internal parts to move smoothly again. Apply it sparingly to avoid attracting more dirt.
A clean work surface keeps your wrench protected during repair. Use a flat table or workbench where you can lay out all parts safely.
Paper towels absorb excess oil and wipe away loose particles. Keep several nearby as you work through the cleaning process.
A socket that fits your wrench is essential for testing. You need this to check if your fix actually works. Make sure the socket seats properly on the square drive.
A rag or small container holds your wrench while oil soaks into stubborn areas. Let the lubricant sit for five to ten minutes on sticky spots.
Optional but helpful: A calibrated torque tester verifies your wrench works correctly after repair. This confirms the slipping problem is truly solved.
Compressed air can blow out trapped dust from internal mechanisms. This removes particles that lubricant alone might miss.
Most people already own these common tools at home. You probably won’t need to buy anything special. Having everything ready before you start makes the repair process faster and smoother. Organize your supplies on your work surface so nothing gets lost during the fix.
Step-by-Step: Freeing a Sticky Ratchet Head
Start by holding your wrench firmly in one hand. Tap the ratchet head gently against your palm three to five times. This simple motion helps loosen any sticky internals that may be causing the slipping problem.
Next, inspect the square drive opening on your ratchet head. Look for visible dirt, rust, or debris inside. Use a soft cloth or small brush to remove any buildup you see. Wipe the barrel thoroughly as well, since dirt can travel from the main body to the ratchet mechanism.
Apply a small amount of penetrating oil or light machine oil to the square drive opening. Let it sit for a few minutes so the oil can work into tight spaces. This helps dissolve rust and frees stuck components inside.
Wipe away excess oil with a clean cloth or paper towel. Do this carefully to avoid making a mess and to see if the sticking has improved.
Test your wrench by installing a socket onto the ratchet head. Push it on firmly until you hear or feel a click. The socket should sit snugly without any wobbling or movement.
Apply steady, controlled pressure to your wrench handle while holding the socket in place. The connection should feel solid and smooth. If slipping still occurs, repeat the tapping and cleaning steps.
Let your wrench air dry completely before storing it. Make sure you set the torque adjustment to the lowest setting before putting it away. This protects the internal calibration and keeps your wrench working properly for future use.
Cleaning and Lubricating the Internal Mechanism
Cleaning and lubricating your digital torque wrench’s internal mechanism is essential for restoring smooth operation. This process removes the gunk that causes slipping and helps your wrench function like new.
Start by disassembling the ratchet head carefully. Most digital torque wrenches have a removable head that twists or slides off. Gently separate the components and lay them on a clean work surface. Take photos before disassembly so you remember how everything fits back together.
Use a soft cloth or small brush to wipe away visible dirt, rust, and debris from each part. Pay special attention to the square drive opening where your socket connects. Stubborn rust requires a bit more elbow grease, so don’t rush this step. Remove all particles before applying any lubricant.
Once clean, apply a small amount of light machine oil or penetrating oil to the internal surfaces. Focus on the ratchet mechanism and the square drive area. Let the oil soak for several minutes to penetrate tight spaces. This loosens any remaining sticky spots that cause slipping.
Wipe away excess oil with a clean cloth. Too much oil attracts dirt and creates mess during use. Your goal is light lubrication, not saturation.
Reassemble the ratchet head carefully, ensuring all components align properly. Test the connection by installing a socket and applying gentle pressure. The head should feel secure and responsive.
Let your wrench air dry completely before use. This prevents oil from interfering with electronic sensors inside the wrench. Store your wrench at the lowest torque setting after cleaning. Regular maintenance like this keeps your digital torque wrench reliable and accurate for years.
Proper Socket Installation Techniques
Installing your socket correctly on the ratchet head prevents most slipping problems. Start by examining the square drive opening on your wrench’s ratchet head. This is the small square hole where your socket connects.
Push your socket straight onto the square drive. The socket should slide on smoothly without forcing it. If you feel resistance, stop and check the opening for dirt or debris. A blocked opening causes poor seating and leads to slipping during use.
Once your socket sits on the ratchet head, give it a gentle tug. A properly installed socket should not move or wiggle. If it slides off easily, the connection is not secure. Remove the socket and inspect both the square drive and the socket’s internal square for damage or wear.
Align the socket’s internal square hole directly above the ratchet head’s square drive. Press down firmly with steady, even pressure. Avoid twisting or angling the socket as you install it. Angled installation causes incomplete seating and reduces grip strength.
Test the connection by holding the socket firmly and trying to rotate the ratchet head. There should be no movement between the socket and wrench. If slipping occurs, remove the socket and repeat the installation process.
For sockets with worn internal squares, the connection may never be fully secure. Worn sockets slip regardless of installation technique. Consider replacing damaged sockets to restore proper function.
Clean both the square drive and socket opening regularly. Dirt buildup reduces grip and causes slipping even with correct installation. A quick wipe with a dry cloth before each use keeps these surfaces clean and functional. Proper socket installation combined with regular cleaning eliminates most ratchet head slipping issues.
Correct Storage and Calibration Practices
Proper storage and calibration practices prevent slipping problems from developing in the first place. These habits keep your digital torque wrench functioning reliably for years.
Store your wrench at the lowest torque setting. High settings place stress on internal springs and mechanisms during storage. Loosen your adjustment assembly completely before putting the wrench away. This simple step reduces wear on calibration components and maintains accuracy over time.
Clean your wrench thoroughly before storage. Dirt and moisture trapped inside cause rust and sticky internals. Wipe the barrel, ratchet head, and square drive with a dry cloth. Store your wrench in a cool, dry location away from extreme temperatures and humidity.
Calibration verification ensures your wrench delivers accurate torque values. Use a calibrated torque tester periodically to check your wrench’s performance. Most professionals verify calibration annually or after heavy use. This catches problems early before they affect your work quality.
Handle your wrench gently during operation. Apply steady, controlled pressure to the handle rather than sudden jerking motions. Rapid force changes stress internal components and accelerate wear. Let the wrench do the work at its designed speed.
Install sockets correctly every single time. Push sockets straight onto the square drive until they seat fully. A secure connection prevents slipping during torque application. Check socket condition regularly since worn internal squares cause connection problems.
Keep your wrench away from impacts and drops. Falls damage internal calibration mechanisms and ratchet head alignment. Store it in a protective case or padded bag when transporting. Treat your wrench as precision equipment rather than a general tool.
These storage and calibration habits eliminate most slipping issues before they start.
Common Mistakes That Cause Repeated Slipping
Many people make simple mistakes that cause their digital torque wrench to slip repeatedly. Understanding these errors helps you avoid frustration and keep your tool working properly.
Storing at high torque settings is one of the biggest problems. When you leave your wrench set to a high number, internal springs stay compressed for long periods. This constant pressure weakens the mechanisms inside. Always loosen your adjustment assembly to the lowest setting before putting your wrench away.
Improper socket seating causes frequent slipping too. You must push your socket straight onto the square drive with firm, even pressure. Many users rush this step and don’t ensure the socket sits fully. A loose socket will slip every time you apply force, no matter how well you maintain the wrench itself.
Ignoring rust and dirt buildup leads to repeated problems. Debris gets trapped inside the ratchet head and barrel. This buildup prevents smooth operation and causes internal sticking. You need to clean these areas regularly, not just when slipping starts.
Switching from click type wrenches without adjustment creates issues for new users. Digital models require different handling techniques. You must apply steady, controlled force rather than the quick snapping motion used with click wrenches. Sudden jerking movements trigger slipping and can damage internal components.
Using worn or damaged sockets makes the problem worse. Sockets with bent square holes won’t grip the ratchet head properly. Inspect your sockets before use and replace any that show damage.
These mistakes compound each other. One error leads to more slipping, which causes you to use more force, which creates additional wear. Breaking these habits prevents most slipping issues from happening in the first place.
Troubleshooting Persistent Slipping Issues
When your digital torque wrench keeps slipping despite your efforts, you need a systematic approach to find the root cause. Start by identifying what type of slipping occurs. Does the socket rotate on the ratchet head? Does the wrench click but fail to tighten? Does it slip during force application? Each symptom points to different problems.
Sticky internals cause many persistent slipping issues. Tap your wrench head gently against your palm three to five times. This simple action can free up mechanisms that stick from age or storage. Listen for any grinding sounds, which indicate internal damage requiring professional service.
Next, inspect your ratchet head and square drive under good lighting. Look for rust spots, dirt accumulation, or corrosion. Even tiny particles prevent proper socket seating. Clean these areas thoroughly with a dry cloth and appropriate cleaning solution for your wrench type.
Apply the right lubricant after cleaning. Use products specifically designed for torque wrenches. General purpose oils can attract dirt and gum up mechanisms over time. A small amount goes a long way on the square drive and ratchet head joints.
Test your socket connection again after cleaning and lubricating. Push the socket straight onto the square drive until you feel it seat fully. Wiggle it gently to confirm it doesn’t rotate. If slipping continues, your socket may have a worn internal square.
Check your torque setting too. Verify it matches your task requirements. Incorrect settings sometimes create the impression of slipping when the wrench functions normally. If problems persist after these steps, your wrench may need professional recalibration or internal repairs from a qualified technician.
Final Thoughts
A slipping ratchet head does not mean your wrench is broken. Most of the time, it just needs some care and attention.
Simple habits make a big difference. Clean your wrench often. Store it at the lowest torque setting. These two steps alone prevent many slipping problems.
Proper socket installation matters more than people think. Always seat your socket fully before you apply force. A loose connection will slip no matter how careful you are with pressure.
Rust and dirt are silent enemies. They build up slowly and cause sudden slipping when you least expect it. Regular cleaning keeps your ratchet head working the way it should.
If you switched from a click type wrench, give yourself time to adjust. Digital wrenches feel different in your hand. Your grip and pressure need to change too.
Testing and calibration should not be optional steps. A calibrated torque tester tells you if your wrench still delivers accurate results. This is especially true after you fix a slipping issue.
Persistent slipping usually points to a deeper problem. Worn sockets or damaged internal squares often need replacement, not just cleaning. Know when a repair job is beyond simple maintenance.
Your torque wrench is a precision tool. Treat it with the same care you would give any measuring device. Small efforts in cleaning and storage protect its accuracy for years.
Fixing a slipping ratchet head is rarely complicated. Follow the basics. Clean often, store properly, and install sockets with care.
Your wrench will reward you with reliable performance and accurate readings every time you use it.
Frequently Asked Questions
Why does my digital torque wrench ratchet head slip during use?
Slipping happens when the connection between your socket and ratchet head isn’t secure. Sticky internal parts, rust buildup, or dirt on the square drive cause this problem. Sometimes the socket simply isn’t seated all the way onto the ratchet head.
You might also slip if you’re applying jerky or uneven pressure to the handle. Smooth, steady force works much better than sudden movements.
How do I clean my torque wrench to stop slipping?
Start by wiping down the barrel and ratchet head with a clean, dry cloth. Focus on the square drive where your socket connects. Remove any visible dirt, dust, or rust particles.
For stubborn buildup, use a soft brush to gently scrub the area. Never use harsh chemicals or solvents that could damage internal components. After cleaning, apply a light lubricant designed for precision tools to the square drive.
Should I store my wrench at a specific torque setting?
Yes. Always loosen your adjustment assembly to the lowest setting before storing your wrench. High torque settings put constant pressure on internal springs and gears during storage, which affects calibration over time.
This simple habit prevents many slipping issues and keeps your wrench accurate for years.
What’s the right way to install a socket on the ratchet head?
Push your socket straight onto the square drive until you hear or feel a click. The socket should sit flush with no gaps. Give it a gentle tug to confirm it’s secure before you start working.
Never force a socket that doesn’t fit properly. Wrong sized sockets slip easily and can damage the ratchet head.
How often should I test my wrench for accuracy?
Use a calibrated torque tester at least once per year if you use your wrench regularly. Testing catches problems early before they affect your work. If you notice slipping, test immediately to rule out calibration drift as the cause.

Hi, I’m Frankie Shaw, the founder and writer behind Swittchly 👋. I’m a passionate tech enthusiast who loves exploring the latest gadgets, devices, and electronics that hit the market. Through my honest, research-backed Amazon product reviews, I help readers make smarter buying decisions without the hype or confusion.