How To Fix DSLR Camera Tripod Socket Thread Stripping?
Your camera feels loose on the tripod. It wobbles when it should stand still. That small movement usually means one thing. Your tripod socket thread is stripped.
This problem happens to many camera owners. You screw in the tripod plate too many times. Or you tighten it too hard by accident. Over time, the metal or plastic threads wear down. The screw no longer grips like it used to.
A stripped tripod socket can feel like a big problem. But it does not mean your camera is broken beyond repair. There are simple ways to fix this issue at home.
In a Nutshell
- Check the damage first. A stripped thread can be minor or severe. Look closely before you decide on a fix.
- Try a simple tightening trick. Sometimes a thin washer or tape wrap can help the screw grip again.
- Use a repair insert for bigger damage. A threaded insert can restore the socket to its original strength.
- Epoxy works for small cracks. Special metal epoxy can fill gaps and hold the thread steady.
- Know when to call a professional. Some damage needs expert repair tools and skills you may not have at home.
- Prevent future stripping. Avoid overtightening your camera plate and check the socket often.
- Test your camera after any fix. Always confirm it sits firm and level before you shoot again.
Understanding the Tripod Socket and Why Threads Strip
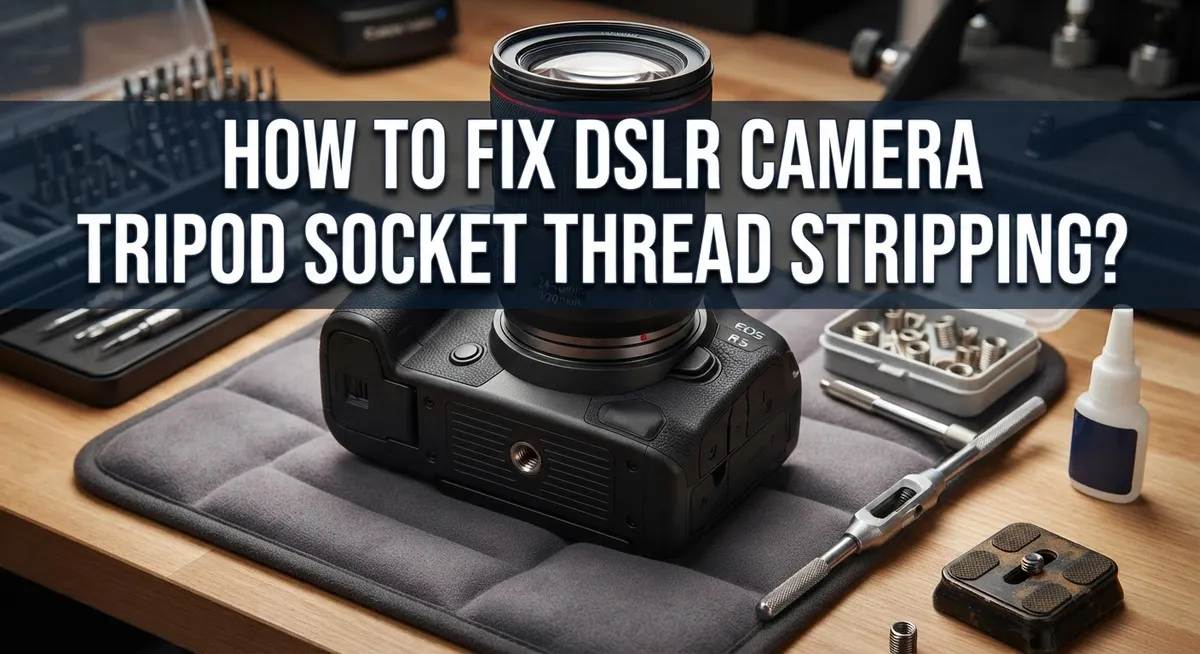
Your camera’s tripod socket is a small threaded hole on the bottom of the camera body. This socket accepts the tripod screw, which holds your camera firmly in place. The threads inside this hole are what grip the screw and keep everything stable.
Thread stripping happens when the metal threads inside the socket wear down or break. Once stripped, the screw spins freely without catching anything. Your camera then slides around or falls off the tripod completely.
Why does stripping occur? The most common cause is overtightening. Many photographers crank the tripod screw too hard, thinking it needs to be super tight. This extra force damages the delicate threads inside.
Another reason is repeated use. Every time you attach and remove your camera, the threads experience friction. Over months or years, this constant movement weakens the metal.
Using a bent or damaged tripod screw also causes problems. A crooked screw doesn’t sit straight in the socket. This creates uneven pressure that strips the threads on one side.
Poor quality tripod heads can contribute too. Cheap tripod screws may have rough edges or improper threading. These screws damage the socket faster than standard ones.
The socket itself can fail if your camera was dropped or hit hard. Impact damage crushes the threaded hole from the inside out. Even a small fall can cause invisible damage that shows up later.
Environmental factors matter as well. Dirt and sand inside the socket create friction. Moisture can cause rust that weakens the metal threads over time.
Understanding these causes helps you prevent future damage. You’ll know what habits to avoid and how to protect your camera’s tripod socket from early failure.
Signs Your Camera’s Tripod Socket Thread Is Damaged
You’ll notice several clear signs when your camera’s tripod socket thread becomes damaged. The most obvious indicator is excessive wobbling when your camera sits on the tripod. Even when you tighten the mounting screw all the way, your camera still moves or tilts unexpectedly.
Another sign is resistance or grinding sounds when you screw your camera onto the tripod head. The screw may feel like it’s catching on something instead of threading smoothly. You might hear a slight grinding or crunching noise as you turn it.
The screw itself may not tighten firmly anymore. You’ll turn it several rotations without feeling the normal resistance that comes from threads engaging properly. This happens because the metal threads inside the socket have worn away or broken off.
Pay attention to uneven tightening. One side of your camera may sit higher than the other, even after you’ve tightened the screw completely. This suggests that only some threads remain intact while others have stripped away.
Look for visible damage around the socket opening. You might see small metal shavings, scratches, or discoloration around the hole on your camera’s bottom. These physical signs show where the threads have failed.
Some cameras show intermittent problems. Your camera holds fine one day, then becomes loose the next time you use it. This pattern suggests progressive thread damage that’s getting worse over time.
Test the socket by gently wiggling your camera side to side while it’s mounted. Significant movement indicates thread failure. A properly functioning socket keeps your camera completely stable and secure.
Tools and Materials Needed Before You Begin
Before you start any repair work, gather the right tools and materials. Having everything ready makes the process faster and prevents frustration.
You’ll need a screwdriver set with multiple sizes. Different tripod screws require different heads, so having options matters. A Phillips and flathead screwdriver cover most situations.
Get some fine grit sandpaper or steel wool. You use these to clean the socket area and remove rust or debris. Cleaning first helps you see the actual damage clearly.
A small flashlight or headlamp is essential. The tripod socket sits on your camera’s bottom, making it hard to see. Good lighting lets you inspect the threads properly.
Pick up some thread repair materials. These include threaded inserts, epoxy putty, or metal epoxy. Keep different types on hand since repair methods vary based on damage severity.
You should have calipers or a ruler to measure the socket. Knowing the exact diameter helps you choose the right repair insert size. Measurements prevent ordering incorrect parts later.
Get pliers and a wrench for holding and turning components. You may need to remove the insert or hold the socket steady during repairs.
Keep lubricating oil nearby. A light machine oil helps threads move smoothly and prevents future friction damage. Apply it sparingly to avoid attracting dust.
Have paper towels and a small brush for cleaning. Dust and debris inside the socket interfere with repairs.
Finally, wear safety glasses. Metal shavings can fly when you work on the socket. Protecting your eyes matters.
Store all these tools in a small container. This keeps everything organized and accessible when you need it.
Step-by-Step Guide to Repairing a Stripped Tripod Socket
The repair process begins with careful assessment of your socket’s condition. First, stop using your camera with the tripod immediately. Continued use will only make the damage worse and create additional problems inside the socket.
Next, clean the entire socket area thoroughly. Use your small brush to remove dust, debris, and any loose threads. A flashlight helps you see inside the socket clearly. Wipe away everything with a paper towel so you can inspect the damage properly.
Examine the socket opening with your magnifying tool or calipers. Look for the specific location where threads are damaged. Some damage occurs at the entrance while other problems hide deeper inside. Document what you see because this information guides your repair choice.
Test the socket gently by hand before attempting any fixes. Insert a tripod screw slowly and feel for resistance or grinding. Note exactly where the problem starts. This tells you whether damage is shallow or extends deep into the socket.
Consider the severity carefully. Minor surface damage needs different treatment than severe stripping. If threads are only slightly worn, you might use a slightly larger diameter screw. If damage is extensive, you’ll need a more involved repair approach.
Document the socket size before proceeding further. Measure the diameter and depth of your socket. Write down these measurements because you’ll reference them during repair. Take photos from multiple angles if possible.
Finally, decide which repair method suits your situation best. Shallow damage responds well to certain techniques. Deep damage requires alternative solutions. Your assessment determines which path forward makes sense for your specific camera and socket condition.
Using a Helicoil or Thread Insert for a Permanent Fix
A Helicoil is a small metal coil that fixes stripped threads permanently. It works by creating new threads inside your damaged socket. This method is reliable and lasts for years.
Start by getting a Helicoil kit that matches your socket size. These kits come with special drill bits, insertion tools, and the coils themselves. The process requires precision, so work slowly and carefully.
First, drill out the stripped socket to a larger diameter. Your Helicoil kit will specify the exact drill size needed. Use a power drill or hand drill with steady pressure. Remove all debris from the hole when finished.
Next, tap new threads into the enlarged hole. The kit includes a tap tool for this step. Turn it clockwise slowly until you create clean new threads. Stop when the tap reaches the proper depth.
Insert the Helicoil into the threaded hole. Use the insertion tool that comes in your kit. Push it down until the coil sits flush with the socket opening. The coil should not stick out above the surface.
Remove the insertion tool by turning it counterclockwise. Your new threads are now ready to use. The Helicoil creates a stronger socket than the original threads.
Test your repair by mounting your camera on a tripod. Tighten gently at first. The connection should feel firm and secure without resistance or grinding sounds.
This method works best for serious damage where other fixes won’t hold. The repair is permanent and restores full functionality. Your camera socket will be stronger than before because the Helicoil material is durable and reliable.
Preventing Future Thread Damage on Your DSLR
Preventing future thread damage starts with understanding what causes the problem in the first place. Most damage happens when you screw your camera in too tightly or at an angle. Take your time when mounting your camera and stop turning once you feel resistance.
Always hand tighten first before using any tools. Your fingers give you better feedback than mechanical force. You’ll feel when the threads catch properly and when they’re about to strip. Never force a camera into the socket if it doesn’t slide in smoothly.
Store your camera without the tripod attached whenever possible. Leaving your camera mounted for long periods puts constant stress on the threads. The weight of the camera combined with vibration slowly damages the connection. Remove your camera after each shooting session.
Check your tripod socket regularly for loose connections. A small amount of movement is normal, but excessive wiggling means trouble ahead. Tighten the socket gently if you notice play developing. Catch problems early before they become serious.
Use a tripod that matches your camera’s weight class. Lightweight tripods can cause the socket to work loose over time as the camera shifts. A properly matched tripod reduces unnecessary stress on the threads.
Keep the socket clean and dry between uses. Dirt and moisture can accelerate wear on the threads. Wipe the socket opening with a dry cloth regularly. Store your camera in a dry location to prevent corrosion.
Consider using a quick release plate system. These plates attach to your camera and connect to the tripod separately. The plate takes the stress instead of your camera’s socket. This method significantly extends the life of your threads and prevents future damage from occurring.
Common Mistakes to Avoid During Repair
Making mistakes during repair can turn a small problem into a major issue. The biggest error people make is rushing the process without proper assessment. You need to understand exactly how damaged your socket is before attempting any fix.
Applying too much force is another common mistake. Many people overtighten the tripod mount ball, which actually causes more damage to the already weakened threads. Use gentle, steady pressure instead.
Skipping the cleaning step leads to poor results. Dirt and debris inside the socket prevent proper thread insertion and can interfere with Helicoil installation. Always clean thoroughly before starting any repair work.
Using the wrong size tools damages the socket further. If your socket requires a specific diameter for drilling or tapping, using an incorrect size creates more problems. Measure twice and verify your measurements before proceeding.
Ignoring lubrication causes friction damage during repair. When you’re drilling or tapping new threads, the socket needs proper lubrication to prevent overheating and metal damage. Apply lubricating oil consistently throughout the process.
Not testing incrementally leads to wasted effort. Test your repair after each major step rather than waiting until the end. This helps you catch problems early when they’re easier to fix.
Failing to secure your camera properly during testing is dangerous. Always mount your camera on a stable tripod when testing repairs. A falling camera can cause serious injury and additional damage.
Finally, attempting repairs beyond your skill level causes irreversible damage. If you feel uncertain about any step, stop and seek professional help. Some socket damage requires expert intervention to avoid permanent camera damage.
When to Seek Professional Camera Repair Services
Knowing when to stop fixing your camera yourself is important. Professional repair services exist for a reason, and some situations demand expert help.
You should seek professional help if the socket damage is severe. When the threads are completely gone or the socket wall is cracked, DIY methods often fail. A professional has specialized equipment that can handle these cases properly.
If you’ve already attempted a repair and it didn’t work, professionals can fix your mistakes. They know how to remove failed inserts and restore the socket correctly. Trying again yourself might cause more damage.
Consider professional service if your camera is expensive or new. High end DSLR bodies deserve expert care. The cost of professional repair is often less than replacing a damaged camera.
You should also seek help if you lack the right tools. Attempting repairs without proper equipment leads to accidents. Professional technicians have drills, taps, and insertion tools designed for camera work.
If the socket damage extends into the camera body itself, stop immediately. Internal damage requires professional attention to avoid electronics problems. Moisture or metal shavings inside your camera can cause serious failures.
Professional services also offer warranty protection. If something goes wrong during their repair, they stand behind their work. This protection gives you peace of mind.
Some camera manufacturers have official repair centers. These centers use genuine parts and follow manufacturer specifications. They understand your specific camera model better than general repair shops.
Don’t wait too long to decide. The longer you delay, the more additional damage can occur. Contact a professional repair service if you feel uncertain about any step in the process.
Final Thoughts
Fixing a stripped tripod socket thread takes patience. You now know the simple steps to try at home. You also know when to stop and call a professional.
Small damage often fixes itself with basic tools and care. Bigger damage needs expert hands. Your camera is valuable, so treat repairs with respect.
Start every repair with the easiest fix first. Move to harder methods only if needed. This saves your camera from extra stress.
Prevention matters more than repair. Good habits protect your socket for years. Simple care today saves money tomorrow.
Never rush a repair job. Take your time with each step. Rushing causes new problems instead of fixing old ones.
Testing your work is just as important as the repair itself. Always check your fix before trusting it with your camera. A quick test now prevents a costly accident later.
Remember that every camera is different. Some models have more delicate sockets than others. What works for one camera may not work for another.
Trust your instincts during this process. If something feels wrong, stop right away. Your camera deserves careful handling, not guesswork.
Professional help exists for good reason. Skilled technicians have tools and training you may not have. Sometimes their help is the smartest choice.
Keep this guide handy for future reference. Thread damage can happen again if you are not careful. Being prepared helps you act fast next time.
In the end, your camera’s health depends on your choices. Simple fixes work for simple problems. Bigger problems need bigger solutions. Choose wisely, and your camera will serve you well for years to come.
Frequently Asked Questions
Can I use my camera with a slightly stripped socket?
Yes, you can use your camera if the stripping is minor. A loose tripod connection won’t harm your camera’s internal parts. However, your camera may shift or tilt on the tripod. This creates instability during shooting. Test the connection carefully before taking important photos. If your camera feels secure enough, you’re fine to continue. Just monitor the socket regularly for further damage.
How do I know if my socket damage is permanent?
Permanent damage occurs when threads are completely gone or the socket walls are damaged. You’ll notice the tripod screw spins freely without gripping. The socket may also have visible cracks or metal shavings inside. If you can see into the camera body through the socket, the damage is severe. This situation requires professional help immediately.
What’s the difference between a stripped and a loose socket?
A loose socket still has intact threads but feels wobbly. You can tighten it and it holds firm. A stripped socket has damaged threads that won’t grip the screw. The screw keeps spinning without catching anything. Loose sockets are easier to fix at home. Stripped sockets need more advanced repair techniques.
Will my warranty cover tripod socket damage?
Most camera warranties exclude accidental damage or normal wear and tear. Tripod socket damage typically falls into this category. Your warranty might cover defects if the socket failed without your use. Contact your camera manufacturer to confirm. Professional repair shops can assess whether warranty applies to your specific situation.
Is it safe to use a tripod adapter on a stripped socket?
Adapters can provide temporary stability but won’t fix the underlying problem. They work best for minor looseness, not severe stripping. Using adapters on heavily damaged sockets can cause more harm. The adapter may slip or create uneven pressure on the socket. This approach buys you time but isn’t a permanent solution.

Hi, I’m Frankie Shaw, the founder and writer behind Swittchly 👋. I’m a passionate tech enthusiast who loves exploring the latest gadgets, devices, and electronics that hit the market. Through my honest, research-backed Amazon product reviews, I help readers make smarter buying decisions without the hype or confusion.