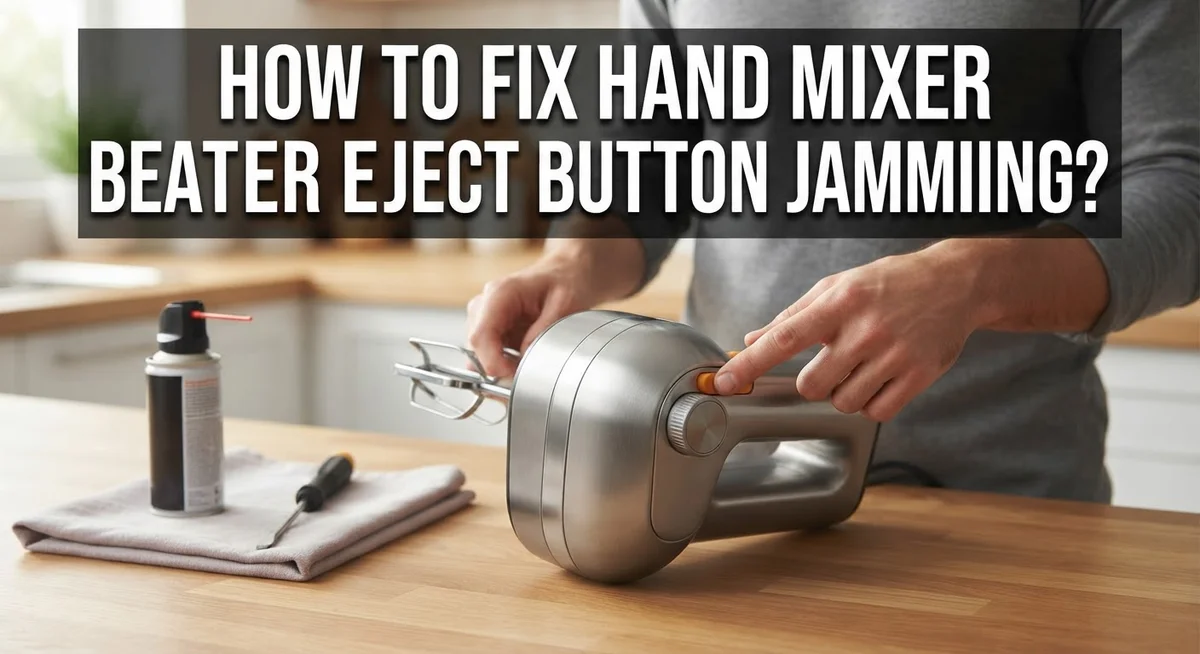
How to Fix a Hand Mixer Beater Eject Button That’s Jamming?
Your hand mixer is a kitchen hero. It whips cream, beats eggs, and mixes batter in seconds.
But then the beater gets stuck. You press the eject button, and nothing happens.
This is a super common problem. Many people think their mixer is broken. They toss it out and buy a new one.
Good news: your mixer is probably just fine. A jammed eject button usually means dirt or dried food is blocking the mechanism. Sometimes it just needs a little lubrication to work smoothly again.
This article will show you exactly how to fix a jammed beater eject button. We will walk through simple, safe steps you can do at home.
You will learn why unplugging your mixer first matters. We will explain how mineral oil can reduce friction inside the mechanism. You will also discover the right wiggling technique to loosen a stuck beater.
By the end, you will know how to get your beaters ejecting easily again. No repairman needed. No new mixer required.
Let’s get your kitchen tool working like new again.
In a Nutshell
Here is a quick summary to fix your jammed beater eject button fast.
-
Always unplug the mixer first. This keeps your fingers safe during the fix.
-
Press the eject button all the way down. Many people only push it halfway, which stops it from working.
-
Wiggle the beaters gently while you press the button. This small movement helps loosen the stuck parts.
-
Add a drop of mineral oil to the beater ends. Use a paper towel to spread it evenly and avoid mess.
-
Insert and eject the beaters several times. This action works the oil deeper into the mechanism.
-
Don’t give up on your mixer too soon. Most jamming issues are simple fixes, not signs of a broken appliance.
Lubrication and gentle movement solve most jamming problems. Your mixer is very likely fine. With these steps, you can get it working smoothly again in just a few minutes.
Why the Beater Eject Button Jams
Your beater eject button jams for several straightforward reasons. Understanding what causes the problem helps you fix it faster and avoid the same issue later.
Dried food and debris build up inside the mixer over time. When you use your mixer, small particles from batter, dough, or frosting escape into the mechanism. These bits dry and harden around the eject button and beater socket. The button becomes stiff or stops working entirely.
Moisture and rust develop when water gets into the internal parts. If you wash beaters and don’t dry them completely before reinserting them, moisture seeps into the ejection mechanism. Metal parts inside can oxidize slightly, creating friction that makes the button stick.
Lack of lubrication is the most common culprit. The eject mechanism has small moving parts that need to slide smoothly. Without any lubrication, these parts rub against each other and become harder to move. Over months of use, the button requires more and more force to press.
Beater misalignment happens when you insert beaters at a slight angle. The beater shaft doesn’t sit perfectly in its socket, causing the release mechanism to bind. The button feels jammed even though nothing is physically broken.
Normal wear and tear affects all kitchen tools. Springs inside the ejection system weaken over time. Plastic components can warp slightly from heat or repeated use. The button needs progressively harder presses to work.
The good news is that most jamming problems are reversible. Your mixer is not broken. The mechanism simply needs cleaning and lubrication to function smoothly again. Gentle wiggling combined with the right lubricant restores proper operation in most cases. You rarely need to replace the mixer or any internal parts.
Safety First: Preparing Your Mixer for Repair
Before you start working on your hand mixer, safety must come first. Your mixer contains electrical components that can cause injury if you’re not careful. The most important step is to unplug the mixer from the wall outlet completely. Never attempt any repairs while the mixer is plugged in, even if you think the power is off.
Once unplugged, let your mixer sit for a few minutes. This allows any residual electrical charge to dissipate safely. Check that the cord is fully removed from the outlet and not just switched off at the power button.
Next, inspect your mixer for any visible damage or cracks in the housing. Look at the beater slots and the area around the eject button. If you see cracks or water damage, stop here. These signs mean your mixer may have internal electrical issues that require professional help.
Clear your work area of clutter. You want a clean, flat surface where you can set your mixer down safely. Gather your tools and materials nearby so you don’t need to leave your mixer unattended while holding parts.
Wash your hands before handling the mixer. This prevents oils and dirt from transferring to the internal mechanisms. Dry your hands completely so you have a good grip on the mixer and beaters.
Check the beater slots for any visible debris or food particles. Use a dry cloth to gently wipe around the eject button and beater insertion area. Don’t force anything or use sharp objects that could scratch the mixer.
Position your mixer on a stable surface where it won’t tip over. Make sure you have good lighting so you can see what you’re doing clearly. If you wear glasses or contacts, put them on now so your vision is sharp throughout the repair process.
Step-by-Step: How to Fix a Jammed Eject Button
Start by pressing the eject button all the way down with firm, steady pressure. Many people stop halfway through the press, which means the internal mechanism never fully engages. Hold it down for a full second before releasing.
If the button still won’t work, gently wiggle the beater back and forth while simultaneously pressing the eject button. This gentle rocking motion helps loosen any debris or dried food stuck in the release mechanism. The combination of movement and button pressure often frees up the jam.
Next, apply a small amount of mineral oil directly to the end of the beater where it connects to the mixer. Use a paper towel to avoid mess. Mineral oil works because it reduces friction without damaging the mixer’s internal parts.
Now insert the beater back into the mixer and press eject immediately. Repeat this cycle five to ten times. Each time you insert and eject, you’re working the lubricant deeper into the mechanism. You’ll likely feel the button becoming easier to press with each attempt.
Pay attention to how the button responds. It should gradually feel smoother as the oil spreads through the internal components. If you notice any grinding sounds or unusual resistance, stop and let the mixer rest for a few minutes.
After several cycles, try pressing the button without the beater inserted. The button should move freely and click into place. If it still feels stiff, repeat the oil application and insertion cycle a few more times.
This process typically takes ten to fifteen minutes total. Most jamming issues resolve completely with this approach. Your mixer’s eject button should return to normal operation, and your beaters will pop out smoothly every time you press the release button.
Using Mineral Oil to Loosen a Stuck Beater
Mineral oil works exceptionally well for stuck beater mechanisms. This simple lubricant reduces friction between the internal parts that control the eject function. When your button jams, dried residue and lack of lubrication are usually the culprits.
Start by applying a small amount of mineral oil directly to the metal end of the beater. Use a paper towel to hold the beater steady while you work. The oil needs to reach the connection point where the beater sits inside the mixer.
Once you’ve coated the beater end, insert it back into the mixer with a gentle twisting motion. This helps distribute the oil into the mechanism. Press the eject button immediately after inserting the beater.
Now comes the important part: repeat this cycle multiple times. Insert, eject, insert, eject. Each cycle works the mineral oil deeper into the stuck parts. You should notice the button becoming more responsive with each attempt.
The repetitive motion combined with lubrication gradually loosens the jammed mechanism. This process typically takes ten to fifteen minutes. Don’t rush it. Gentle, consistent movements work better than forcing the button.
After several cycles, try pressing the eject button without any beater inserted. The button should feel smoother and respond more quickly. If it still feels stiff, apply a tiny bit more mineral oil and repeat the process.
The beauty of this method is that it addresses both problems at once. The oil lubricates the mechanism while your repetitive movements help break apart any stuck particles. Most people see improvement within the first few cycles.
This approach is safe, affordable, and effective for most jamming situations. Your mixer likely isn’t broken. It just needs proper lubrication and gentle mechanical action to work smoothly again.
Common Mistakes That Make the Problem Worse
Many people make mistakes that actually make beater jamming worse instead of better. Understanding what NOT to do helps you avoid causing additional damage to your mixer.
The first major mistake is not pressing the eject button all the way down. People often tap the button lightly or press it halfway, expecting the beater to pop out. This partial pressure does not activate the release mechanism fully. The button needs firm, complete pressure to work properly. If you keep tapping gently, you train yourself into a bad habit that wastes time and frustration.
Another common error is attempting to remove the beater while the mixer is still plugged in. This creates a safety hazard. You could accidentally turn on the mixer while your hands are near the spinning parts. Always unplug your mixer first, without exception. This simple step protects you from injury and prevents electrical damage.
People frequently give up too quickly and assume their mixer is broken beyond repair. They discard the appliance thinking the eject button is permanently damaged. In reality, most jamming issues are fixable with simple techniques. Throwing away a mixer prematurely wastes money and resources.
Failing to use lubricant is another critical mistake. Some people try forcing the beater out with excessive pressure or yanking motions. This approach can crack the plastic housing or bend internal components. Mineral oil reduces friction and allows stuck parts to move freely without force. Skipping this step means you are working against the mechanism instead of with it.
Finally, people sometimes use the wrong type of lubricant or apply it incorrectly. You need a light oil that does not gum up over time. Applying too much lubricant creates mess and does not help. A small amount applied directly to the beater connection point works best. Avoid heavy greases or thick oils that attract dust and food particles.
Troubleshooting: When the Button Still Won’t Release
If your eject button still won’t release after initial attempts, don’t panic. Most jammed beaters are fixable with a bit of patience and the right approach.
First, verify you’ve unplugged the mixer completely. Safety comes first. Press the eject button multiple times in quick succession. Sometimes rapid pressing helps break the jam loose. Hold each press for two to three seconds before releasing.
Next, try a different angle. Gently tilt the mixer slightly while pressing the button. The angle change can help the internal mechanism shift into the release position. Apply steady, firm pressure without forcing it, as excessive force can damage the button mechanism itself.
If the button still resists, apply mineral oil around the button’s edges. Let it sit for five minutes so the lubricant can penetrate the internal components. Then try pressing again. Wiggle the beater gently side to side while pressing the button simultaneously. This combination motion often works when the button alone won’t budge.
Try the eject cycle without a beater installed. Sometimes the beater itself is causing resistance. Insert and eject several times with no attachment. This cleans out any debris blocking the mechanism.
Consider whether water or food residue might be the culprit. Moisture causes internal rust and sticking. If you suspect this, apply mineral oil and let it work for ten to fifteen minutes before attempting removal again.
If the button still won’t respond after these steps, the internal spring mechanism may be damaged. However, this is rare. Most jamming issues resolve with lubrication and gentle mechanical action. Give yourself at least twenty to thirty minutes of attempting these methods before concluding the mixer needs professional repair.
Maintenance Tips to Prevent Future Jamming
Keeping your hand mixer in top shape prevents eject button problems from developing in the first place. Regular cleaning is your first line of defense against jamming issues. After each use, wipe down the beater attachment point and eject button area with a dry cloth to remove any food particles or moisture.
Store your mixer in a dry location away from humidity. Moisture is one of the biggest culprits behind stuck mechanisms. Never leave the mixer in a damp kitchen cabinet or near the sink. A cool, dry shelf works best for long term storage.
Check the eject button’s movement every few weeks. Press it gently several times to ensure smooth operation. This simple habit catches minor stiffness before it becomes a real problem. Consistent use actually helps maintain the mechanism, so regular mixing is beneficial.
Clean the beater ends before storing them. Food residue hardens over time and can cause sticking. A quick rinse and dry prevents buildup that leads to jamming. Make sure both the beater and the socket are completely dry before storage.
Apply a tiny amount of mineral oil to the beater end every month or two, even when everything works fine. This preventive lubrication keeps friction low and parts moving smoothly. Insert and eject the beater a few times to distribute the oil evenly.
Inspect the eject button itself for visible cracks or damage. A damaged button may jam more easily than a healthy one. If you notice any physical defects, address them early before the problem worsens.
Avoid forcing the eject button at any time. Gentle, deliberate pressure is always better than aggressive pushing. Forcing causes wear that eventually leads to malfunction.
These simple maintenance steps take just minutes and dramatically reduce your chances of experiencing jamming issues. Prevention is always easier than repair, so building these habits into your routine saves frustration down the road.
Final Thoughts
A jammed eject button feels frustrating. But now you know it rarely means your mixer is broken.
Most jamming problems come from friction, not faulty parts. A little mineral oil and some gentle wiggling often solve the issue in minutes.
Remember the basics. Unplug your mixer first. Press the eject button all the way down. Apply lubricant to the beater end. Then work the beaters in and out several times.
These small steps make a big difference. They loosen stuck mechanisms and restore smooth ejection.
Patience matters here. Don’t force the button or yank on the beaters. This can damage the internal spring and turn a simple fix into a real repair.
If you’ve tried everything and the button still won’t budge, the spring mechanism might be worn out. That’s okay. It happens after years of use.
At that point, you can decide if repair or replacement makes sense for your situation.
But for most people, this never becomes necessary. Regular maintenance prevents future headaches. Clean your beaters after each use. Add a drop of mineral oil every month. Check the button’s movement now and then.
These habits take almost no time. Yet they keep your mixer working smoothly for years.
Think of it this way. A jammed eject button is a small problem with a simple solution. You don’t need special tools or expert help.
Just some oil, a paper towel, and a few minutes of your time. That’s often all it takes to get your hand mixer back in action.
So next time your beater sticks, stay calm. Follow these steps. Your mixer will likely eject perfectly again, ready for your next baking project.
Frequently Asked Questions
Why is my beater stuck in the mixer?
A stuck beater usually happens because of friction between the beater shaft and the socket. Dust, dried food, or moisture can build up over time. The eject button may not be getting a full press either. Most of the time, this isn’t a sign your mixer is broken.
Can I fix a jammed eject button myself?
Yes, you can fix it in most cases. Start by unplugging the mixer completely. Press the eject button all the way down while gently wiggling the beater side to side.
Apply mineral oil to the beater end using a paper towel. Insert and eject the beaters several times to work the oil into the mechanism. This reduces friction and usually solves the problem.
What mistakes should I avoid?
Don’t force the eject button hard. Pressing too hard can damage the internal spring. Never try to remove a beater while the mixer is plugged in.
Avoid using water or thick grease as lubricants. Mineral oil works best because it flows easily into tight spaces. Don’t throw away your mixer thinking it’s broken. Most jamming issues are fixable with simple steps.
How often should I lubricate my mixer?
Apply a small amount of mineral oil to the beater end every one or two months. Do this even when everything works fine. This keeps friction low and prevents jamming before it starts.
Store your mixer in a dry place away from humidity. Check the eject button movement every few weeks. Clean the beater ends before storing them. These quick steps take minutes and make a real difference.
When should I consider replacement?
If you’ve tried lubrication and gentle wiggling without success, the internal spring mechanism may be worn out. At that point, you can decide whether repair or replacement makes sense for your situation.

Hi, I’m Frankie Shaw, the founder and writer behind Swittchly 👋. I’m a passionate tech enthusiast who loves exploring the latest gadgets, devices, and electronics that hit the market. Through my honest, research-backed Amazon product reviews, I help readers make smarter buying decisions without the hype or confusion.