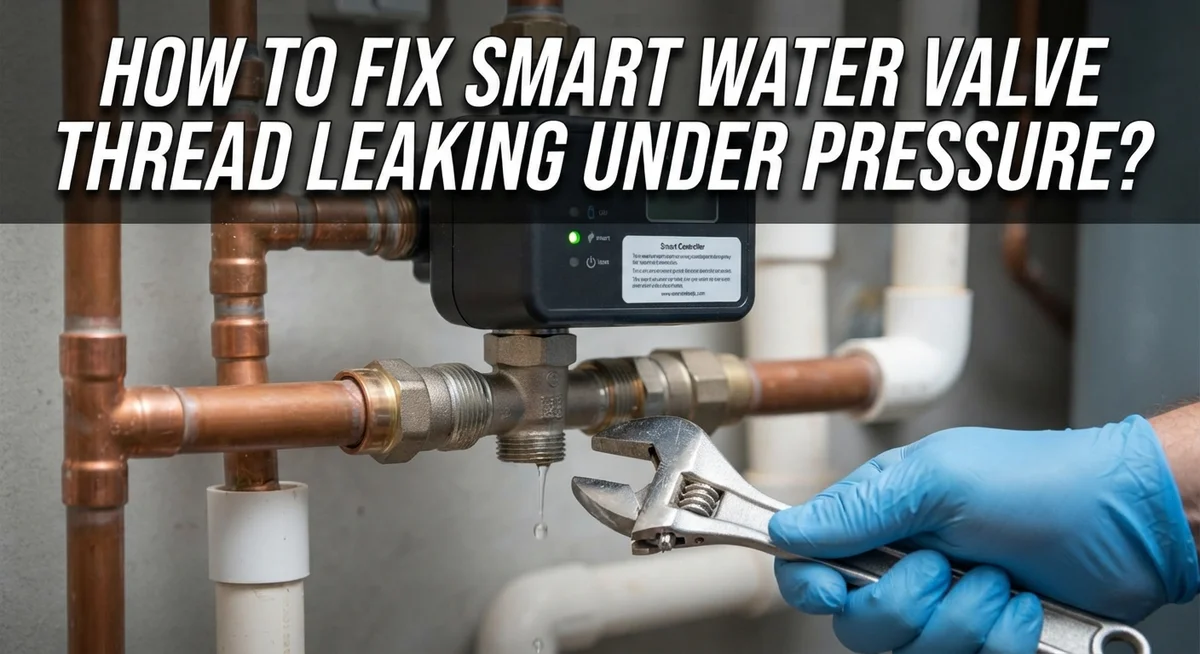
How To Fix Smart Water Valve Thread Leaking Under Pressure?
A leaking smart water valve can turn into a big headache fast. You feel confident your system is protected, then water starts dripping from the threads. That small drip can waste water and damage your floors over time.
Thread leaks usually happen when pressure builds up inside the valve. The seal between the threads and the fitting weakens. This lets water sneak through even when everything looks tightly connected.
Most smart valves fail at the same spots. Worn washers, damaged O-rings, and old Teflon tape are common culprits. Mineral buildup inside the valve can also cause parts to wear out faster than expected.
In a Nutshell
- Shut off the water supply first. Always relieve pressure before you touch any threaded parts. This step keeps you safe and prevents a messy surprise.
- Check the usual suspects. Compression fittings, washers, and O-rings wear out over time. These small parts cause most leaks under pressure.
- Wrap threads properly. Use Teflon tape with at least six full wraps. Too little tape is a common reason fixes fail.
- Inspect the internal mesh filter. Mineral buildup often hides inside the valve. Cleaning or replacing this filter can solve stubborn leaks.
- Test the handle after reassembly. Make sure it moves smoothly and shuts off completely. A stiff or loose handle often signals a bigger problem.
- Add leak sensors as backup protection. Place them in cold-prone areas near your valve. They alert you early if a new leak starts.
Understanding Why Smart Water Valve Threads Leak Under Pressure
Smart water valve threads leak under pressure because the sealing components inside wear down over time. When water pushes against these weakened areas, it finds the easiest escape route, which is usually at the threaded connections.
Compression fittings are the most common culprits. These fittings rely on a rubber washer to create an airtight seal. Once the washer cracks or flattens, water seeps past it under pressure. The force of pressurized water actually makes the leak worse because it pushes harder against the damaged seal.
O-rings inside your valve also deteriorate with age and exposure to minerals in your water. When an O-ring fails, it can no longer hold back the water flow. You’ll notice the leak gets stronger when the valve is under full pressure.
Mineral buildup creates another serious problem. Hard water deposits accumulate inside the valve chamber and around the threads. This buildup prevents the internal components from sealing properly. The minerals essentially create tiny gaps where water can escape.
Worn internal cartridges represent a third major issue. These cartridges control water flow and must fit precisely inside the valve body. When they wear out, they no longer make a tight seal, and pressurized water finds its way through.
The threads themselves can also become damaged or corroded. If the thread grooves wear down or rust develops, the tape and fittings cannot grip properly. This allows water to leak past the connection point.
Understanding these causes helps you identify where your specific leak originates. Different problems require different solutions. Knowing which component failed tells you exactly what to replace or repair.
Tools and Safety Precautions Before You Begin
Before you start fixing a leaking smart water valve, gather the right tools and take safety precautions seriously. Preparation prevents mistakes that could damage your valve further or cause water damage to your home.
Start by turning off the main water supply to your house. Locate the shutoff valve, usually near your water meter or where the main line enters your home. Turn it clockwise until it stops.
Next, relieve all pressure from the system. Open the lowest faucet in your house and let water drain completely. This step prevents water from spraying out when you unscrew threaded connections.
Gather these essential tools before beginning: adjustable wrenches in various sizes, a screwdriver set with both flat and Phillips heads, pliers for gripping small parts, and a bucket to catch residual water. You’ll also need Teflon tape, a flashlight to see inside the valve, and clean rags or towels.
Wear safety glasses to protect your eyes from water spray or debris. Keep a towel nearby to wipe your hands and prevent slipping. If you have sensitive skin, wear rubber gloves to avoid irritation from mineral deposits or old tape residue.
Check your work area for adequate lighting. A well lit space helps you see small components clearly. This reduces the chance of missing worn parts or applying tape incorrectly.
Keep your phone nearby to reference the valve’s manual or take photos of the assembly before disassembly. Photos help you remember how parts fit back together. Lay out all removed components on a clean surface in the order you remove them.
Taking these precautions saves time and prevents costly mistakes.
Step-by-Step Guide to Fixing a Leaking Valve Thread
Once you have your tools ready and the water supply shut off, you’re prepared to begin the actual repair work. The process follows a logical sequence that prevents further damage to your valve.
Start by locating the threaded connection points on your smart water valve. These are typically found where the valve connects to your water line. Use your adjustable wrench to grip the fitting firmly, then slowly turn it counterclockwise to loosen it.
Take your time during this step. Rushing can strip the threads or crack the fitting. Once the connection loosens, unscrew it by hand to avoid over tightening when you reassemble later.
Next, carefully remove the entire valve assembly from the line. Water may still drip from the connection, so position a bucket underneath to catch any remaining moisture. This prevents water damage to your floors or surrounding areas.
Now examine the internal components. Look for the mesh filter inside the valve body. Mineral deposits often accumulate here and cause leaks. Gently clean this filter with a soft brush or cloth. If you see white or brown crusty buildup, soak the filter in vinegar for 15 to 20 minutes to dissolve mineral deposits.
Check the compression fitting and washer inside the valve. These small rubber or plastic components deteriorate quickly. If they appear cracked, flattened, or discolored, they need replacement with new ones of the same size.
Inspect the O-ring as well. This rubber seal prevents water from escaping around the internal cartridge. If it looks dry, cracked, or permanently compressed, it’s time for a new one.
Clean all threaded surfaces with a dry cloth before reassembly. Remove any old tape residue or mineral buildup using a soft brush. This ensures your new sealing materials make proper contact with the threads.
Inspecting and Replacing Worn Washers, O-Rings, and Filters
When you inspect a leaking smart water valve, you’re looking for three main problem areas: worn washers, damaged O-rings, and clogged filters. These components sit inside your valve and create the seal that stops water from dripping.
Start by removing the valve assembly from the water line. Once it’s disconnected, you can access the internal parts. Look for the compression washer first. This small rubber disk flattens under pressure to create a watertight seal. If it appears cracked, flattened, or has permanent indentations, it needs replacement.
Next, locate the O-ring. This rubber ring sits around the valve’s internal stem and prevents water from leaking out the sides. Press it gently with your finger. If it doesn’t spring back or feels brittle and cracked, it’s worn out and must be replaced.
Check the internal mesh filter too. Water minerals accumulate here over time and restrict flow. Hold it up to light and look for white or brown mineral deposits. A clogged filter reduces water pressure and can cause leaks under strain.
Clean all these components thoroughly before reassembly. Use a soft cloth and distilled water to remove mineral buildup. Don’t use abrasive scrubbers that scratch the surfaces.
When you install new washers and O-rings, apply a thin layer of plumber’s grease to help them seat properly. This reduces friction and creates a better seal. Make sure each component sits flush in its groove. Misaligned parts cause immediate leaks.
Replace the mesh filter with a new one if cleaning doesn’t restore it. These filters are inexpensive and prevent future mineral problems. Reassemble everything carefully, wrapping threads with plumber’s tape before tightening connections.
Proper Teflon Tape Application Techniques
Teflon tape creates a watertight seal on threaded connections. This tape wraps around male threads to fill microscopic gaps where water escapes. Proper application is critical because insufficient wrapping causes leaks even after reassembly.
Start by cleaning the threads completely with a dry cloth. Remove any old tape, debris, or mineral buildup. The threads must be completely dry before you apply new tape. Moisture prevents the tape from adhering properly.
Tear off a strip of Teflon tape about 12 inches long. Hold the valve fitting so the threads face upward. Begin wrapping the tape around the threads in a clockwise direction. This direction matters because it prevents the tape from unwinding during installation.
Apply at least 6 full wraps around the threads. Count each complete rotation carefully. Some plumbers use 8 to 10 wraps for extra security, especially on older valves. More wraps create a thicker seal without causing problems.
Wrap the tape tightly but not so tight that you tear it. The tape should overlap itself slightly with each rotation. Smooth each layer down gently as you go. This pressure helps the tape bond to the metal threads.
After wrapping, fold the end of the tape down and press it firmly. This prevents the tape from catching when you screw the fitting back together. The tape should feel smooth and secure with no loose edges.
Now you’re ready to reattach the valve assembly. Screw the fitting back on by hand first. Turn it clockwise until it feels snug. Then use your wrench to tighten it further. Do not over tighten, as this can crack the fitting or strip the threads.
Testing the Repair and Confirming a Leak-Free Seal
After you reassemble your smart water valve, you need to test it properly to confirm the repair worked. This step prevents water damage and ensures your fix is solid.
Turn the water supply back on slowly. Open the valve gradually rather than all at once. This allows water pressure to build up gradually and helps you spot any new leaks immediately. Listen for hissing sounds or spraying water near the threaded connections.
Check the area around the threads where you applied the Teflon tape. Look for any drips or moisture. Run your hand along the connection point while water flows through the valve. Wet hands will feel even small leaks easily.
Let the valve run at normal pressure for at least 5 minutes. Most leaks appear within this timeframe. If you see water pooling or dripping, turn off the supply immediately and tighten the connection slightly. Do not over tighten, as this can crack the fitting.
Verify that the valve handle moves smoothly and shuts off completely. The handle should stop at the closed position without any water flowing through. Listen for a clear click or feel resistance when you reach the fully closed point.
Place a dry cloth under the valve connection and wait 30 minutes. Check if the cloth stays dry. This confirms your seal is holding under sustained pressure.
Test your leak sensors if you installed them in the area. They should remain inactive when no leaks are present. If everything stays dry and the valve operates normally, your repair is complete and successful.
Common Mistakes That Cause Repeated Leaks
Many people make the same mistakes when fixing smart water valve threads. These errors cause leaks to return even after repair attempts.
The most common mistake is not wrapping enough Teflon tape. People apply only 2 or 3 wraps when they should use 6 or more. Thin coverage leaves gaps where water escapes under pressure. The tape needs to overlap itself completely around the threads.
Another frequent error is failing to relieve water pressure before taking the valve apart. Water still trapped inside the valve can spray out and prevent you from seeing the actual problem. Always shut off the main supply and open a nearby faucet to release remaining pressure.
Many people skip the internal inspection step entirely. They assume the problem is just the threads, but worn washers or damaged O-rings inside the valve cause most leaks. You must remove the valve assembly and examine these parts. If you don’t replace them, the leak returns within days.
Improper thread preparation causes repeated failures too. Dirt, mineral deposits, and old tape bits must be cleaned away completely. A dry cloth removes these obstacles. Applying new tape over old debris creates an incomplete seal.
Some people reassemble the valve too quickly without testing components first. The handle should move smoothly and shut off completely when you turn it. If movement feels stiff or the handle stops midway, internal parts need replacement.
Finally, rushing the pressure test is a mistake. Don’t turn the water on full blast immediately. Increase pressure gradually over several minutes. This helps you catch small leaks before they become big problems and prevents damage to your newly sealed connections.
Troubleshooting Persistent Leaks After Reassembly
When your smart water valve continues leaking after you’ve reassembled it, the problem usually stems from a few specific issues. The most common cause is incomplete sealing at the threaded connection points. This happens because water finds even tiny gaps between threads when pressure builds up.
Start by shutting off your water supply again. Release all remaining pressure from the system before attempting any further work. Open the valve handle completely to drain any trapped water inside the valve body.
Next, carefully unscrew the threaded connections you just reassembled. Examine the threads closely for any visible damage, corrosion, or mineral deposits. Even small white crusty buildup can prevent a proper seal. Use a dry cloth to wipe away any debris you find.
Check your compression fittings and washers. Worn or damaged washers are a leading cause of persistent leaks. If the washer looks flattened, cracked, or discolored, replace it with a new one. The same applies to O-rings that appear dry or deteriorated.
When you reapply Teflon tape, wrap it more generously this time. Use at least 6 to 8 full wraps around each threaded section. Wrap in a clockwise direction and press firmly as you go. This creates multiple layers that fill microscopic gaps in the threads.
Before reassembling, apply a small amount of plumber’s grease to new washers and O-rings. This helps them seat correctly and creates a better seal. Reassemble the valve slowly and hand tighten all connections first.
Turn your water supply back on gradually. Monitor the threaded areas for 10 to 15 minutes under full pressure. If leaking persists, the valve cartridge itself may be faulty and need replacement.
Final Thoughts
Fixing a leaking smart water valve thread does not have to feel overwhelming. Most leaks trace back to simple causes like worn washers, insufficient sealing tape, or mineral buildup inside the fittings. Once you understand these basics, the repair process becomes straightforward.
The key to success lies in patience and preparation. Always relieve water pressure before you touch any threaded connection. This single step prevents most accidental spills and injuries during repair.
Take time to inspect every component you remove. Small parts like mesh filters and O-rings often hide the real source of a leak. Skipping this step leads to repeated failures.
Proper Teflon tape application remains one of the simplest yet most effective fixes. Wrapping threads correctly creates a tight seal that withstands normal water pressure. Rushing this step almost always causes leaks to return.
Smart water valves also benefit from regular maintenance checks. Inspecting fittings every few months helps you catch small issues before they turn into bigger problems. This habit saves both time and money over the long run.
If leaks continue after your repair attempts, do not get discouraged. Sometimes internal components like cartridges or seals need replacement rather than simple resealing. Knowing when to escalate the fix makes a big difference.
Remember that smart valves combine mechanical parts with electronic sensors. This means both plumbing skills and basic troubleshooting knowledge come into play. Treating the valve as a system, not just a pipe fitting, helps you fix problems more effectively.
With the right approach, most homeowners can resolve thread leaks without professional help. Careful disassembly, proper sealing, and thorough testing form the foundation of a lasting repair. Following these steps keeps your smart water valve working safely for years to come.
Frequently Asked Questions
Why does my smart water valve leak even after I turn the handle to off?
A leaking valve after shutoff usually means internal components are worn out. Damaged washers inside the valve body prevent a complete seal. O-rings may crack or shrink over time. The cartridge itself could be faulty. Mineral buildup from hard water also blocks proper closure.
Start by shutting off your main water supply. Then unscrew the threaded connections carefully. Remove and inspect the internal cartridge and washers. Replace any damaged parts you find.
What causes thread leaks to happen under pressure?
Thread leaks appear when water pressure pushes against loose or poorly sealed connections. Insufficient Teflon tape is the most common cause. You need at least 6 full wraps around each thread. Worn compression fittings cannot hold pressure effectively either.
Improper thread preparation allows water to find tiny gaps. Dirty threads or old tape residue prevents new tape from sealing correctly. Always clean threads thoroughly before applying fresh tape.
Can I fix a thread leak without taking apart the whole valve?
Sometimes, yes. If the leak is minor, you can try tightening the connection slightly using an adjustable wrench. Turn it just a quarter turn clockwise. Do not over tighten, as this damages threads.
If tightening does not stop the leak, you must disassemble the valve. Minor leaks often indicate the problem runs deeper inside the valve body.
How do I know if the leak is from threads or from inside the valve?
Locate where water drips. If it comes from where two pieces screw together, the leak is from threads. If water seeps from the valve body itself or near the handle, internal components are failing.
Use a dry cloth to identify the exact leak point. This tells you whether to focus on thread sealing or internal repairs.

Hi, I’m Frankie Shaw, the founder and writer behind Swittchly 👋. I’m a passionate tech enthusiast who loves exploring the latest gadgets, devices, and electronics that hit the market. Through my honest, research-backed Amazon product reviews, I help readers make smarter buying decisions without the hype or confusion.