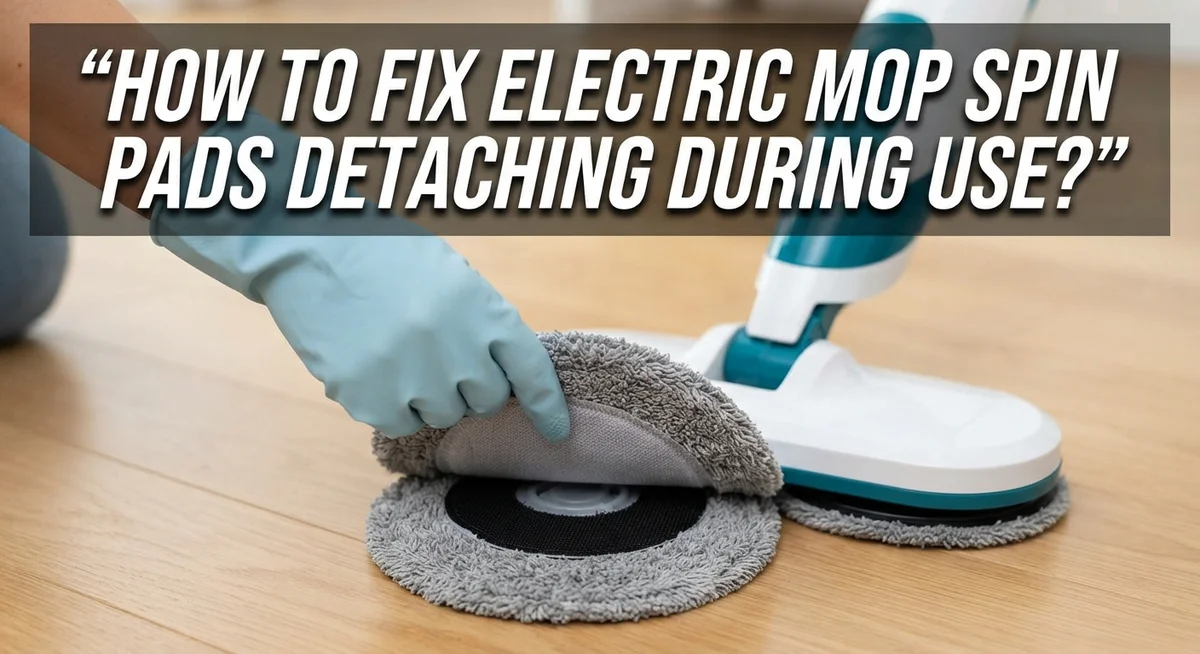
How To Fix Electric Mop Spin Pads Detaching During Use?
Does your electric mop pad keep flying off while you clean? You are not alone.
This is one of the most annoying problems mop owners face. You start cleaning, and suddenly the spin pad detaches from the disc.
The good news? This issue is usually easy to fix.
Most detachment problems come from simple causes. Velcro buildup, loose internal parts, or improper attachment often cause the pad to snap off.
Lint and hair collect on the velcro surface over time. This buildup weakens the grip between the pad and the disc.
In a Nutshell
- Clean the velcro often. Lint and hair buildup stops pads from gripping. A quick wipe keeps the surface sticky and ready.
- Check the pad disc rotation. Spin it by hand before you start. It should move with some resistance, not spin freely.
- Attach pads the right way. Press the pad firmly onto the disc. A loose fit will cause it to pop off mid clean.
- Inspect the back plate. Open it up and look for loose parts inside. Push components until you hear a click. That sound means everything is seated correctly.
- Charge your mop fully. A low battery can cause the motor to behave oddly, which sometimes leads to pad issues.
- Use proper technique when removing pads. Grasp the mop head firmly and pull upward. This protects the disc mechanism from damage over time.
Why Electric Mop Pads Detach: Common Causes
Electric mop pads detach for several reasons. Understanding these causes helps you prevent the problem before it starts.
Velcro degradation is the most common culprit. The velcro surface on your pad disc traps lint, hair, and dust particles over time. This buildup creates a barrier between the velcro and the pad itself. When the velcro gets too dirty, it loses its grip strength. Your pads simply slide off during the spinning motion.
Loose internal components inside the pad disc mechanism also cause detachment. The pad disc contains small parts that hold everything together. If these components shift or loosen, the pad attachment point becomes unstable. Your pads won’t sit firmly on the disc anymore.
Improper pad attachment happens when you don’t secure the pads correctly onto the disc. Many people rush this step. They place the pad on the disc without pressing it down firmly. The pad needs full contact with the velcro surface to stay attached.
Insufficient pad disc rotation indicates a mechanical problem. If the disc doesn’t spin smoothly with resistance when you rotate it by hand, something is wrong inside. A faulty disc mechanism won’t hold pads securely during operation.
Low battery charge can also contribute to pad detachment. When your mop doesn’t have enough power, the spinning motion becomes uneven. This irregular motion puts extra stress on the pad attachment.
Finally, worn out pads themselves may be the issue. Old pads develop weak adhesive properties. They simply don’t grip the velcro like new pads do.
Most detachment problems stem from neglected maintenance. Regular cleaning and inspection prevent these issues from developing in the first place.
Inspecting and Cleaning the Velcro Attachment System
Your mop’s velcro attachment system is the key to keeping pads secure. When velcro stops working properly, pads fall off during cleaning. The good news is that inspecting and cleaning this system takes just a few minutes.
Start by examining both sides of the velcro. Look at the velcro on your pad disc (the part attached to your mop head). Then check the velcro on the back of your cleaning pad itself. You should see a fuzzy surface on one side and a rough, hook-like surface on the other.
Lint and hair accumulate on velcro over time. This buildup creates a barrier that prevents the two velcro surfaces from gripping each other. Use a soft brush or old toothbrush to gently scrub the velcro on your pad disc. Brush in one direction to lift away trapped fibers.
For stubborn debris, use a lint roller or tape. Press the sticky side against the velcro and pull away slowly. This removes embedded particles without damaging the velcro itself.
Check the pad’s velcro too. If you see visible damage, pilling, or worn spots, the velcro may need replacement. However, most velcro just needs cleaning to work like new.
After cleaning, press your pad firmly onto the disc. You should feel strong resistance as the velcro grips. The pad should not move or shift around.
Clean your velcro system every two to three weeks, depending on your cleaning frequency. Regular maintenance prevents most detachment problems before they start. This simple habit keeps your mop running smoothly and your pads exactly where they belong.
Checking Pad Disc Rotation and Internal Components
The pad disc rotation mechanism is critical to keeping your pads secure during operation. When this component fails, pads detach easily. Let’s check if your disc rotates properly.
Start with a manual rotation test. Grasp your mop head firmly and rotate the pad disc by hand. You should feel noticeable resistance as it turns. Smooth, effortless spinning means the mechanism has problems. Resistance indicates the internal components are working correctly.
Pay attention to any grinding sounds or unusual friction. These noises suggest loose parts inside the disc assembly. If you hear clicking or grinding, the internal mechanism needs inspection.
Open the back plate carefully. Most electric mops have a removable back cover that reveals internal components. Check for any visibly loose screws, springs, or gears. Push any loose components firmly until you hear a clicking sound. This click confirms the part is seated properly.
Look for debris inside the disc cavity. Lint, hair, and dust accumulate in tight spaces. Remove any obstructions you find. Even small particles can interfere with rotation and cause pads to slip.
Verify the disc spins smoothly after cleaning. Rotate it by hand again. The resistance should feel consistent and controlled. If spinning is still too easy or too hard, internal components may need professional service.
Test your mop on a small area after inspection. Watch the pad disc during operation. It should rotate steadily without wobbling or hesitation. If pads still detach, the velcro system or pad attachment technique may need attention instead.
Regular manual rotation checks prevent most disc problems from worsening.
Step-by-Step Guide to Reattaching Pads Securely
Reattaching your electric mop pads correctly prevents them from detaching mid clean. Follow these steps to secure them properly every time.
Start by grasping your mop head firmly with both hands. This gives you control and stability during the attachment process. Hold the mop at a comfortable angle so you can see the pad disc clearly.
Align your pad with the disc before pressing down. Check that all corners match up with the disc surface. Misalignment is a common reason pads slip off during use. Take a moment to ensure everything lines up perfectly.
Press the pad down firmly onto the velcro surface. Use steady pressure across the entire pad. Start from the center and work outward toward the edges. This removes air pockets and creates a strong bond between pad and disc.
Verify the pad is completely secured by tugging it gently. The pad should not move or lift away from the disc. If it shifts easily, remove it and try again. Proper attachment means zero movement when you pull.
Rotate the pad disc by hand after attachment. The disc should spin with noticeable resistance. Smooth rotation confirms the pad sits correctly on the disc. Grinding sounds or jerky movement means something is wrong.
Test your mop on a small floor area first. Run it for 30 seconds and watch the pad. It should stay in place without any shifting or peeling. If the pad holds firm, you’re ready for full cleaning.
Repeat this process each time you change pads. Consistent proper attachment keeps your mop working reliably and prevents frustrating mid clean detachment problems.
Proper Techniques for Removing and Attaching Mop Pads
Proper attachment technique makes the difference between pads that stay secure and ones that pop off mid clean. Start by holding your mop head firmly with both hands. This grip gives you stability and control during the entire attachment process.
Align your pad carefully before pressing down. Check that all four corners match up with the disc surface. Misalignment is a common cause of pads detaching later. Take a moment to verify everything lines up correctly.
Press the pad down with steady, even pressure across the entire surface. Don’t just push down on one corner. Apply force from the center outward to ensure full contact with the velcro. You should feel the pad seat completely onto the disc.
Test the attachment by tugging gently on the pad. The pad should not move or lift away. If it shifts at all, remove it and reattach using firmer pressure. A properly attached pad resists your pull.
After securing the pad, rotate the pad disc by hand. The disc should spin with noticeable resistance. Smooth, effortless spinning means the pad is locked in place. Grinding sounds or stiff rotation indicate a problem that needs attention before use.
For removal, use the same firm grip approach. Grasp your mop head with both hands and pull the pad upward steadily. Don’t yank or twist. Pads should lift away cleanly without snapping or tearing.
Clean the velcro surface before each reattachment. Remove lint and hair buildup that prevents proper adhesion. A clean velcro surface grips the pad more effectively. This simple step solves most detachment problems.
Practice these techniques consistently. Proper attachment habits prevent frustration during your cleaning sessions.
Preventive Maintenance to Stop Future Detachment
Preventive maintenance stops pad detachment before it happens. The key is keeping your electric mop in good working condition through regular care.
Clean your velcro surfaces every two weeks. Lint and hair accumulate on the velcro pads and reduce their grip strength. Use a lint roller or soft brush to remove debris from the disc surface. This simple step restores adhesion and prevents pads from loosening during use.
Inspect your pad disc regularly for obstructions. Debris inside the disc cavity causes resistance and affects how pads attach. Open the back plate and look inside. Remove any dust, hair, or particles you find. A clean disc mechanism ensures pads stay firmly in place.
Rotate your pad disc by hand before each cleaning session. Grasp the mop head firmly and turn the disc slowly. It should spin with noticeable resistance, not freely. Listen for grinding sounds or unusual friction. These signs indicate internal problems that need attention before they cause pad detachment.
Check pad attachment points for wear. The velcro surface loses effectiveness over time. When velcro becomes thin or matted down, pads slip off more easily. Replace pads when velcro no longer holds them securely.
Store your mop properly between uses. Keep it in a dry location away from moisture. Damp conditions weaken velcro adhesion. Store pads separately if possible to prevent velcro from degrading.
Test your mop on a small area after maintenance. This confirms everything works correctly. Regular preventive care takes just minutes but saves you from frustrating mid clean detachment issues. You’ll enjoy consistent performance and longer pad life when you maintain your electric mop consistently.
Mistakes That Make Pad Detachment Worse
Many people make simple mistakes that cause their electric mop pads to detach more often. Understanding these errors helps you keep your pads secure during cleaning.
Ignoring lint and hair buildup is the biggest mistake users make. Dust, pet hair, and debris collect on the velcro surface over time. This buildup acts like a barrier that prevents the pad from gripping properly. When you ignore this accumulation, the velcro loses its sticking power completely.
Skipping the manual rotation check before use causes problems too. Many users attach their pads and start cleaning without testing the disc. They don’t rotate the pad disc by hand to verify it spins with resistance. A disc that spins freely signals loose internal components or improper attachment. Catching this early stops mid clean detachment.
Attaching pads carelessly makes detachment worse. Rushing through the attachment process means corners don’t align properly with the disc. Uneven pressure when pressing down creates weak spots where the pad lifts away. These weak attachment points fail quickly during the spinning motion.
Using excessive force when removing pads damages the velcro permanently. Snapping or yanking pads off tears the velcro fibers. This damage reduces grip strength for future attachments. Always grasp the mop head firmly and pull upward slowly instead.
Charging your mop incompletely affects disc rotation strength. A partially charged battery means weaker spinning power. The disc won’t rotate with enough force to hold pads securely. Always charge your mop fully before each cleaning session.
These mistakes compound each other. One error leads to another problem. Breaking these habits stops most detachment issues immediately.
Advanced Troubleshooting for Persistent Detachment Issues
When pads keep detaching despite your best efforts, you need to dig deeper into the mop’s internal mechanics. The problem often lives inside the machine where you cannot see it.
Start by opening the back plate of your electric mop. Most models have screws or clips that release this panel. Once open, look for the pad disc mechanism. You should see the spinning disc that holds your pads in place.
Check if any internal components feel loose. Push gently on springs, clips, and connectors you find inside. Listen for a clicking sound. This click tells you the part just seated properly into its slot.
Lint and debris hide inside the machine too. Use a dry cloth to wipe out the interior cavity where the pad disc sits. Pay special attention to the edges and corners. Hair wraps around internal parts and prevents the disc from spinning with full force.
The motor connection to the pad disc deserves inspection. Make sure this link is tight and secure. A weak connection reduces spinning power, which causes pads to slip off during operation.
Test the disc rotation manually after you close the back plate. It should turn with strong resistance. If it spins too freely, something inside needs adjustment.
Charge your mop fully before testing again. A weak battery reduces the motor’s power output, making the disc spin slower than it should. This reduced speed cannot hold pads firmly in place.
If problems persist after these steps, the motor itself may need professional service. Internal mechanical failure requires expert repair rather than home fixes.
Final Thoughts
Fixing detached spin pads comes down to three things. Clean velcro, proper attachment, and regular checks. Master these, and your mop will run smoothly again.
Most detachment problems start small. A little lint here, a loose pad there. Left unchecked, these small issues turn into bigger headaches.
The good news? You don’t need special tools or skills. Simple habits prevent most problems. Wipe the velcro often. Check the pad disc before you start cleaning. Attach pads with a firm, steady grip.
When simple fixes don’t work, look deeper. Open the back plate. Check for loose parts. Listen for that clicking sound when components snap into place correctly.
Patience matters here. Rushing through attachment or ignoring small signs of wear leads to repeated detachment. Take an extra few seconds to check your pad disc rotation. This small step saves you from bigger frustrations later.
Your electric mop works hard for you. Give it the same care in return. Regular maintenance keeps the motor, disc, and pads working together smoothly.
Think of pad detachment as a signal. Your mop is telling you something needs attention. Listen to that signal early, and you avoid bigger repair issues down the road.
Consistency beats occasional deep cleaning. A quick wipe after each use does more good than a thorough clean once a month. Build this into your routine.
Most detachment issues resolve within minutes once you know what to check. No need to feel stressed or overwhelmed by the process.
With these steps in mind, your mop pads should stay firmly attached during every cleaning session. Clean floors and a mop that works properly go hand in hand.
Frequently Asked Questions
Why do my electric mop pads keep falling off during cleaning?
Pads detach for three main reasons. First, velcro surfaces accumulate lint and hair, which weakens the grip. Second, the pad disc inside your mop may have loose internal components. Third, you might not be attaching the pads firmly enough onto the disc.
The good news? Most detachment issues are fixable at home. Start by cleaning the velcro on both the pad and the disc. Use a dry cloth to remove all debris. Then manually rotate the pad disc by hand. It should spin with noticeable resistance, not freely.
How do I clean velcro to restore pad grip?
Velcro loses its stickiness when lint builds up on the tiny hooks. Gently brush the velcro surface with a dry cloth or soft brush. Remove all visible hair and dust particles.
For stubborn buildup, use a lint roller on the velcro. Roll it back and forth several times. The adhesive quality improves noticeably after cleaning.
Should I charge my mop before troubleshooting pad detachment?
Yes. Always charge your mop fully before testing. A weak battery reduces motor power, making the pad disc spin slowly or inconsistently. This weakness causes pads to slip off during use.
Charge for the full recommended time. Then test the disc rotation manually. It should spin smoothly with good resistance.
What does the clicking sound mean when I inspect the back plate?
That clicking sound means internal components are now secure. When you open the back plate and push components into place, you should hear or feel a click. This confirms everything is properly seated.
If you hear no click, components may still be loose. Push again until the click occurs.

Hi, I’m Frankie Shaw, the founder and writer behind Swittchly 👋. I’m a passionate tech enthusiast who loves exploring the latest gadgets, devices, and electronics that hit the market. Through my honest, research-backed Amazon product reviews, I help readers make smarter buying decisions without the hype or confusion.