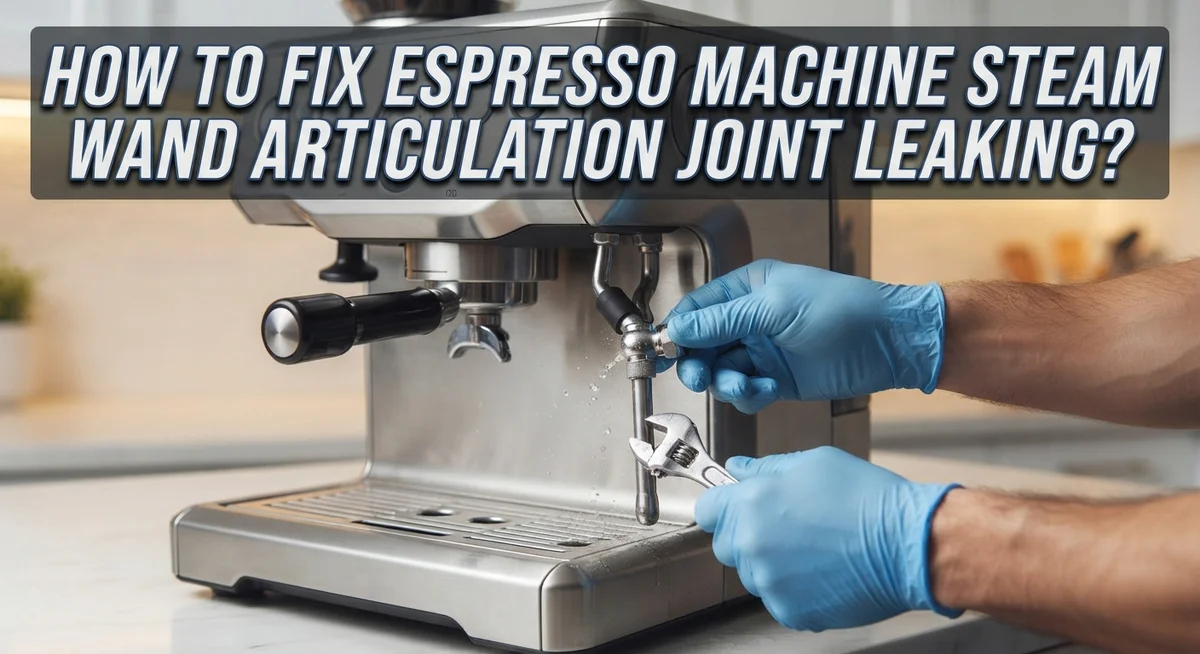
How To Fix Espresso Machine Steam Wand Articulation Joint Leaking?
A leaking steam wand joint can turn your morning coffee routine into a messy chore. You spot water pooling under the wand. You wonder if your machine is breaking down.
Good news: this is a common problem with a simple fix. Most leaks happen at the ball joint where the wand moves up and down.
Loose connections, mineral buildup, or worn O-rings usually cause this issue. Sometimes the internal parts wear out over time.
In a Nutshell
- Grip and tighten: Hold the top ball joint firmly and tighten the wand connection. This stops most leaks caused by loose parts.
- Check the O-rings: Look closely at the rubber O-rings on the steam wand tip. Cracks or wear mean they need replacing.
- Clear mineral buildup: Clean any deposits blocking the internal valves. This is often the simplest solution for a leaky joint.
- Examine the teflon tube: Check it for tears or cracks. A damaged tube will keep leaking no matter how much you tighten the joint.
- Replace the silicone disc: If the white silicone disc on the valve stem looks worn, swap it out. This small part often causes big leaks.
- Test before you finish: Run steam through the wand after each fix. Pooling water means the problem is not solved yet.
Understanding the Steam Wand Articulation Joint
The steam wand articulation joint is the flexible connection point where your steam wand bends. This ball joint allows you to angle the wand in different directions while steaming milk or water.
Your steam wand has several key parts. The top ball joint sits at the connection between the rigid pipe and the flexible wand section. Below that sits the steam valve, which controls the flow of steam. Inside the valve, you will find a white silicone disc that acts as a seal.
The joint also contains rubber O-rings. These small rings create a watertight seal at connection points. When they wear out or crack, steam and water escape from the joint instead of flowing through the wand tip.
A teflon tube runs through the center of the wand. This tube carries steam from the machine to the tip. If this tube develops tears or cracks, pressure builds up at the articulation point, forcing water out through weak spots.
Mineral deposits create another common problem. When hard water minerals accumulate inside the valve, they block the steam passage. This pressure buildup forces water to leak from the joint itself.
Understanding these parts helps you identify where your leak originates. A leak at the very top of the joint suggests a loose connection. Water pooling below the ball joint points to damaged O-rings. Slow dripping from the wand tip indicates a stuck valve or mineral blockage.
The articulation joint is designed to withstand regular use, but it needs proper maintenance. Regular descaling prevents mineral buildup. Gentle handling protects the O-rings from damage. Knowing how these components work together helps you fix leaks quickly and prevent future problems.
Common Causes of Articulation Joint Leaks
Your steam wand articulation joint leaks for specific reasons. Understanding these causes helps you fix the problem correctly.
Loose connections are the most common culprit. The ball joint connection can loosen over time from regular use and steam pressure. Each time you steam milk, vibrations gradually work the connection looser. This creates tiny gaps where water escapes.
Mineral deposits build up inside your machine. Hard water leaves behind calcium and lime scale. These deposits accumulate around the valve stem and internal passages. When minerals block the valve, pressure increases and forces water out through the joint instead of the steam tip.
Damaged O-rings cause persistent leaks. Rubber O-rings seal the connection points on your steam wand. Heat and regular use wear these rings down over time. Cracked or flattened O-rings no longer create a watertight seal.
Worn internal components develop gaps. The white silicone disc on your valve stem eventually wears thin. The teflon tube inside your wand can develop small tears or cracks. These damage points allow water to escape at the articulation joint.
Improper tightening makes leaks worse. Many people grip the steam wand itself while tightening. This puts pressure on the wrong part and doesn’t close the connection properly. You need to grip the top ball joint firmly for correct leverage.
Neglected maintenance speeds up all these problems. Skipping regular descaling lets minerals accumulate faster. Without cleaning, deposits block valves and increase pressure on seals. This combination causes leaks to develop sooner than normal.
Identifying which cause applies to your machine guides your repair approach. Start by checking if tightening stops the leak or if you need deeper cleaning and part replacement.
Tools and Materials Needed Before You Start
Before you start fixing your espresso machine steam wand articulation joint leak, gather the right tools and materials. Having everything ready makes the repair faster and prevents frustration.
You need a wrench set to grip and tighten the ball joint connection. A small wrench works best for the articulation joint without damaging the metal. Include an adjustable wrench as a backup option.
Get a soft cloth or microfiber towel for cleaning. You’ll use this to wipe away water and mineral deposits during inspection. Paper towels work too, but cloth holds up better during repeated wiping.
Bring descaling solution or white vinegar for removing mineral buildup. Mineral deposits block valves and cause leaks. Mix vinegar with equal parts water if you prefer a gentler approach.
Gather replacement O-rings in common sizes. These rubber seals wear out over time and cause persistent leaking. Check your machine’s manual for the correct O-ring sizes before you begin.
Include a small brush or old toothbrush for scrubbing tight spaces. This tool reaches mineral deposits inside the articulation joint. A soft brush prevents scratching the metal components.
Have a container or small cup nearby to catch water drips. This keeps your workspace clean and lets you observe any leaking patterns. A shallow bowl works perfectly for this purpose.
Grab a flashlight or headlamp for better visibility. The articulation joint sits in a tight space where shadows make inspection difficult. Good lighting helps you spot cracks, damage, or mineral buildup clearly.
Keep your machine’s manual within reach. Reference guides show exact component locations and specifications. This prevents mistakes during disassembly and reassembly.
Having these tools and materials ready means your repair goes smoothly. You won’t waste time searching for items mid repair.
Step-by-Step Guide to Fixing the Leak
Start by turning off your espresso machine and letting it cool completely. Safety comes first when working with steam equipment.
Locate the articulation joint where your steam wand bends. Hold the top ball joint firmly with one hand. Use your wrench to tighten the connection where the wand attaches. Turn clockwise slowly and steadily. Don’t force it, as over tightening can damage the joint.
After tightening, inspect the rubber O-rings around the joint. Look for visible cracks, flattening, or discoloration. If you spot damage, these seals need replacement. Remove the old O-rings carefully and install new ones of the same size.
Check the teflon tube running through your wand’s center. Look for tears or splits along its length. A damaged tube causes water to escape inside the joint. You’ll need to replace the entire tube if you find damage.
Mineral deposits block internal valves and cause leaks. Fill a container with descaling solution or white vinegar. Soak the steam wand for 15 to 20 minutes. Use your soft brush to scrub away buildup from the tip and connection points. Rinse thoroughly with clean water.
Inspect the white silicone disc inside the valve stem. If it appears worn, cracked, or flattened, swap it for a new one. This small disc creates the seal that stops leaks.
Reassemble all components carefully. Make sure each part sits flush against the next. Tighten connections gently but firmly. Run steam through the wand for several seconds to test your repair. Water should flow smoothly without dripping from the joint.
Cleaning Mineral Deposits and Descaling Tips
Mineral deposits are one of the biggest reasons your steam wand articulation joint leaks. Hard water leaves behind crusty buildup inside your machine. This buildup blocks valves and forces water to escape through weak points at the joint.
Descaling removes these deposits effectively. Use a descaling solution or white vinegar mixed with water. Run the solution through your steam wand for several minutes. Let it sit inside the wand for 15 to 20 minutes so the acid can break down mineral layers. Then flush the wand thoroughly with clean water until no vinegar smell remains.
Pay special attention to the valve stem area. Mineral deposits love hiding inside this small space. Use a soft brush or old toothbrush to gently scrub around the connection point. Work slowly to avoid damaging the delicate internal seals. Rinse multiple times after brushing.
Regular descaling prevents future leaks. Do this monthly if you live in a hard water area. Weekly descaling works even better for machines used frequently. Preventing mineral buildup is easier than fixing leaks later.
After descaling, check if your leak stops. Many leaks disappear once minerals are gone. If water still drips from the articulation joint, the problem likely involves damaged O-rings or internal components.
Never ignore mineral deposits. They cause pressure to build inside the wand. This pressure pushes water out through any opening it finds. Descaling regularly keeps your steam wand healthy and leak-free for years.
Inspecting and Replacing O-Rings and Seals
O-rings and seals form the waterproof barrier inside your steam wand articulation joint. When these rubber components wear out or crack, water leaks directly from the connection point.
Start by visually inspecting all O-rings around the joint area. Look for visible cracks, hardening, or flat spots where the rubber lost its flexibility. Damaged O-rings cannot seal properly, even if you tighten everything correctly.
Remove the O-rings carefully and feel them with your fingers. A healthy O-ring feels slightly springy and returns to its original shape. A worn O-ring feels stiff, brittle, or permanently flattened.
Check the rubber surfaces for discoloration or sticky residue. Mineral buildup can harden O-rings and prevent them from creating a tight seal. Gently clean each O-ring with a soft cloth and mild water.
Inspect the white silicone disc inside the valve stem as well. This component also acts as a seal. If it appears cracked, warped, or discolored, it needs replacement.
Look at the teflon tube running through your wand’s center. Small tears in this tube allow water to escape sideways instead of flowing through the proper channels.
When you find damaged seals, replacement is necessary. Order O-rings that match your machine’s specifications. Check your manual for the correct sizes and materials.
Before reassembling, clean the grooves where O-rings sit. Debris trapped in these grooves prevents proper sealing. Use a small brush to remove any particles.
Apply a thin layer of food-grade silicone grease to new O-rings. This helps them slide into place smoothly and improves their seal quality. Never use regular grease, as it damages rubber components over time.
Install new O-rings with the same orientation as the originals. Reassemble your steam wand and test for leaks before using it.
Common Mistakes to Avoid During Repair
When fixing your steam wand articulation joint leak, certain mistakes can make the problem worse or damage your machine permanently.
Over-tightening the connection is a major error. Many people think tighter always means better. This is wrong. When you force the wand too hard, you can crack the internal components or strip the threading. Always use firm but gentle pressure. Hold the top ball joint with one hand while turning the wand connection with the other. This gives you proper control and leverage without excess force.
Ignoring mineral buildup is another common mistake. People often assume the leak is structural when it’s actually caused by deposits blocking the internal valve. If you skip the descaling step and jump straight to replacing parts, you waste time and money. Always clean mineral deposits first. Use a descaling solution or vinegar and water mixture. Give it time to work. Many leaks stop after proper cleaning.
Not inspecting O-rings before reassembly causes repeated failures. You might replace a seal, reassemble everything, and find the leak returns within days. This happens because you missed a second damaged O-ring or didn’t clean the groove properly. Always check every seal carefully. Feel the rubber surfaces with your fingers. Look for cracks, discoloration, or sticky spots. Clean the grooves where O-rings sit before putting new ones in.
Rushing the reassembly process creates problems too. Take your time putting components back together. Make sure each O-ring sits correctly in its groove. Verify that the teflon tube has no new tears. Double check that the white silicone disc is properly positioned. Patience prevents leaks from returning and saves you from repeating the entire repair.
Troubleshooting Persistent Leaks After Repair
When your steam wand still leaks after repair, the problem usually stems from incomplete fixes or new issues that developed during reassembly.
Check your tightening technique first. Many people tighten the wand connection from the wrong angle. Hold the top ball joint firmly with one hand while turning the wand connection with your other hand. This gives you proper leverage and prevents cross-threading. A loose connection is the quickest reason for persistent leaks.
Inspect the teflon tube carefully. This small tube runs through your wand’s center and carries steam. Small tears or cracks in this tube cause water to escape at the articulation joint. Hold it up to light and look for any damage. If you see cracks, the tube needs replacement.
Test your descaling results. Sometimes mineral deposits return quickly if you didn’t fully flush the system. Run water through the steam wand for 30 seconds after descaling. Listen for any blockages or restrictions in flow. Trapped minerals can cause pressure buildup that forces water out at the joint.
Verify your O-ring installation. New O-rings must sit properly in their grooves. Twisted or pinched seals fail immediately. Confirm each O-ring is centered and flat before reassembling. Food-grade silicone grease helps them slide into place correctly.
Check the valve stem area. The white silicone disc inside the valve stem wears down over time. Even new O-rings won’t stop leaks if this disc is damaged. If tightening and cleaning don’t work, this internal component likely needs replacement.
Persistent leaks after repair usually mean you missed one of these specific issues. Work through each step systematically before assuming your machine needs professional service.
Final Thoughts
Fixing a leaking steam wand joint does not need to feel complicated. Most leaks come from small, fixable problems like worn seals or mineral buildup.
Your steam wand works hard every day. Heat, pressure, and moisture slowly wear down its internal parts. This is normal and expected over time.
The good news is that most repairs take less than an hour. You just need patience and the right approach.
Start with the simplest fixes first. Tighten connections properly and clean away visible mineral deposits. These quick actions solve many leak problems on their own.
If the leak continues, move to deeper inspection. Check every seal and rubber component carefully. Small cracks or hardened rubber often cause repeated leaking.
Regular maintenance prevents most future leaks. Descale your machine on a consistent schedule based on your water hardness and usage.
Clean your steam wand after every use too. Wipe away milk residue before it hardens and blocks internal passages.
Keep spare O-rings and seals on hand if you use your machine often. This saves time when parts eventually wear out.
Pay attention to early warning signs. A small drip today can become a bigger leak next week if ignored.
Trust your hands during repairs. If a connection feels loose or a seal feels brittle, address it right away.
Your espresso machine can serve you well for many years. Proper care and quick repairs keep it running smoothly.
Do not feel discouraged if the first fix does not work completely. Steam wand issues often need a few adjustments before they fully resolve.
With careful attention and regular upkeep, your steam wand will stay leak free and ready for daily use.
Frequently Asked Questions
Why is water pooling around my steam wand joint?
Water pooling is not normal and signals a leak that needs attention. This happens when the ball joint connection loosens or when internal seals wear out. Check if the connection feels tight by holding the top ball joint firmly and gently turning the wand. If water continues dripping, mineral deposits or damaged O-rings are likely the culprits.
Can I fix the leak just by cleaning?
Cleaning works only if mineral buildup is the cause. Descale your machine thoroughly to remove deposits blocking the valve. However, if the leak persists after cleaning, the problem is structural. You’ll need to inspect and possibly replace O-rings or the internal white silicone disc on the valve stem.
What’s the correct way to tighten the steam wand connection?
Hold the top ball joint firmly with one hand while turning the wand connection with your other hand. This grip gives you proper leverage and prevents damage. Tighten gradually until snug, then stop. Over-tightening causes cracks and makes problems worse.
How often should I inspect my steam wand for leaks?
Check your steam wand after every 5 to 10 uses. Look for water dripping from the joint or pooling underneath. Early detection saves you from bigger repairs later. Also inspect O-rings and the teflon tube for visible cracks or damage during regular cleaning.
What should I replace if tightening doesn’t work?
Start by replacing the O-rings around the connection point. If that doesn’t stop the leak, replace the white silicone disc inside the valve stem. These seals wear down with regular use and are the most common cause of persistent leaks.

Hi, I’m Frankie Shaw, the founder and writer behind Swittchly 👋. I’m a passionate tech enthusiast who loves exploring the latest gadgets, devices, and electronics that hit the market. Through my honest, research-backed Amazon product reviews, I help readers make smarter buying decisions without the hype or confusion.