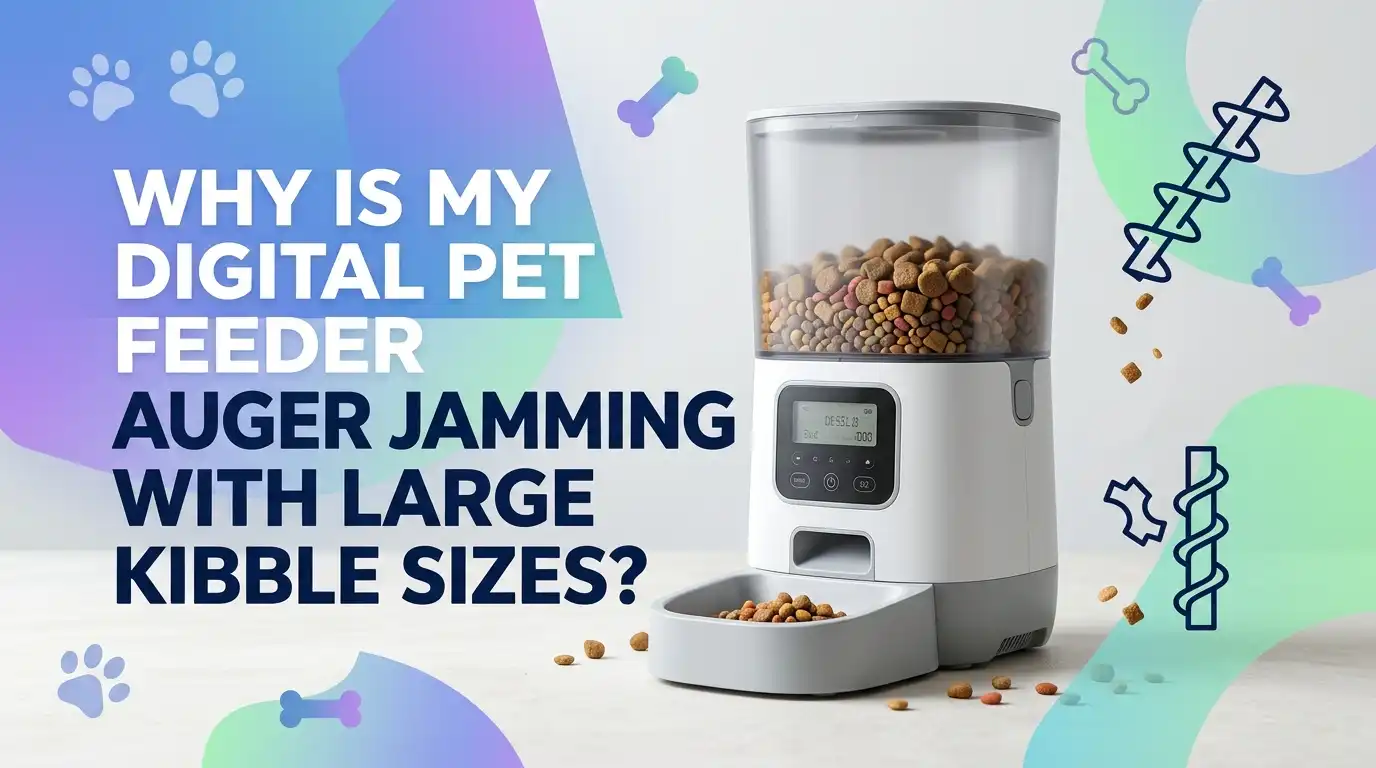
Why Is My Digital Pet Feeder Auger Jamming With Large Kibble Sizes?
If your digital pet feeder keeps jamming when it meets large kibble, you are not alone. This is one of the most common feeder problems. It can happen even in a good unit that usually works well.
The issue often starts with a simple mismatch. The feeder expects dry food pieces of a certain size and shape, but your kibble is wider, thicker, oilier, or more uneven than the machine can move.
The good news is that most auger jams have a clear cause. In many cases, you can fix the problem at home with a few careful checks. You do not need guesswork. You need a clean process.
Key Takeaways
- Large kibble is often the main cause, but it is usually not the only cause. A feeder can jam because the pieces are too wide, too long, oddly shaped, dusty, oily, or damp. A size that looks close enough can still cause trouble if the shape catches inside the auger path.
- Start with the feeder manual and the food itself. Many digital feeders work best with dry kibble in a limited range. Some support roughly 2 to 15 mm pieces. If your food sits near the top of that range, the feeder may still struggle when pieces are thick, flat, or irregular. A quick size check can save hours of trial and error.
- Cleaning matters more than most pet owners think. Kibble dust, broken bits, and oil build up around the auger, rotor, chute, and outlet. That build up creates drag. Over time, the motor works harder, the food moves slower, and the next large piece gets stuck.
- Moisture makes a small problem much worse. Dry food pulls in humidity from the air. Then dust and oil turn into sticky residue. That residue can make large kibble cling together and jam as a group. A dry hopper is a big part of a reliable feeder.
- Power and settings can also play a role. Weak batteries, the wrong adapter, an overfilled hopper, or portions that are too large for one drop can all increase stress on the auger. A feeder that looks broken may simply need better power, smaller meal portions, or less food in the tank.
- The best fix depends on the cause. Sometimes you should clean the feeder. Sometimes you should switch kibble shape. Sometimes you should reduce hopper fill level. Sometimes the auger or rotor is worn and needs service. The smart move is to test one cause at a time and confirm what changes the result.
Why Large Kibble Causes More Auger Jams
A digital feeder works by moving food through a narrow path. The auger, rotor, or internal wheel pushes dry kibble from the hopper to the outlet. That system works best when the food pieces are fairly even. When kibble gets larger, the room for error gets smaller.
A big piece can turn sideways. It can wedge against the wall. It can catch on another piece and form a small block. That is why large kibble often jams faster than small kibble. Even if one piece fits, two or three pieces together may lock the path.
Irregular shapes make the problem worse. Round kibble rolls more easily than wide stars, thick triangles, or flat disks. The auger does not judge food by brand name. It only reacts to size, shape, dryness, and friction.
The main benefit of large kibble is that some pets chew it more slowly. The downside is clear. It puts more stress on the feeder path and raises the chance of a jam.
Know Your Feeder’s Kibble Size Limit First
Before you open the feeder, start with the most basic check. What kibble size does the feeder support? Many pet owners skip this part because the food looks close enough. That guess can lead to repeat jams.
Some feeder guides suggest dry kibble in a range close to 2 to 15 mm. Other models narrow that range further, such as 5 to 15 mm. If your food is near the upper limit, the feeder may still jam if the shape is thick or uneven. That is why the printed range is a starting point, not a guarantee.
Look at the manual or the support page for your exact model. Then compare that number with your food. If the food is larger than the listed range, the cause is already clear.
Pros of using the manual first: fast, simple, and based on the design of your feeder.
Cons: it does not always explain how shape, dust, or oil change real life performance.
Still, this is the best first move because it gives you a clear boundary before you try deeper fixes.
Measure the Kibble Instead of Guessing
Now do a hands on test. Pour out a small sample of food. Pick at least ten pieces. Measure the widest part of each piece with a small ruler or kitchen caliper. If you do not have a measuring tool, place pieces next to a marked ruler and check the average width.
Do not measure only one piece. A bag often contains a mix of sizes. Broken bits, oversized pieces, and misshaped pieces can all show up in the same batch. One oversized piece is enough to start a jam. That is why a sample matters more than a single glance.
Also check thickness and shape. A narrow but very thick nugget can still catch inside the auger. This simple test often explains why one flavor works and another does not, even from the same brand.
Pros of measuring: accurate, cheap, and easy to repeat with every new bag.
Cons: it takes a few minutes, and size alone may not explain issues caused by oil or moisture.
Check for Kibble Bridging Inside the Hopper
Sometimes the auger is not the first problem. The problem begins higher up in the hopper. Large kibble can lock together above the feed opening and form a bridge. When that happens, the motor turns, but fresh food does not drop into the auger path.
This can look like an auger jam even when the auger itself is still free. A quick sign is this: the hopper still has food, but the outlet stays empty and the feeder sounds normal for a moment. Then it stops or throws an error.
Unplug the feeder first. Remove the food. Look down into the hopper and around the feed opening. Break apart any packed cluster by hand. Then test a small amount of kibble again. If the feeder works with a half filled hopper but jams when full, bridging may be the real cause.
The good part of this check is that it is easy. The weak point is that bridging often returns if you do not also fix food size, dust, or moisture.
Clean the Auger, Rotor, and Food Chute Step by Step
A dirty feeder jams faster. Kibble dust sticks to oil. Oil sticks to plastic. Then broken crumbs catch on that rough layer. Over time, the auger path gets tighter and rougher. Large kibble that once passed through can suddenly stick.
Start by unplugging the feeder and removing any backup batteries if your model uses them. Empty the hopper. Take out the removable tank, tray, rotor, or auger parts if your unit allows it. Wash non electric parts with warm water and mild soap. Dry them fully before reassembly.
Use a small brush or soft cloth to clean the chute, outlet, and corners. If your model has an anti clog sensor, clean it gently with a dry soft cloth. Do not leave any moisture inside the food path. That can create the next jam.
Pros of deep cleaning: low cost, high impact, and often solves repeat jams.
Cons: it takes time, and you must be careful with electric parts and sensors.
A clean path gives the auger the best chance to move large kibble without drag.
Remove Kibble Dust, Broken Pieces, and Oily Residue
Many feeder problems come from the small stuff, not the big stuff. Fine dust settles into the auger housing. Tiny broken bits lodge in corners. Food with more surface oil leaves a slick film that grabs dust and turns it sticky.
This matters because large kibble already has less room to move. Add a layer of sticky residue, and the auger has to work much harder. The next piece may not slide. It may scrape, tilt, and stop.
To reduce this, shake the bag gently before use and look at the bottom for heavy dust. You can also pour food through a large kitchen strainer for a small test batch. That helps remove crumbs before they enter the feeder. This is a simple fix that many people overlook.
Pros of dust removal: cheap, easy, and helpful for many food brands.
Cons: it adds one extra prep step, and it does not fix kibble that is truly too large.
If your feeder works better with freshly cleaned food, dust and residue are likely part of the problem.
Keep Moisture Out of the Hopper
Dry food does not stay truly dry forever. It absorbs moisture from the air. In a humid room, kibble can soften slightly and feel tacky. Then dust and oil combine into a paste like layer on moving parts. Large kibble becomes even harder to feed because it grips the chute instead of sliding through it.
Check the lid seal. Make sure it closes fully. If your feeder uses a desiccant pack, replace it on schedule. Some support pages suggest replacing these packs about every half month or about once a month depending on the product and home conditions. A dry hopper helps both food flow and food freshness.
After washing feeder parts, let them air dry until fully dry. Even a small amount of trapped moisture can cause trouble after you refill the tank.
Pros of moisture control: helps prevent clumps, mold risk, and sticky build up.
Cons: it needs regular attention, especially in humid homes.
If your jams get worse during wet weather, humidity may be a major trigger.
Do Not Overfill the Food Tank
It is tempting to fill the hopper to the top so you can forget about it for longer. That can backfire. Too much food creates more downward pressure. That extra weight can compress kibble near the feed opening and increase bridging or tight packing around the auger entry.
A very full hopper can also hide early warning signs. You may not notice clumping or dust buildup until the feeder stops. By then, the jam is already set. Many troubleshooting guides suggest avoiding overfilling and keeping food closer to the middle level when testing a problem.
Try this simple test. Fill the hopper halfway and run several manual feed cycles. Then increase the level and test again. If jamming starts only at higher fill levels, pressure inside the tank is part of the issue.
The benefit of a lower fill level is better flow. The downside is more frequent refills. Still, this is one of the easiest fixes and often one of the most effective.
Test the Power Supply and Motor Strength
A feeder can look jammed when the real issue is weak power. If the motor does not get steady power, it may fail to push large kibble through the path. That is why many support pages tell users to check the original adapter, the power cord, and fresh batteries.
Start with the feeder plugged into its correct adapter. If your model uses batteries for backup, install fresh ones. Then run a manual feed test with a small amount of kibble. Listen to the motor. A strong motor sound is steady and smooth. A weak one may struggle, pause, or click.
Also check whether the feeder works better nearly empty than half full. If weak power is part of the problem, added food weight often makes it worse. Some feeders also warn about blocked outlets when sensors are dusty or when motor resistance rises.
Pros of a power test: quick and useful for ruling out electrical issues.
Cons: it will not solve a true blockage caused by food shape or residue.
You want to know whether the motor is fighting the food, or failing before the fight even starts.
Check the Sensor, Outlet, and Error Messages
Modern feeders often include outlet sensors, anti clog detectors, or blockage warnings. These are helpful, but they can also confuse the picture if the sensor is dusty or if leftover kibble sits near the outlet after a successful drop.
If your feeder shows messages like rotor stuck, outlet blocked, or foreign object, do not assume the motor is dead. Clean the outlet and sensor area first with a dry soft cloth. Remove any stuck kibble. Then run a manual test cycle and watch whether food actually drops.
Some models may continue to feed while still showing a warning, especially after a software update. That means the alert may be telling you to clean the area, not replace the whole feeder. The message matters, but the actual feeding result matters more.
The good side of sensors is early warning. The weak side is that they can react to dust, crumbs, or a brief blockage that clears itself. Always verify the result with a manual feed test.
Adjust Portion Size and Feeding Schedule
Large kibble can jam when too much food tries to move at once. A bigger meal means more pieces enter the auger path in one cycle. If your feeder struggles with large food, smaller and more frequent meals may work better than one large drop.
For example, instead of one large serving, split the same daily amount into two or three smaller servings. This reduces pressure in the chute and gives the auger a cleaner path each time. It also helps you notice problems earlier because each cycle moves less food.
You should also check whether uneaten food piles up around the bowl outlet on some models. That pile can trigger a blockage warning or cause back pressure near the discharge point. A better schedule can reduce both internal jams and outlet block issues.
Pros of smaller feed cycles: gentler on the auger and easier to monitor.
Cons: it may take extra setup time and may not fit every pet’s routine.
If the feeder jams only on larger portions, the schedule itself may be part of the fix.
Decide Whether to Change Food Shape, Size, or Formula
Sometimes the cleanest answer is also the simplest. Your feeder and your current kibble may just be a poor match. If the food sits near the upper size limit, has sharp edges, creates a lot of dust, or feels oily, switching to a smaller and more uniform kibble may solve the issue fast.
Do a short side by side test. Use a small batch of your current food in one set of manual cycles. Then test a more uniform kibble in the supported size range. Keep everything else the same. If the second food runs cleanly, the feeder is telling you what it likes.
Pros of changing kibble: often the fastest long term fix.
Cons: pets may need time to adjust, and some medical diets limit your options.
If you cannot change the food, try mixing in only the size approved by your vet and feeder manual. The goal is not perfect food. The goal is food the auger can move every time.
Know When a Part Is Worn or the Feeder Needs Service
If you have cleaned the feeder, checked power, controlled moisture, reduced fill level, and tested the right kibble size, but the unit still jams, the problem may be mechanical wear. The rotor may be warped. The auger housing may have rough edges. The motor may be weaker than it should be. A part may not spin freely anymore.
Look for signs like scraping sounds, repeated rotor stuck errors after cleaning, visible deformation, or a rotor that does not turn smoothly by hand when the unit is off and disassembled according to the manual. At this stage, repeated resets will not help much. A worn part usually stays worn.
Pros of repair or part replacement: it can restore normal feeding without changing food.
Cons: it may cost time, money, and effort, and some units are easier to replace than repair.
If your testing keeps pointing back to the same sticking point, trust the pattern. That usually means the feeder needs service, not another guess.
Build a Simple Routine to Prevent Future Jams
The best way to deal with auger jams is to stop them before they start. Once you know your feeder’s food limit, you can build a simple routine that keeps the unit reliable. Check new kibble size before filling the tank. Do not overfill. Keep the hopper dry. Remove dust and crumbs. Clean the chute, rotor, and outlet on a regular schedule.
Run a manual feed test after deep cleaning and after opening a new bag of food. Watch how the food falls. Listen to the motor. That two minute check can catch a problem before your pet misses a meal. Small routine checks beat emergency fixes every time.
A good prevention plan is boring, and that is the point. A boring feeder is a reliable feeder. When the system stays clean, dry, and matched to the right kibble, large jam problems usually drop fast.
FAQs
Can I grind large kibble to make it feeder friendly?
You can, but it is usually not the best long term fix. Grinding creates more dust and broken edges. That extra dust can build up inside the feeder and cause fresh jams. A better choice is a kibble that already fits the feeder’s supported size range and has a more even shape.
Why does my feeder jam only with a new bag of the same food?
Food batches can vary. One bag may have more oversized pieces, more crumbs, or more oil on the surface. Storage also matters. If the new bag absorbed humidity before use, the food may feel slightly sticky. That can change how it moves through the auger even when the label looks the same.
Is it safe to run the feeder again right after a jam?
Only after you clear the blockage and inspect the path. Empty the food, clean the stuck area, and confirm the rotor or auger moves freely. Then run a small manual test. Repeating a jam without checking the cause can strain the motor and make the next failure worse.
How often should I deep clean a digital pet feeder?
A light clean of the bowl and outlet should happen often. A deeper clean of the hopper, rotor, and chute should happen on a regular schedule, especially after a bag finishes or when you notice dust buildup. If you live in a humid home or use oily kibble, you may need to clean more often.
Should I replace the feeder if my pet needs large kibble for health reasons?
Maybe. If your pet must stay on a large or special shape kibble and your feeder keeps jamming even after proper cleaning, testing, and power checks, the feeder may simply not match that diet. In that case, a feeder built for larger dry food may be the better answer than forcing the current one to do a job it cannot do well.

Hi, I’m Frankie Shaw, the founder and writer behind Swittchly 👋. I’m a passionate tech enthusiast who loves exploring the latest gadgets, devices, and electronics that hit the market. Through my honest, research-backed Amazon product reviews, I help readers make smarter buying decisions without the hype or confusion.