How To Fix Food Processor Bowl Locking Lug Breaking?
Your food processor bowl won’t lock in place anymore. You twist it. You push it. Nothing happens.
Chances are, the locking lug is broken. This tiny plastic piece plays a big role. It keeps your bowl secured to the base during use.
A broken lug often happens after a drop or hard bump. Sometimes it just wears out over time. Either way, your food processor becomes unsafe to use. The safety interlock won’t engage properly.
In a Nutshell
- Spot the real cause first. Check for cracks, food debris, or a worn safety pin before you start any repair.
- Try the release mechanism gently. Press the release button while twisting the bowl counterclockwise. Never force it.
- Repair with epoxy if the lug is cracked. Use silicone molding material and plastic epoxy to rebuild the broken piece. Let it cure for about 15 minutes.
- Shape the fix properly. Cut and trim the cured epoxy so it matches the original lug shape. This helps the bowl seat correctly again.
- Re-seat the bowl carefully. Rotate it clockwise until you hear a clear click. This sound confirms it locked in place.
- Always check the safety interlock. This step matters a lot. Your processor won’t run if the interlock isn’t engaged properly.
Understanding the Bowl Locking Lug System
The bowl locking lug system keeps your food processor safe and functional. This small but critical piece holds the bowl firmly in place while the machine runs.
Here’s how the system works. Your food processor bowl has two or three plastic lugs on its underside. These lugs fit into matching slots on the base unit. When you rotate the bowl clockwise, the lugs slide into the slots and lock tight. A safety interlock prevents the motor from starting unless the bowl locks completely.
The locking mechanism also includes a release button or lever on the base. Pressing this button disengages the safety interlock and allows the bowl to rotate freely. This design keeps your hands safe during operation.
Why this system matters for safety. If a lug breaks, the bowl won’t lock properly. An unlocked bowl can shift or separate during blending. This creates a serious hazard. The motor won’t start if the safety interlock detects an improperly seated bowl.
The lugs experience constant stress. Each time you lock and unlock the bowl, the plastic flexes slightly. Impact damage from drops accelerates wear and causes cracks. Misalignment during seating can also strain the lugs unevenly.
Understanding this system helps you diagnose problems correctly. A stuck bowl might not mean a broken lug. Food debris or a worn safety pin could be the culprit instead. Checking each component prevents unnecessary repairs.
The good news? Most locking lug issues have straightforward fixes. Knowing how the system functions makes troubleshooting faster and easier. You’ll recognize warning signs before complete failure occurs.
Common Causes of Locking Lug Breakage
The locking lug on your food processor bowl breaks for specific reasons. Understanding these causes helps you prevent future damage and fix the problem correctly.
Impact and drops cause most breakage. When you accidentally drop your processor or bump it hard against a counter, the force travels directly to the lugs. These plastic pieces absorb the shock and often crack or snap off completely. Even a fall from a short height can cause serious damage to this delicate component.
Wear and tear from regular use matters too. Every time you lock and unlock the bowl, the lugs experience stress. Over months or years, the plastic becomes weaker. Eventually, normal use alone can cause a lug to break, especially if your processor gets heavy daily use.
Improper bowl alignment creates extra pressure. When you don’t seat the bowl correctly on the base, the lugs bear uneven weight. This misalignment forces one or two lugs to carry more stress than they should. The weakened lugs then break under pressure that a properly aligned bowl would handle easily.
Food debris stuck in the locking mechanism adds problems. Dried food particles or crumbs wedged between the bowl and base prevent smooth locking. Your instinct might be to force the bowl down, but this extra pressure snaps the lugs. The debris acts like a wedge that concentrates force on specific points.
Worn safety pins inside the base also contribute. These pins hold the lugs in place. When they wear down, the lugs lose support and become more likely to break during normal locking motions.
Tools and Materials Needed for Repair
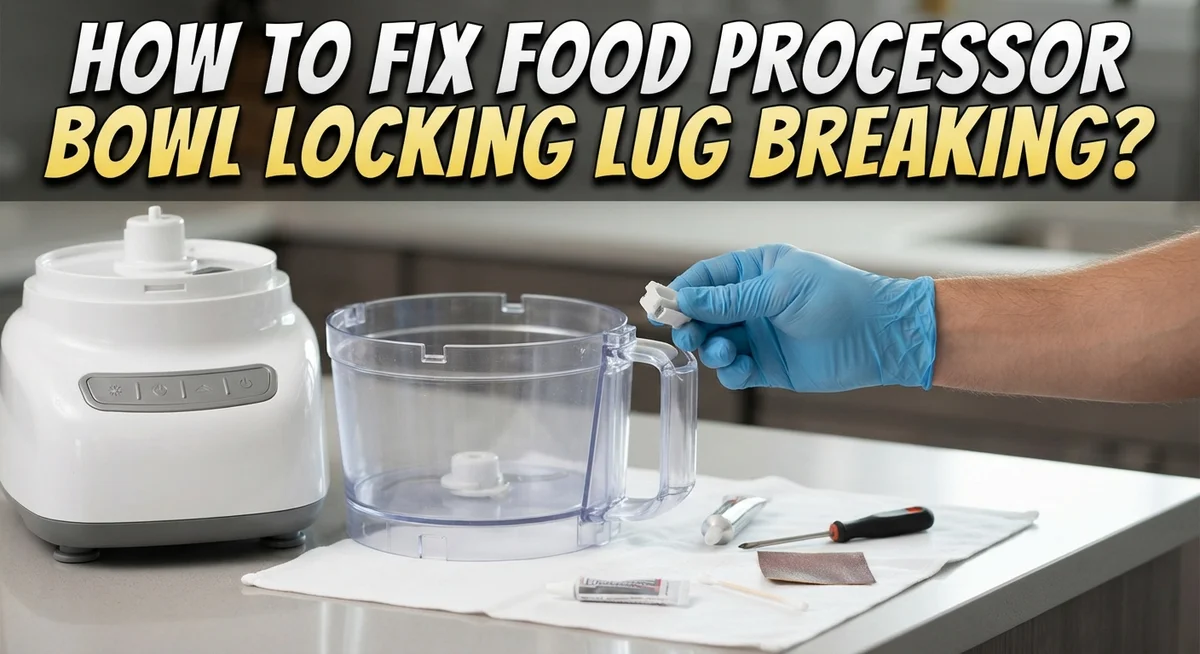
Before you start fixing a broken food processor bowl locking lug, gather the right supplies. You’ll need several items to complete this repair successfully.
Silicone molding material forms the foundation of your repair. This material creates a mold of your original lug so you can replicate its exact shape and size. Get a two part silicone compound that mixes easily and sets quickly.
Plastic epoxy fills your mold and hardens into a strong replacement piece. Choose an epoxy formulated for plastic repairs. This adhesive bonds well to food processor materials and withstands repeated locking cycles.
You’ll also need basic hand tools. A utility knife or small cutting tool trims the cured epoxy to match your original lug’s dimensions. Sandpaper in medium and fine grits smooths rough edges after curing.
Cleaning supplies matter too. Use warm soapy water and an old toothbrush to remove food debris from the locking mechanism. This prevents particles from interfering with your repair or the locking system.
Have a measuring device ready. A ruler or caliper helps you match the repaired lug’s height and width to the original. Accuracy ensures your bowl locks properly after repair.
Protective equipment keeps you safe. Wear disposable gloves when handling epoxy. Work in a well ventilated area since epoxy releases fumes during curing.
Finally, gather reference materials. Take clear photos of your undamaged lug from multiple angles before you begin. These images guide you during molding and shaping, ensuring your repair matches the original design perfectly.
Step-by-Step Guide to Repairing a Broken Lug
Start by removing the broken bowl from your food processor base. Press the release button or lever firmly while twisting the bowl counterclockwise with gentle, steady pressure. Don’t force it, as this causes additional damage.
Inspect the broken lug carefully. Look at its shape, size, and thickness. Take clear photos or measurements so you can recreate it accurately. Clean away any food debris or dried residue from the lug area using warm soapy water and a soft brush.
Prepare your silicone molding material according to package directions. Create a mold by pressing the silicone around an undamaged lug from an identical processor bowl if available. If you don’t have a reference, use your photos and measurements to shape the mold to the correct dimensions. Let the mold cure completely.
Mix your plastic epoxy thoroughly. Pour or pack the epoxy into your prepared mold, filling it completely. Allow the epoxy to cure for the full time recommended, typically around 15 minutes or longer depending on the product.
Once hardened, remove the new lug from the mold carefully. You may need to trim or sand the edges to match the original shape precisely. Test the fit by holding it against the bowl’s attachment point. Make sure it aligns perfectly with the locking mechanism.
Attach the repaired lug to the bowl using appropriate adhesive rated for plastic. Clamp or hold it steady while it sets. Verify that the lug sits flush with the bowl surface and doesn’t protrude unevenly.
Finally, test the repair by reattaching the bowl to the base. Rotate it clockwise until you hear a clear click. The bowl should feel secure and stable. If it wobbles or doesn’t lock properly, the lug may need adjustment.
How to Safely Remove a Jammed or Misaligned Bowl
When your food processor bowl gets stuck or sits crooked on the base, removing it safely prevents more damage to the locking lugs. The first step is locating the release button or lever on your processor. Most models have this mechanism on the side or front of the base unit.
Press the release button firmly while you hold the bowl steady with your other hand. This action disengages the safety interlock system. Now twist the bowl gently in a counterclockwise direction. Move slowly and deliberately. Do not force the bowl or yank it suddenly.
If the bowl resists movement, stop immediately. Forcing it will snap the lugs further or crack the bowl itself. Instead, check what’s blocking it. Food debris often gets wedged between the bowl and base during use. Look for dried particles, crumbs, or hardened food stuck in the locking mechanism.
Use a soft brush or cloth to clean around the lugs gently. Remove any visible debris carefully. Once clean, try the release button and counterclockwise twist again with light pressure.
When the bowl finally comes free, inspect both the bowl lugs and the base pins. Look for damage or misalignment. Before reattaching, make sure the bowl sits properly on the base. Align the lugs with the slots on the base unit.
Lower the bowl straight down until you hear or feel a click. This sound indicates proper seating. Rotate the bowl clockwise slowly until it locks completely. The bowl should sit flush against the base with no gaps or wobbling.
Never rush this process. Taking time to remove and reattach your bowl correctly protects the locking system from future breakage.
Tips for Preventing Future Lug Damage
Preventing future lug damage starts with how you handle your food processor daily. Avoid dropping or bumping the bowl against hard surfaces. Even small impacts can weaken the lugs over time or cause immediate cracks.
Always place the bowl gently onto the base. Don’t force it down or twist it too hard during installation. The lugs need only light pressure to lock into place. When you hear the click, stop rotating. Extra force strains the plastic unnecessarily.
Store your food processor in a safe location where it won’t get knocked around. Keep it away from edges of counters or shelves. Store the bowl separately if you have limited space, rather than stacking heavy items on top of it.
Clean the locking mechanism regularly. Food particles stuck in the lugs create misalignment problems. When particles build up, the bowl sits unevenly on the base, putting stress on one lug more than others. Use a soft brush or damp cloth to wipe around the lugs after each use.
Check your bowl for signs of wear before damage gets serious. Look for small cracks or discoloration around the lug areas. Catch these early warnings and you can replace the bowl before it breaks completely.
Handle the release button correctly too. Press it gently while twisting the bowl counterclockwise. Yanking on the bowl without using the release button puts dangerous pressure on the lugs.
Finally, follow the manufacturer’s guidelines for your specific model. Different processors have different locking systems. Understanding how yours works helps you use it properly and keep those lugs intact for years of reliable food processing.
Common Mistakes to Avoid During Repair
Repairing a broken locking lug requires patience and attention to detail. Many people make mistakes that make the problem worse instead of better.
Forcing a stuck bowl is the biggest error you can make. When your bowl won’t budge, people often twist harder or pull with force. This causes the remaining lugs to crack or break completely. Stop immediately if you feel resistance. Use the release button first, then twist gently in the counterclockwise direction. Give it time to loosen naturally.
Another common mistake involves poor bowl alignment when reinstalling it. People rush to get the bowl back on the base. They don’t check if the lugs line up correctly with the base pins. Misalignment puts stress on the repair you just completed. Align the bowl carefully before rotating it clockwise. Listen for the click that signals proper seating.
Ignoring the safety interlock is also risky. This mechanism prevents the processor from running if the bowl isn’t secure. Some people try to bypass this feature or ignore warning signs. A broken lug affects this safety system. Always verify the interlock works after your repair.
Don’t skip the curing time for your epoxy. Rushing to use your processor before the adhesive fully hardens causes the new lug to fail immediately. Follow the package instructions exactly.
Finally, avoid repairing without inspecting the base pins. Damaged pins on the base can break your repaired lug again. Check the base thoroughly before reinstalling your bowl. Clean any debris from the locking mechanism. These small steps prevent you from repeating the same repair over and over again.
Troubleshooting Persistent Locking Issues
When your food processor bowl locking lug breaks, you may notice the bowl won’t stay attached to the base properly. The locking mechanism fails because the lug no longer grips the base pins securely. This creates a safety hazard since the bowl can shift during operation.
Start by identifying what’s actually stuck. Sometimes the bowl feels jammed when debris blocks the lugs instead. Food particles or dried residue can prevent proper seating. Use a soft brush to clean around all locking areas on both the bowl and base.
If debris isn’t the problem, your lug may be cracked or partially broken. Inspect it closely under good lighting. Look for visible cracks, chips, or pieces missing from the lug itself.
Test the release mechanism first. Press the release button while holding the bowl steady. Twist gently counterclockwise without forcing. If it moves freely, your issue might be alignment rather than a broken lug.
Check whether the bowl sits straight on the base. A crooked position suggests misalignment, not lug failure. Remove the bowl completely and examine both the bowl lugs and the base pins for damage.
Once removed, rotate the bowl clockwise slowly until you feel it drop into place. You should hear a distinct click. If the bowl won’t lock at all and the lug looks damaged, epoxy repair becomes necessary.
Verify your base pins aren’t bent or worn. Damaged pins prevent proper locking even if your lug is intact. Run your finger along each pin to feel for bending or rough spots.
Understanding whether your issue stems from a truly broken lug or something else saves you repair time and effort.
Final Thoughts
A broken locking lug feels like a big problem. But you can fix it with the right steps.
Epoxy repairs work well for small cracks and breaks. They save you money and keep your food processor running.
The key is patience. Rushing the process leads to weak repairs that break again soon.
Take time to mold the epoxy correctly. Let it cure fully before you test the bowl.
Proper alignment matters just as much as the repair itself. Even a perfect epoxy job fails if you seat the bowl wrong.
Always check your base pins too. A cracked lug paired with worn pins means double trouble for your locking system.
Regular care prevents most lug damage. Simple habits like gentle placement and clean lugs go a long way.
Your food processor works hard for you. It deserves a little attention in return.
If your repair doesn’t hold, don’t panic. Sometimes a second attempt with fresh epoxy solves the issue.
Some breaks are too severe for home repair. In these cases, a replacement bowl or part might serve you better.
Know your limits with DIY fixes. Safety matters more than saving a few dollars.
Test your repaired bowl carefully before regular use. Run it empty first to check the seal and lock.
Trust your instincts here. If something feels off, stop and inspect the bowl again.
Most importantly, stay calm through this process. Broken lugs feel frustrating, but they’re fixable problems.
With the right approach, your food processor can work like new again. Take your time, follow these steps, and enjoy a properly functioning kitchen tool once more.
Frequently Asked Questions
Can a broken locking lug be repaired at home?
Yes, you can repair a broken lug using epoxy molding material. The process involves creating a mold of the damaged area, filling it with plastic epoxy, and letting it cure for about 15 minutes. After curing, you trim the repaired lug to match its original shape.
This method works best for small cracks and partial breaks. Larger damage may require professional repair or bowl replacement instead.
Why won’t my food processor bowl come off the base?
Your bowl may be stuck for several reasons. First, check if food debris is blocking the locking lugs. Clean around the base and bowl edges thoroughly.
Next, press the release button or lever while gently twisting the bowl counterclockwise. Never force it, as this causes additional damage. If the bowl still won’t budge, your lug might be cracked or the base pins could be bent.
How do I know if my locking lug is actually broken?
A broken lug usually prevents the bowl from sitting securely on the base. The bowl may wiggle, feel loose, or won’t click into place. You might also see visible cracks or missing pieces on the lug itself.
Remove the bowl carefully and inspect both the lug and the corresponding pins on the base. Bent or worn pins can mimic a broken lug problem.
What’s the correct way to reseat my bowl after repair?
Align the bowl’s lugs with the base slots. Rotate the bowl clockwise slowly until you feel or hear a distinct click. This click confirms the bowl locked properly.
Check that the bowl sits level on the base before using your processor. Improper seating means the safety interlock won’t function correctly.

Hi, I’m Frankie Shaw, the founder and writer behind Swittchly 👋. I’m a passionate tech enthusiast who loves exploring the latest gadgets, devices, and electronics that hit the market. Through my honest, research-backed Amazon product reviews, I help readers make smarter buying decisions without the hype or confusion.