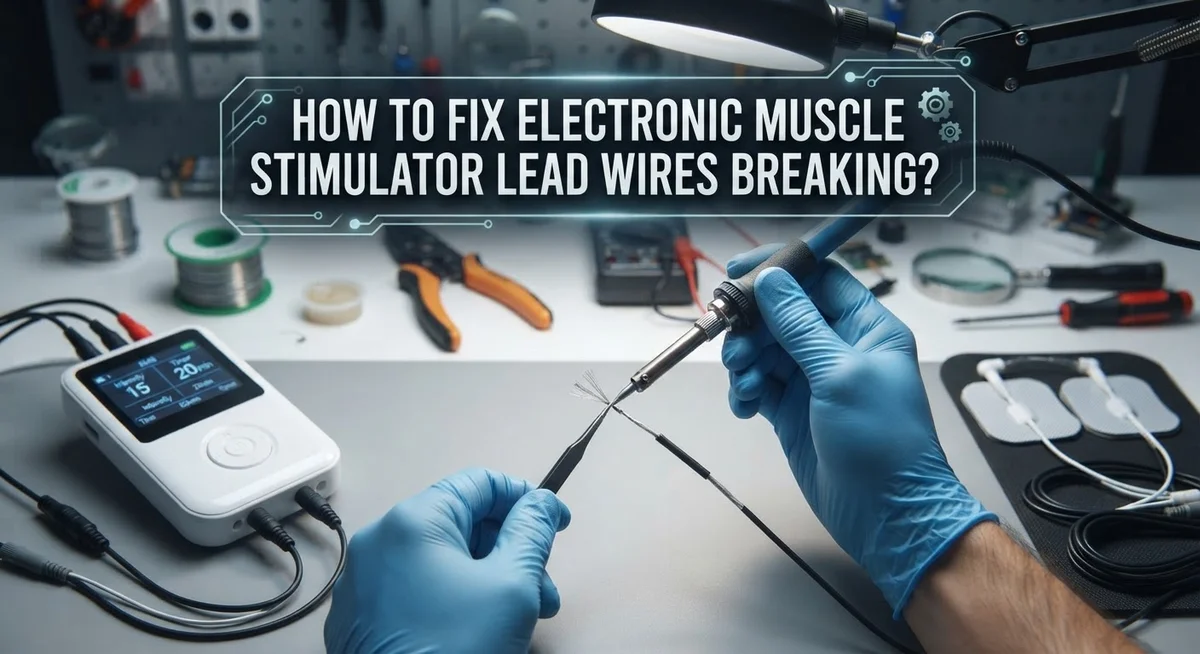
How To Fix Electronic Muscle Stimulator Lead Wires Breaking?
Electronic muscle stimulators help you recover faster and manage pain better. But there is one problem many users face. The lead wires break too soon.
You turn on your device, and nothing happens. Or worse, you feel a weird shock in one spot. This usually means your lead wires have a break somewhere.
This issue is common and it is also frustrating. You paid good money for your device. You expect the wires to last as long as the machine does.
The good news is you can often fix this problem yourself. You do not always need to buy a whole new set of wires right away.
This guide will show you simple ways to spot damage in your lead wires. We will walk through easy fixes you can try at home.
You will also learn why these wires break in the first place. Understanding the cause helps you prevent the same problem again.
By the end of this article, you will know how to test your wires safely. You will also learn tips to make your new or repaired wires last much longer.
In a Nutshell
• Check the wire ends first. Look for fraying or exposed metal near the connector tips. This is where breaks happen most often.
• Test continuity with a multimeter. This simple tool tells you if a wire carries current all the way through. A broken wire shows no reading.
• Look for kinks and pinch points. Wires that get bent sharply or trapped under furniture wear out faster than wires stored flat.
• Small breaks can often be repaired. You can splice the wire or use heat shrink tubing to fix minor damage at home.
• Bad connector pins need replacing. Sometimes the wire itself is fine, but the metal pin inside the connector is loose or corroded.
• Store your wires properly after each use. Loop them loosely and keep them away from heat. This one habit prevents most future breaks.
Following these steps helps you catch problems early. You save money by fixing wires yourself instead of buying new ones right away. Your device works better when the wires carry a strong, steady signal.
Why Lead Wires Break: Common Causes
Lead wires break for several clear reasons. Understanding these causes helps you prevent future damage and extend the life of your device.
Repeated bending and flexing is the biggest culprit. Every time you coil, uncoil, or move your wires, tiny stress fractures form inside the cable. Over weeks or months, these fractures grow into complete breaks. The areas near connectors suffer most because they flex the most during use.
Pinching and crushing happens when you trap wires under furniture, doors, or equipment. Even light pressure repeated many times damages the internal conductors. Heavy pressure can crush them instantly, creating dead spots along the wire length.
Heat exposure weakens the rubber or plastic coating. Leaving wires near heating vents, direct sunlight, or hot surfaces causes the insulation to crack and peel. Once the coating fails, moisture gets inside and corrodes the metal conductors.
Moisture and sweat are silent killers. Your skin releases salt and moisture during workouts. These liquids seep into tiny cracks and corrode the copper or aluminum inside. Corrosion creates resistance that blocks electrical flow.
Pulling too hard on the connector causes internal wires to snap. Yanking the wire instead of holding the connector itself puts all the stress on those delicate internal connections. This happens quickly and completely breaks the circuit.
Age and material fatigue eventually affect all wires. Rubber and plastic become brittle over time. Copper and other metals develop micro fractures from constant electrical current passing through them.
Poor storage combines several problems at once. Wires stored in tight coils, hot environments, or damp places experience all these issues simultaneously. This accelerates breakdown significantly.
Knowing these causes lets you protect your wires and keep them working longer.
Signs Your Lead Wires Are Damaged or Failing
Your lead wires show several clear warning signs before they completely fail. Pay attention to these signals so you can fix problems early.
Visible damage is your first clue. Look at the entire length of each wire under good lighting. You should see smooth plastic or rubber coating with no cracks, splits, or exposed wires underneath. Any area where the outer coating peels away means moisture can enter and cause shorts.
Intermittent connection problems signal trouble. Your device works sometimes but cuts out randomly during use. You might feel the electrical pulses stop and start without reason. This happens when internal wires have small breaks that only make contact when the wire bends a certain way.
Burning smells or discoloration warn of serious issues. If your wire smells like melted plastic or rubber, stop using it immediately. Dark spots, scorching, or white residue on the connector or wire coating mean heat damage has occurred inside.
Loose connectors indicate worn contact points. Try plugging your lead wire into the device. If it slides in too easily or falls out without resistance, the connector pins have worn down. The wire itself might be fine, but poor contact prevents current from flowing properly.
Tingling or unusual sensations during use suggest electrical leaks. You should feel steady pulses, not random tingles or pain. Strange sensations mean electricity is escaping where it shouldn’t, often through damaged coating.
Visible corrosion around metal parts requires attention. Greenish or white crusty buildup on connectors comes from moisture exposure. This corrosion blocks electrical current and spreads quickly if left untreated.
Check your wires weekly during storage to catch these problems early.
Tools and Materials Needed for Repair
Before you start fixing your lead wires, gather the right supplies. Having everything ready makes the job faster and safer.
Wire strippers are essential tools. They remove the outer coating from damaged wire sections so you can access the inner conductors. Choose strippers sized for your wire gauge. Most lead wires use smaller gauges, so look for precision strippers rather than heavy duty versions.
Solder and a soldering iron help you reconnect broken wires properly. Solder creates a permanent electrical connection between wire segments. The soldering iron heats both the wires and solder to fuse them together. A 30 to 40 watt iron works well for thin lead wires.
Heat shrink tubing protects your repairs and prevents short circuits. This tubing slides over your soldered joint and shrinks when heated, creating a waterproof seal. Get tubing in sizes matching your wire diameter.
Electrical tape offers a backup insulation layer. Wrap it around heat shrink tubing for extra protection against moisture and sweat.
A small knife or wire cutter lets you trim damaged sections cleanly. Make straight cuts across the wire for better solder connections.
Isopropyl alcohol and a small brush clean away dirt and oxidation from wire ends. Clean connections solder much better than dirty ones.
Connector pins may need replacement if the connector itself is damaged. These tiny metal pieces carry the electrical signal. Keep extras on hand since they’re inexpensive and small.
Safety gear matters too. Wear safety glasses when soldering. Use a soldering mat to protect your work surface from heat damage. Keep a damp sponge nearby to cool your iron between joints.
Step-by-Step Guide to Fixing a Broken Lead Wire
Now that you have your tools ready, let’s walk through the actual repair process step by step.
Start by unplugging your device completely. Never work on electrical equipment while it’s connected to power. Safety comes first every single time.
Examine the broken section carefully. Use a flashlight to see exactly where the wire snapped or where the damage occurs. Mark the damaged area with a small piece of tape so you don’t lose track of it.
Cut away the damaged portion if needed. Use your wire cutter to remove any severely crushed, melted, or broken sections. Make clean cuts at right angles to the wire.
Strip about half an inch of insulation from each wire end. Place your wire stripper around the coating and gently squeeze while pulling it away. You want to expose the copper strands underneath without nicking them.
Clean the exposed copper wires thoroughly. Use isopropyl alcohol and a small brush to remove any dirt, corrosion, or oxidation. Clean wires make much better connections.
Twist the copper strands together tightly. If you’re joining two wires, intertwine the strands from each end so they hold together firmly.
Apply solder to create a permanent bond. Heat the joint with your soldering iron for a few seconds, then touch solder to the connection point. The solder should flow smoothly around the wires.
Slide heat shrink tubing over the joint. This tubing protects your repair and prevents electrical shorts. Heat it gently with your iron until it shrinks snugly around the wire.
Let everything cool completely before testing. Wait several minutes, then reconnect your device and test the lead wire carefully.
How to Test Lead Wires After Repair
After you repair your lead wires, testing them properly ensures they work safely and effectively. This step prevents future problems and confirms your repair job succeeded.
Start your test with a visual inspection first. Look at your solder joints and heat shrink tubing under bright light. The connections should appear smooth and secure without gaps or exposed wire. Check that your heat shrink tubing covers the entire repaired area completely.
Next, perform a continuity test using a multimeter. Set your multimeter to the continuity or resistance setting. Touch one probe to each end of the repaired wire. A working wire shows low resistance or produces a beeping sound. High resistance or no beeping means your repair failed and needs redoing.
Test the connector fit carefully. Plug your lead wires into your device and ensure they sit snugly without wobbling. Loose connections indicate poor soldering or damaged connector pins. The wires should feel secure when you gently tug them.
Run a functional test with low settings. Turn on your device and start at the lowest intensity level. Feel for steady, consistent pulses. The stimulation should feel even and predictable, not jumpy or weak. Gradually increase the intensity while monitoring the sensation.
Watch for warning signs during testing. Stop immediately if you notice burning smells, tingling sensations, or sudden power loss. These indicate electrical problems that need attention.
Let your device cool down between tests. Extended testing generates heat that can damage fresh repairs. Test again after a brief cooling period to confirm everything still works properly.
Document your test results mentally or on paper. This helps you track which repairs hold up over time and which ones need reinforcement later.
Best Practices to Prevent Future Wire Breakage
Preventing wire breakage starts with how you store and handle your device. Keep your muscle stimulator in a clean, dry place away from extreme heat or cold. Temperature swings can weaken the wire insulation over time.
Coil your lead wires loosely when storing the device. Tight coils create stress points that eventually snap. Think of it like a phone charger that breaks from being wound too tightly. A loose figure eight pattern works well for storage.
Avoid bending the wires repeatedly at sharp angles. Each bend creates tiny cracks in the insulation and internal wire. If you must bend them, do it gently and keep the angle gradual.
Check your wires regularly for signs of wear. Look for exposed copper, discoloration, or stiff sections. Catching problems early prevents complete failure during use.
Keep moisture away from your lead wires completely. Sweat, water, and humidity damage the insulation and cause corrosion inside connectors. Wipe down your device after each session with a dry cloth.
Store connectors carefully so they don’t get bent or crushed. A small protective case keeps everything safe from accidental damage.
Use your device on the lowest settings initially. High intensity puts extra stress on older wires. Gradually increase intensity only if your wires feel sturdy.
Never yank or pull on the wires when removing them from pads or connectors. Grip the connector itself and gently wiggle it free. Pulling on the wire creates internal strain that weakens connections.
Inspect the connection points where wires meet pads or connectors monthly. Loose connections create heat and accelerate damage. Tighten any loose connectors gently by hand.
These simple habits extend your lead wire lifespan significantly and keep your device working reliably.
Common Mistakes to Avoid When Repairing Lead Wires
Many people make mistakes when fixing lead wires that actually cause more damage. Understanding what to avoid will help you succeed with your repair.
Don’t rush the soldering process. Applying heat too quickly can damage the wire insulation even more. Hold the soldering iron steady and give the solder time to flow naturally. If you’re new to soldering, practice on scrap wire first before touching your actual device.
Avoid using too much solder on the connection joint. Excess solder creates a thick, brittle bond that breaks easily. You only need enough solder to coat the joint completely and create a smooth connection.
Never skip the insulation step after soldering. Some people think the solder alone protects the connection. This is wrong. Heat shrink tubing or electrical tape is essential for preventing shorts and protecting the joint from moisture and damage.
Don’t forget to let solder cool naturally. Blowing on it or dunking it in water weakens the connection. Patient cooling creates a stronger, more reliable bond that lasts longer.
Avoid twisting the wires too tightly when joining them. Excessive twisting can stress the copper strands and create weak points. A simple overlap with proper soldering works better than aggressive twisting.
Don’t test your repair immediately after finishing. Let everything cool completely first. Testing too soon can damage the fresh solder joint before it fully sets.
Finally, avoid repairing the same spot multiple times. If a wire keeps breaking in the same location, the wire itself may be damaged beyond that point. Consider replacing that section entirely rather than repeatedly patching the same area. Taking your time and following proper techniques prevents frustration and device failure.
Troubleshooting Persistent Connectivity Issues
Connectivity issues with your electronic muscle stimulator often point to problems within the lead wire system itself. These issues can range from loose connections to internal wire damage that isn’t immediately visible.
Start by checking your connector ports first. Dust and debris accumulate inside these areas over time. Gently clean both the male and female connector ends using a dry cloth or soft brush. Sometimes poor contact happens simply because dirt blocks the connection points.
Next, inspect where the wires enter the connectors. This junction point experiences constant flexing and stress. Look for any signs of cracking, separation, or loose fitting. A wire that pulls away from its connector terminal causes intermittent connectivity problems.
Test each lead wire individually if your device has multiple wires. Disconnect them one at a time and reconnect them firmly. Listen for a satisfying click that indicates proper seating. If one wire consistently fails to stay connected, that specific wire likely needs repair or replacement.
Check the actual wire path from connector to electrode pad. Feel along the entire length for soft spots, kinks, or areas where the insulation feels thinner. These weak points interrupt electrical flow and create connectivity failures.
Gently wiggle the wires while the device is powered off. If you notice the signal cuts in and out during this test, you’ve found your problem area. The internal conductors are probably broken or frayed at that location.
Sometimes connectivity issues stem from corrosion inside the connectors. This happens when moisture enters the connection points. If you see any discoloration or white crusty deposits, corrosion is blocking your signal. Clean these areas thoroughly with a dry cloth and allow them to air dry completely before reconnecting.
Final Thoughts
Fixing broken lead wires is a skill you can learn quickly. With patience and the right tools, you can save money and keep your device working well.
Small problems become big problems if you ignore them. That’s why regular checks matter so much.
Your lead wires go through a lot of stress. They bend, stretch, and get coiled every time you use your device.
This wear and tear is normal. But knowing how to spot damage early helps you fix things before they get worse.
Remember that soldering takes practice. Your first repair might not look perfect, and that’s okay.
Each attempt teaches you something new. Soon you will handle wire repairs with confidence.
Prevention still beats repair every single time. Taking care of your wires now means fewer problems later.
Simple habits like storing wires properly and avoiding sharp bends go a long way. These small steps protect your investment for months or years.
Don’t wait until a wire snaps completely. Check your equipment often, and act quickly when you notice trouble.
A little effort now saves a lot of frustration later. Your muscle stimulator can serve you well for a long time if you treat the wires with care.
Trust your instincts here. If something feels off during use, stop and inspect the wires right away.
This proactive approach keeps your device running smoothly. It also helps you avoid unsafe situations caused by faulty connections.
Fixing lead wires isn’t complicated once you understand the basics. Stay patient, follow safe steps, and your device will thank you with reliable performance every time you use it.
Frequently Asked Questions
What causes lead wires to break in the first place?
Lead wires break due to repeated bending and stress over time. Your device gets used frequently, and the wires flex constantly during movement. Sharp bends create weak points where the wire eventually snaps. Wrapping wires too tightly around the device also damages them. Heat exposure and moisture can weaken the wire insulation gradually.
Can I prevent lead wire damage before it happens?
Yes, prevention works better than repairs. Store your device in a cool, dry place when not in use. Avoid leaving wires coiled tightly or kinked. Keep wires away from sharp objects and rough surfaces.
Handle the connectors gently when plugging and unplugging. Don’t yank wires out of ports. Let them cool down after use before storing them away.
How do I know if my lead wire is damaged but not completely broken?
Watch for intermittent connection problems. Your device might work sometimes but not others. The signal may cut out unexpectedly during use. You might notice reduced stimulation intensity.
Gently wiggle the wire near the connector while powered off. If the connection flickers on and off, damage exists. Check the wire insulation for visible cracks or exposed copper. Sometimes the damage is inside the wire, so poor performance is your only clue.
What’s the difference between fixing a wire and replacing it entirely?
Soldering repairs work well for small breaks near connectors. The joint becomes strong and functional again with proper technique. However, if the wire breaks in the middle or multiple breaks exist, replacement makes more sense. Repairing the same spot repeatedly weakens the wire further.
New wires cost less than constantly repairing old ones.

Hi, I’m Frankie Shaw, the founder and writer behind Swittchly 👋. I’m a passionate tech enthusiast who loves exploring the latest gadgets, devices, and electronics that hit the market. Through my honest, research-backed Amazon product reviews, I help readers make smarter buying decisions without the hype or confusion.